Revitalize Your Outdoor Space: How to Bring Your Deck Back to Life with Professional Refinishing
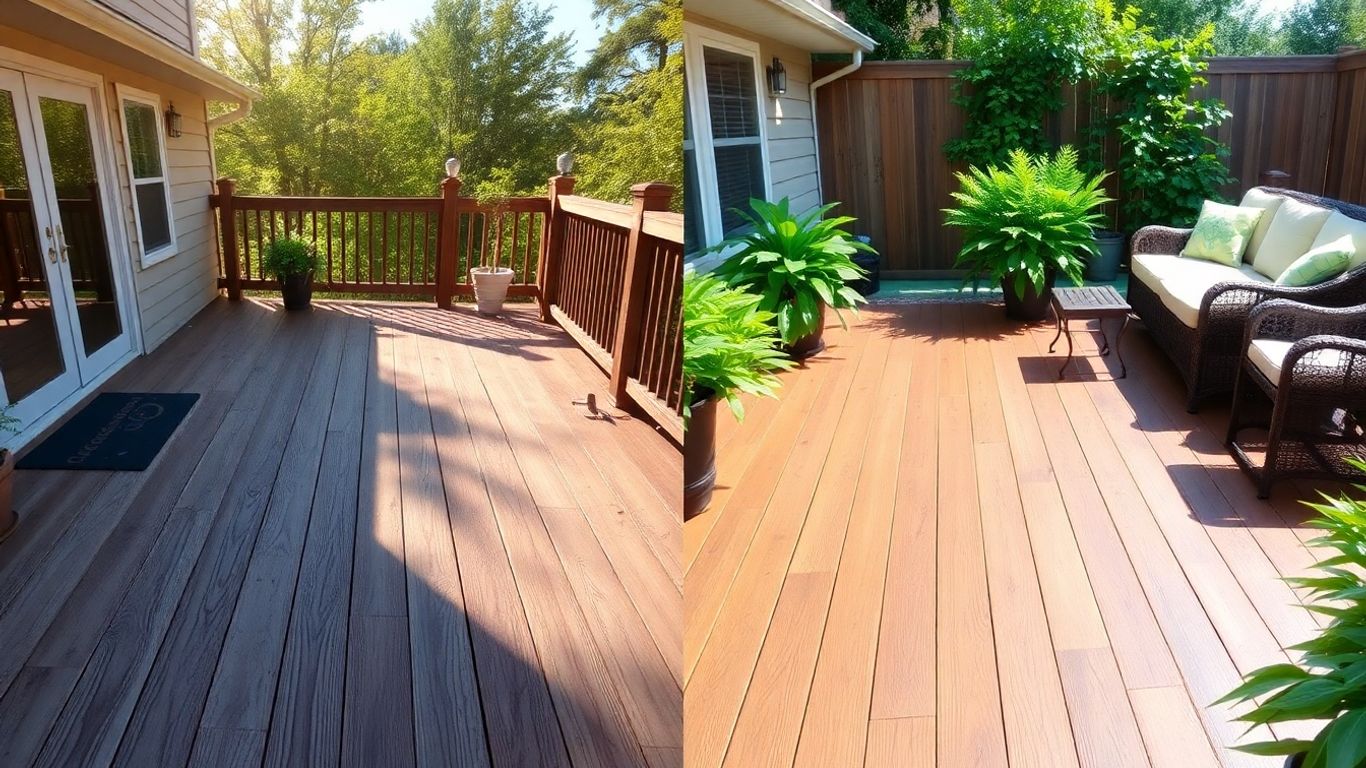
Your deck is a fantastic part of your home, perfect for relaxing or entertaining. But over time, the weather can really do a number on it, leaving it looking worn out and tired. If you're wondering how to bring your deck back to life with professional refinishing, you've come to the right place. We'll walk you through the whole process, from figuring out what's wrong with it to making it look brand new again.
Key Takeaways
- Before you do anything, check your deck carefully for any damage, like rot or loose parts. This helps you know what needs fixing.
- Give your deck a really good clean to get rid of all the dirt and grime. Make sure it's totally dry before you move on.
- Fix any broken boards, tighten up anything that's loose, and smooth out any rough spots with sanding.
- Pick the right stain or finish to protect your deck and make it look great. Apply it evenly for the best results.
- Keep up with cleaning and check your deck now and then to make sure it stays in good shape for years to come.
Assessing Your Deck's Condition
Before we even think about slapping on a fresh coat of paint or stain, we need to take a good, hard look at what we're working with. It's like going to the doctor for a check-up – you wouldn't start a marathon without knowing if you had a sprained ankle, right? Your deck is no different. A thorough inspection now saves a lot of headaches, and maybe even some money, down the road.
Identifying Structural Issues
This is the big one. We're talking about the bones of your deck. You need to check if the main supports are solid. Get down there and poke around with a screwdriver, especially where the posts meet the ground or any beams connect. If that screwdriver sinks in easily, you've got rot, and that's a serious problem that needs fixing before anything else. Also, check where the deck attaches to your house. Are the bolts tight? Is there any sign of water getting behind the flashing? These are the things that keep your deck from becoming a safety hazard.
Evaluating Cosmetic Damage
Once we're sure the structure is sound, we can look at the surface stuff. This is about how your deck looks and feels. Are there boards that are really splintered or warped? Are nails popping up? Maybe some areas are discolored from sun or mildew. Loose railings are also a big red flag here. While these might not make the deck fall down, they definitely make it look tired and can be annoying, or even dangerous, to use.
Understanding the Impact of Weather
Weather is the main culprit behind most deck wear and tear. Think about the sun beating down all summer, then rain, snow, and ice in the colder months. This constant cycle really breaks down the wood fibers. UV rays fade the color and dry out the wood, making it prone to cracking. Moisture can lead to rot and mildew growth, especially in shaded or damp areas. Even temperature changes cause the wood to expand and contract, which can loosen fasteners and create gaps over time. Recognizing how weather has affected your deck will help you choose the right products and methods to protect it in the future.
A deck that's been neglected can look pretty rough, but often, the damage is only on the surface. A professional can spot the difference between a deck that needs a complete overhaul and one that just needs some TLC. It's all about knowing what to look for.
Preparing Your Deck for Restoration
Before we even think about slapping on a fresh coat of stain, we've got to get the deck itself ready. This part is super important, honestly. Skipping steps here means your fancy new finish might not stick right, or worse, you'll be dealing with problems down the road. It's like trying to paint a dirty wall – it just won't look good.
Clearing and Sweeping the Surface
First things first, you need to clear everything off. All the furniture, the grill, those potted plants you keep forgetting to water – get it all off the deck. Then, grab a stiff broom and give the whole surface a good sweep. You want to get rid of all the loose stuff: leaves, dirt, twigs, whatever else has decided to call your deck home. This makes the next step, the actual cleaning, way easier.
Deep Cleaning with Deck Solutions
Now for the real cleaning. Depending on how grimy your deck is, you might use a pressure washer or just a good old-fashioned scrub brush with a deck cleaner. If you're using a pressure washer, be gentle! You don't want to blast away the wood itself. Always work with the grain of the wood and keep the nozzle moving. For tougher spots, like mildew or stubborn dirt, a dedicated deck cleaner is your best bet. You can find them at most hardware stores. Just follow the instructions on the bottle. A clean surface is key for the stain to properly adhere.
Allowing Adequate Drying Time
This is where patience comes in. After you've cleaned your deck, you absolutely must let it dry completely. We're talking several days, depending on the weather. If you try to stain a damp deck, the moisture will get trapped under the stain, leading to peeling and bubbling later on. It's better to wait a bit longer and have the job done right. You can check out some tips on proper deck cleaning to make sure you're doing it right.
Don't rush the drying process. It's a critical step that impacts the longevity of your refinishing project. A little extra waiting time now saves a lot of headaches later.
Addressing Necessary Repairs
Before you even think about slapping on a fresh coat of stain, it's time to get down to business with any necessary repairs. This is where we tackle the nitty-gritty to make sure your deck is not just pretty, but also safe and sound.
Repairing or Replacing Damaged Boards
Look closely at your deck boards. Are there any that are cracked, warped, or just look like they've seen better days? Sometimes, a board is just too far gone and needs to be swapped out. You'll want to carefully remove the old board, making sure not to mess up the ones next to it. Then, cut a new board to size and secure it firmly in place. It’s a bit like a puzzle, but getting it right makes a huge difference.
Securing Loose Components
Loose railings or wobbly steps are a big no-no. They’re not just annoying; they’re a safety hazard. Go around and check every screw, bolt, and nail. Tighten anything that's loose. If a screw is stripped or a nail is popping out, replace it. Using deck screws is usually a better bet than nails for a more solid hold. Making sure everything is snug and secure is really important for the overall stability of your deck.
Fixing Cracks and Splinters
Even small cracks and splinters can get worse over time and are unpleasant underfoot. For minor cracks, wood filler can often do the trick. Once it's dry, you'll want to sand the area smooth. Splinters can sometimes be hammered down or sanded away. If you're dealing with a lot of splintering, it might be a sign that the wood is getting pretty old and might need more attention down the line. Addressing these little issues now prevents bigger problems later and makes your deck much nicer to walk on barefoot.
Don't underestimate the importance of these repair steps. A deck that looks good but has underlying structural issues is a ticking time bomb. Taking the time to fix these problems properly is an investment in the longevity and safety of your outdoor space. It's always a good idea to get a professional opinion if you're unsure about the extent of the damage or how to best fix it. You can find local deck repair professionals to help assess and complete these vital repairs.
Here’s a quick rundown of what to look for:
- Rotten wood: Check posts, joists, and beams, especially where they meet the ground or concrete. Soft spots mean rot.
- Loose fasteners: Screws and nails that have worked their way out.
- Cracked or split boards: Especially near the ends or where they are fastened.
- Warped boards: Boards that have twisted or bowed significantly.
- Damaged ledger board: The board connecting the deck to your house needs to be secure and properly flashed.
The Refinishing Process
Once your deck is clean, repaired, and completely dry, it's time for the fun part: making it look great again! This stage is all about applying the right protective finish to keep your deck looking good and standing up to the elements. It’s not just about slapping on some color; it’s about giving your deck a new lease on life.
Choosing the Right Stain or Finish
Picking the right product is a big deal. You've got a few main types to think about, and what works best depends on your wood and what you want it to look like.
- Transparent Stains: These are super light. They barely add color, letting the natural wood grain shine through completely. They're great for newer decks or really nice woods like cedar or redwood, offering basic protection from the sun and moisture.
- Semi-Transparent Stains: These add a bit of color and still let you see the wood grain. They're a popular choice because they offer a good mix of looks and protection. Think of it as enhancing the wood's natural beauty while giving it some defense against UV rays.
- Semi-Solid Stains: These have more pigment than semi-transparent ones, hiding more of the wood grain but still allowing some texture to show. They offer better protection against sun damage.
- Solid Stains (or Deck Paints): These look a lot like paint and completely cover the wood grain. They provide the most protection from the sun and weather but can sometimes peel or chip over time if not applied correctly.
When you're choosing, think about the type of wood you have, the color you're going for, and how much protection you really need. Always grab something made for outdoor use.
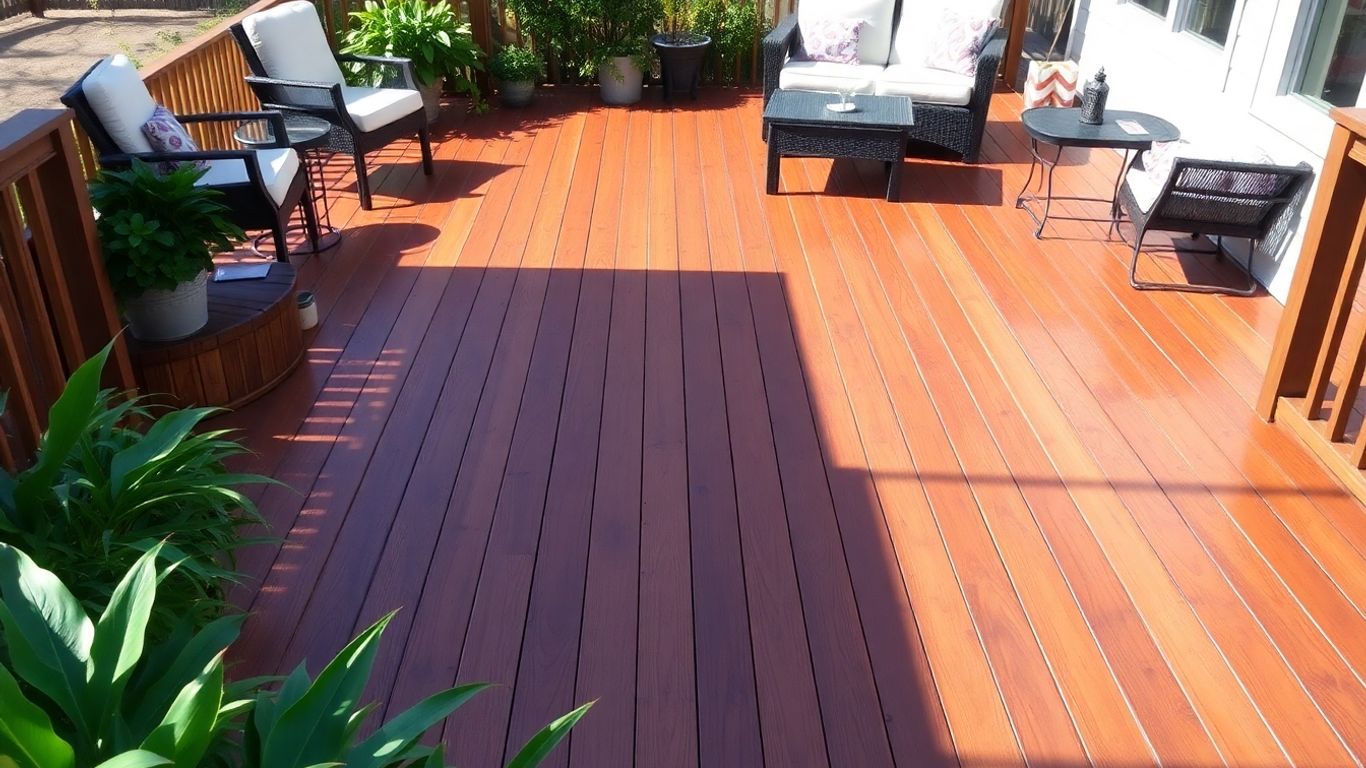
Applying New Stain for Protection
Applying the stain is where the magic happens. It's not complicated, but you do need to be a bit careful to get it right. The goal is an even coat that soaks into the wood properly.
Here’s a general idea of how it's done:
- Get Your Tools Ready: You might use brushes, rollers, or a sprayer, depending on the product and your preference. Make sure you have enough stain for the whole job.
- Start Applying: Work with the grain of the wood. Apply the stain evenly, making sure not to leave puddles or dry spots. If you're using a sprayer, you might need to back-brush to work it into the wood.
- Wipe Off Excess: For most stains, especially transparent and semi-transparent ones, you'll want to wipe off any excess product that hasn't soaked in after about 15-20 minutes. This stops it from looking blotchy or sticky.
- Second Coat (If Needed): Some stains, particularly solid ones, might need a second coat for full coverage. Let the first coat dry completely according to the manufacturer's instructions before applying another.
It might seem like a lot of steps, but taking your time here really pays off in the long run.
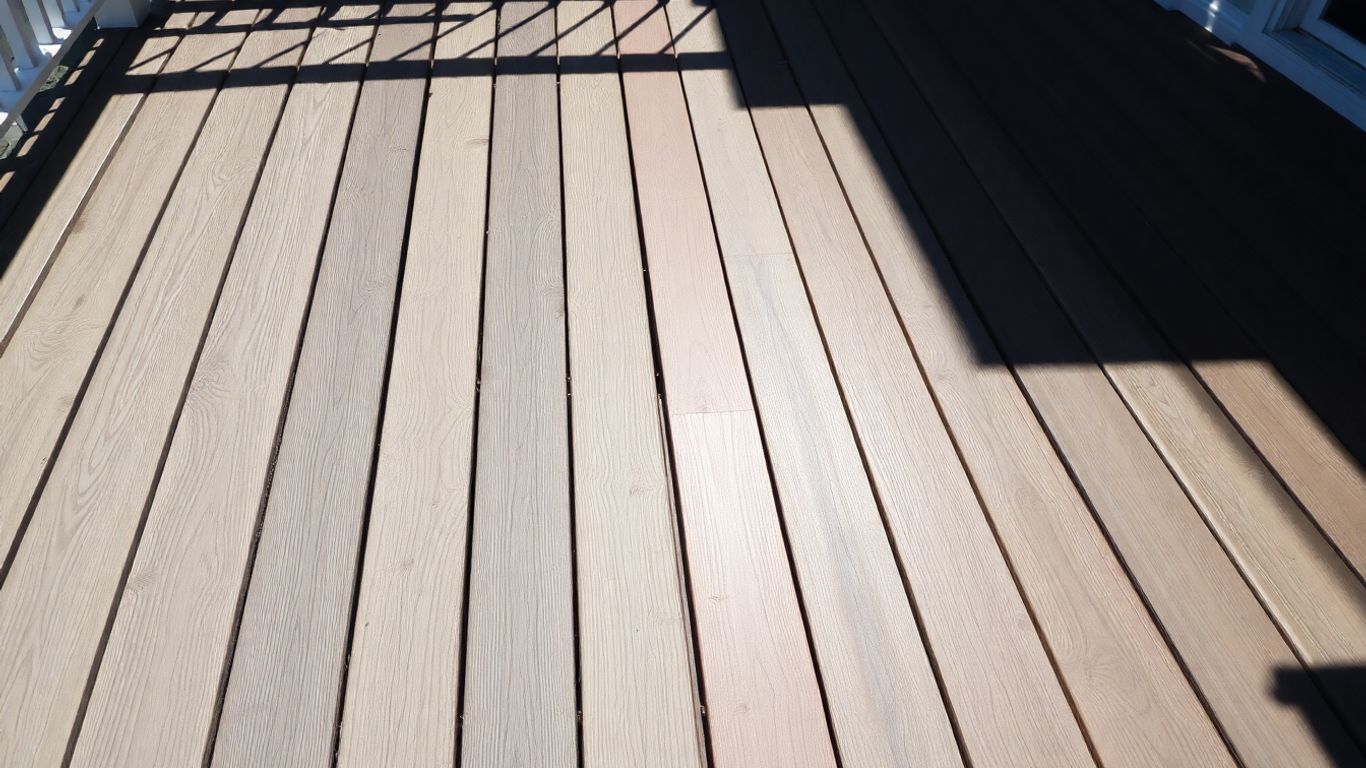
Sanding for a Smooth Surface
Sanding isn't always a must-do before staining, but it can make a big difference, especially if your deck is older or has had multiple finishes applied over the years. Sanding helps to:
- Even Out the Surface: It smooths out any rough spots or minor imperfections in the wood.
- Remove Old Finishes: If there's old, flaking stain or sealant, sanding gets rid of it so the new finish has a clean surface to stick to.
- Improve Adhesion: A lightly sanded surface gives the new stain something better to grip onto, helping it last longer.
If you do sand, it's usually best to do it by hand with sanding blocks rather than a power sander. Power sanders can sometimes be too aggressive and damage the wood. You want a light, even scuff, not to take off a lot of material. After sanding, make sure to sweep away all the dust before you apply any stain or sealant. This step should happen after the deck is clean and dry, and ideally a day or two before you plan to stain.
Remember, the prep work you do before refinishing—like cleaning and making repairs—is just as important as the staining itself. A clean, smooth surface is key to a finish that looks good and lasts for years.
Enhancing Your Deck's Functionality and Appeal
Once your deck is looking sharp and feeling solid again, it's the perfect time to think about how you can make it even better. It's not just about having a nice-looking surface; it's about creating a space you'll actually want to spend time in. Little additions can make a big difference in how you use and enjoy your outdoor area.
Adding Shade Structures
Spending time on your deck during a sunny afternoon can be tough if there's no relief from the sun. That's where shade structures come in. Think about adding a pergola. It gives you that overhead structure, and you can even grow vines on it for natural shade. Or, maybe a retractable awning is more your style – you can pull it out when you need it and tuck it away when you don't. These aren't just practical; they add a certain look to your yard, making the deck feel more like a destination.
Incorporating Built-In Seating
Forget about dragging chairs out every time. Built-in seating is a game-changer. You can have benches made right into the deck's design, using the same wood or composite material. This saves space and always looks tidy. Plus, it gives you a permanent spot to sit without the fuss of moving furniture. It really makes the deck feel more like a part of the house, an actual room outdoors.
Upgrading Furniture and Accessories
Even with great structures and seating, the right furniture and accessories tie everything together. Consider comfortable cushions for your built-in seats, a nice outdoor rug to define the space, and maybe some planters with colorful flowers or herbs. Think about lighting too – string lights can create a magical atmosphere for evening gatherings, or subtle deck lights can make it safer to walk around after dark. It's all about making the space feel welcoming and functional for whatever you want to do, whether that's dining, lounging, or just enjoying the fresh air.
Maintaining Your Restored Deck
So, you've gone through the whole process, and your deck looks fantastic! That's great. But here's the thing: a deck doesn't just stay looking good on its own. It needs a little ongoing attention to keep it that way. Think of it like keeping a car running smoothly – regular check-ups and a bit of care go a long way.
Establishing a Regular Cleaning Routine
First off, let's talk about cleaning. You don't need to scrub it down every week, but a good annual clean is pretty important. This means getting rid of all the leaves, dirt, and whatever else the seasons throw at it. A yearly deep clean helps prevent mold and mildew from setting up shop, which can really damage the wood over time. Just use a mild deck cleaner and a brush that isn't too stiff, so you don't scratch up that nice new finish. And don't forget to sweep it off regularly, especially after big storms or when leaves start falling. It’s a simple step, but it makes a big difference.
Periodic Inspections and Touch-Ups
Beyond just cleaning, you'll want to keep an eye on things. A quick walk around your deck once a year, maybe in the spring before you really start using it, is a good idea. Look for any loose screws or nails that might have popped up. Check for any small cracks or splinters that have started to form. Addressing these little issues early on stops them from becoming bigger, more expensive problems later. If you notice a spot where the stain looks a bit faded or worn, a quick touch-up can really help maintain that uniform look and keep the wood protected.
Understanding Stain Lifespan
Different stains and finishes have different lifespans, and this is something to keep in mind. Generally, you might be looking at reapplying a protective coat every two to three years. This isn't a hard and fast rule, though. It really depends on the type of product you used, the kind of wood your deck is made from, and how much sun and rain it gets. A good quality stain applied correctly will last longer. You can usually tell when it's time for a refresh because water won't bead up on the surface anymore; it'll start to soak in. Keeping up with this will protect your deck from moisture and UV rays, which are the main culprits for wear and tear. For more tips on keeping your deck in top shape, check out these deck maintenance tips.
Taking a little time for regular upkeep will make your deck last much longer and look great for years to come. It’s way easier to do small fixes now than to deal with major repairs down the road.
Benefits of Professional Deck Refinishing
So, you've spent time cleaning, repairing, and maybe even trying to stain your deck yourself. It's a lot of work, right? Sometimes, calling in the pros for a full refinish is the way to go. They've got the know-how and the gear to make your deck look amazing and last longer.
Expertise in Wood Treatment
Professionals know wood. They understand how different types of wood react to various cleaners, stains, and sealants. They can spot issues you might miss, like hidden rot or wood that's too damp to treat properly. This specialized knowledge means they'll pick the right products and methods for your specific deck, avoiding mistakes that could cost you more in the long run.
Access to Quality Materials
Think about the stains and sealants you see at the hardware store. There are tons of options, and it's hard to know which ones are actually good. Professionals usually have access to higher-grade products that aren't always available to the public. These top-quality materials offer better protection against sun, rain, and foot traffic, making your refinishing job more durable.
Ensuring a Long-Lasting Finish
Getting that smooth, even coat of stain or sealant isn't as easy as it looks. Professionals have the right tools and techniques to apply finishes evenly, without drips or missed spots. This careful application is key to protecting the wood and making sure the finish holds up for years, not just a season or two.
Here's a quick look at what you get:
- Proper Surface Prep: They know how to clean and prep the wood so the new finish sticks well.
- Correct Application: Even coats mean better protection and a nicer look.
- Durability: Using the right products and methods makes the finish last longer.
- Time Savings: They get the job done faster than most DIYers.
Hiring professionals for deck refinishing isn't just about convenience; it's an investment in your home's outdoor space. Their skill and access to better materials mean a more beautiful deck that stands up to the elements and lasts for years to come.
Give your deck a new lease on life! Professional refinishing not only makes it look amazing but also protects your investment from the weather. Ready to see the difference a refreshed deck can make? Visit our website today to learn more and get a free quote!
Enjoy Your Renewed Outdoor Oasis
So, there you have it. Bringing your deck back to life isn't just about making it look good again, though that's a big part of it. It's about reclaiming that outdoor space you love, making it safe and enjoyable for years to come. Whether you tackled it yourself or hired the pros, that refreshed deck is now ready for barbecues, lazy afternoons, or just watching the sunset. Think of it as an investment in your home and your downtime. Now go on, put your feet up and enjoy it!
Frequently Asked Questions
How often should I have my deck professionally refinished?
Typically, decks need a good refinishing every 2 to 3 years. However, this can change based on the type of stain used, how much sun and rain your deck gets, and how much you use it. If you notice the color fading, water soaking in instead of beading up, or the stain starting to peel, it's probably time for a refresh.
What's the difference between staining and sealing a deck?
Staining adds color to your deck while also protecting the wood. It can range from a light tint that shows the wood grain to a solid color that hides it completely. Sealing, on the other hand, is usually clear and focuses mainly on protecting the wood from moisture and UV rays without changing its color much.
Can a professional refinishing service fix my deck's rotten spots?
Professionals are great at identifying and fixing cosmetic issues. For rotten spots, they can often replace damaged boards or sections of your deck. However, if the rot has spread deep into the main structure, a full repair or even replacement might be needed. It's best to have them inspect it first.
What should I do to prepare my deck before the professionals arrive?
Before the pros get to work, clear everything off your deck – furniture, plants, grills, you name it. Give it a good sweep to get rid of loose leaves and dirt. This makes it easier for them to start their cleaning and restoration process right away.
How long does the deck refinishing process usually take?
The time it takes can vary, but a typical deck refinishing project often takes a couple of weekends. One weekend is usually for cleaning and repairs, then the deck needs a few days to dry completely. The next weekend is for sanding (if needed) and applying the new stain or finish.
Will refinishing my deck make it look brand new?
Refinishing can make a huge difference, making your deck look much newer and more vibrant. It restores the color, smooths out rough spots, and adds a protective layer. While it might not look *exactly* like a brand-new deck if there were deep damages, it will certainly look significantly revitalized and well-cared for.


Comments
Post a Comment