Interior Painting Tips: Contractors Who Treat Every Wall Like a Canvas

Painting a room can totally change how it looks and feels. It's not just about slapping some color on the walls, though. Real pros, the ones who treat every wall like a canvas, know that it's all in the details. From getting the surface just right to applying the paint so it looks perfect, there's a lot more to it than you might think. We're going to look at some interior painting tips from these artists, so you can get that pro finish at home.
Key Takeaways
- Getting the walls ready is super important. You need to fix any holes or bumps and make sure the surface is smooth before you even think about painting.
- Using the right tools, like good quality paint, primer, and the right brushes or rollers, makes a big difference in how the job turns out.
- Don't rush the application. Professional painters use specific techniques, like rolling in a 'W' pattern, and usually apply at least two coats for the best look.
- Protecting your space is key. Use drop cloths to cover floors and furniture, and painter's tape for clean lines around trim and ceilings.
- The conditions matter. Painting when the temperature and humidity are just right, and making sure there's good airflow, helps the paint dry properly and look its best.
Mastering Surface Preparation for a Flawless Finish

The Importance of Meticulous Surface Prep
Think of your walls as a blank canvas. Before any artist picks up a brush, they make sure their canvas is clean, smooth, and ready. The same goes for painting. Skipping proper prep work is like trying to build a house on sand – it just won't last. A paint job's longevity and appearance depend heavily on how well the surface is prepared. You can have the most expensive paint and the steadiest hand, but if the wall is rough, dirty, or cracked, the paint won't stick right, and it'll look bumpy and unprofessional.
Essential Steps for Wall Repair and Smoothing
Getting your walls ready involves a few key steps. It’s not the most exciting part, but it’s where the magic really starts.
- Clean the Walls: Start by wiping down your walls. Dust, grease, and grime are paint's worst enemies. A simple sponge and some mild soap and water usually do the trick. Make sure they dry completely.
- Repair Imperfections: Look for any holes, cracks, or dents. Fill them with spackle or joint compound. For larger issues, you might need a bit more patching material. Let the patches dry thoroughly.
- Sand Smooth: Once the patches are dry, lightly sand them down so they're flush with the rest of the wall. You're not trying to make the whole wall perfectly smooth, just ensuring the repairs blend in. Use medium-grit sandpaper for this. After sanding, wipe away all the dust.
- Caulk Gaps: Go around and use caulk to fill any remaining small gaps or nail holes you might have missed. This gives you a really clean edge.
Sometimes, you'll run into a wall that's just stubborn. You might try to fix a bulge or a deep gouge, and it just won't come out perfectly without a lot of extra work. At some point, you have to decide if it's worth the time and effort. Often, 'good enough' is truly good enough, especially when you consider your budget and how much time you have.
Protecting Your Space: Drop Cloths and Taping Techniques
Now that your walls are prepped, it's time to protect everything else. This is where you prevent paint from ending up where you don't want it.
- Drop Cloths: Forget those flimsy plastic sheets. Invest in canvas drop cloths. They lay flat, don't slide around, and they actually soak up drips instead of letting them pool and spread. They're more durable and safer to walk on.
- Taping: Use painter's tape for clean lines along trim, windows, doors, and ceilings. Press the edges down firmly to prevent paint from seeping underneath. For outlets and light switches, you can either remove the cover plates or carefully tape around them.
- Furniture: Move furniture to the center of the room and cover it with plastic sheeting or more drop cloths. Don't forget to cover any flooring, even if you're using drop cloths on the floor – an extra layer of protection never hurts.
Exploring Creative Wall Painting Techniques
Painting a room isn't just about slapping on a fresh coat of color. It's an opportunity to get a little artistic and really make a space your own. Forget boring, flat walls; there are tons of ways to add some flair and personality. The right technique can transform a simple room into something truly special.
Achieving Textured Effects with Glazes and Rags
Want to add some depth and visual interest? Glazes are your friend here. They're basically clear liquids you can mix with paint to create softer, more translucent layers. This opens up a world of possibilities for subtle textures.
- Color Washing: This is a great way to get a rustic, aged look. You start with a base color, let it dry, and then kind of haphazardly brush on thinned paint mixed with glaze. It creates variations and a bit of a worn feel.
- Rag Rolling: This technique uses a twisted rag dipped in a different paint color. As you roll it over the wall, the fabric's wrinkles create a unique, semi-patterned texture. It’s a fantastic way to add dynamic texture to interior walls, similar to sponge painting and color washing. This method offers a more subtle effect, allowing for creative and eye-catching wall designs. You can find more on rag rolling if you're curious.
- Strié: For a fabric-like finish, try strié. You apply a base coat, then a wet topcoat mixed with glaze. Dragging a stiff brush through the wet glaze creates soft, horizontal or vertical lines that mimic the look of linen or silk.
Creating Defined Patterns with Stencils and Stripes
If you prefer more precise designs, stencils and stripes are the way to go. They offer a clean, graphic look that can really make a statement.
- Stripes: A classic for a reason! You pick two or more colors, paint a base coat, and then use painter's tape to create sharp, clean lines. Once the paint dries, you peel off the tape for those crisp, contrasting stripes.
- Checkers: Similar to stripes, but with a bit more geometry. You'll use tape to map out your design, often in diagonal sections, and then fill in with contrasting colors for a bold checkerboard effect.
- Stencils: These are super straightforward. You just position the stencil, paint over it with a contrasting color, and voilà – instant pattern! You can use them for small accents or cover an entire wall.
The Art of Ombre and Accent Walls
Sometimes, a single wall can be the star of the show. Ombre and accent walls are perfect for this.
- Ombre: This is all about smooth transitions. You pick at least three colors, usually graduating from light to dark. You paint the lightest color over the whole wall, then blend the next color into the middle section, and finally blend the darkest color at the bottom. The result is a beautiful gradient effect.
- Accent Walls: This is more of a design choice, but it’s a simple way to add a professional touch. You paint three walls one color and then use a bolder, contrasting, or complementary color for the fourth wall. It draws the eye and can really define a space.
When you're playing with these techniques, remember that the glaze is often key. It's a transparent layer that lets the base color show through, giving you that layered, textured look without making the paint too thick. Just be sure to read the instructions on the glaze product you choose, as they can vary a bit.
The Professional Painter's Approach to Application
Getting the paint onto the wall is where the magic happens, but it's also where many DIY projects go sideways. Professionals treat this stage with a lot of care, knowing that technique makes a huge difference in the final look. It's not just about slapping paint on; it's about control and consistency.
Strategic Rolling Patterns for Even Coverage
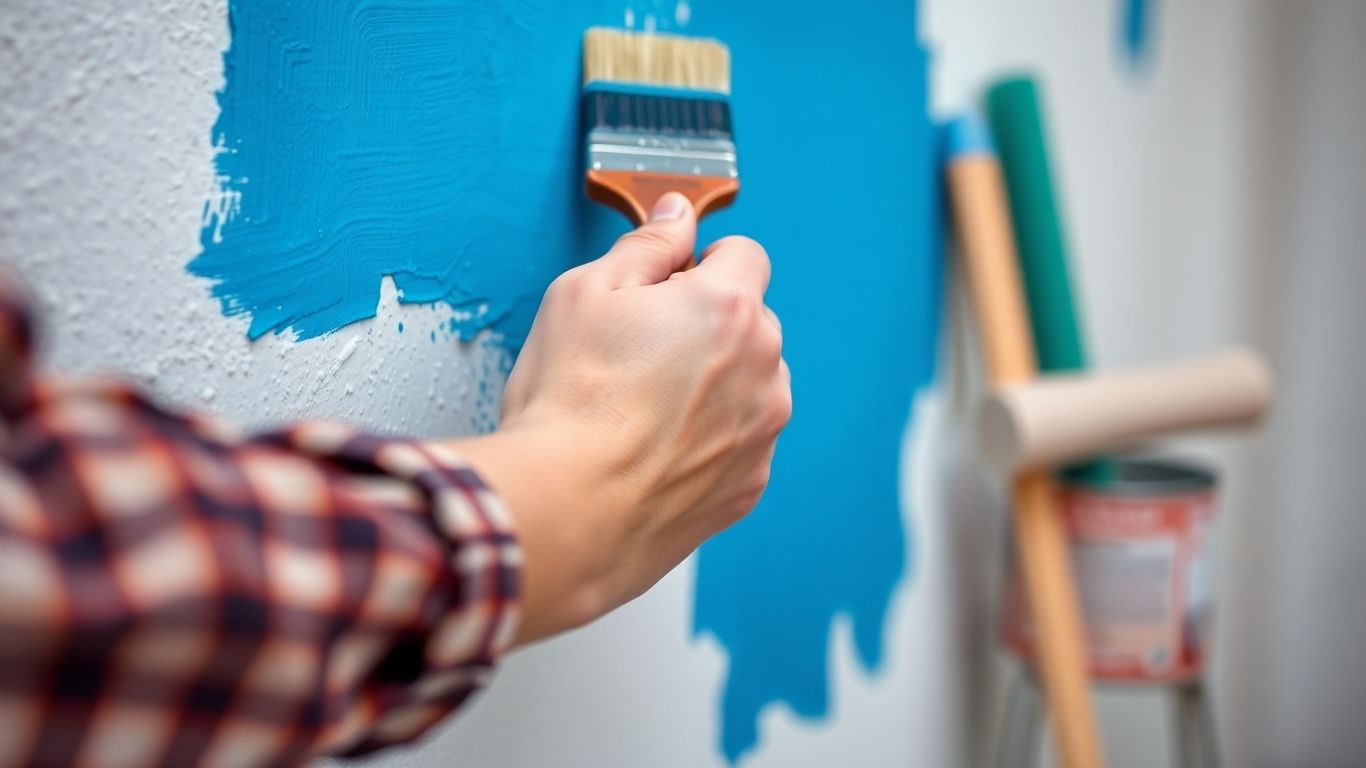
When a pro loads a roller, they don't just dunk it. They dip it about halfway into the paint and then roll it against the screen in the paint tray. This loads the roller evenly, preventing drips and ensuring a consistent amount of paint. The key is to avoid overloading the roller, which leads to splatters and uneven application. Instead of just rolling back and forth in straight lines, painters often use a "W," "M," or "N" pattern. This helps spread the paint more uniformly across the surface, minimizing the chances of visible roller marks or lap lines, especially when you're working to maintain a wet edge.
The Significance of Multiple Coats
Don't expect perfection with just one coat, especially if you're making a big color change. Professionals know that a second, and sometimes even a third, coat is often necessary for a truly rich and opaque finish. This is where patience pays off. After the first coat is dry (usually a couple of hours, depending on the paint and conditions), they'll inspect the wall for any missed spots, lint, or minor imperfections. Any lint is carefully picked off, and the spot is lightly rolled again. If you're using multiple gallons of the same color, it's a good idea to mix them all together in a larger container beforehand. This prevents subtle color variations between batches from showing up on your walls.
Mastering Edges and Trim Work
This is where the detail work really shines. Using the right tools, like a good quality brush and painter's tape, is important. Professionals take their time cutting in around edges, corners, and trim. They'll often use a technique where they load their brush, tap off the excess, and then use smooth, deliberate strokes. For areas like outlets or window frames, careful taping is a must. After painting, the tape is usually removed while the paint is still slightly wet. This helps prevent the paint from peeling off with the tape, giving you a clean, sharp line. It might seem tedious, but this attention to detail is what separates a good paint job from a great one.
Choosing the Right Materials and Tools
Selecting Quality Paint and Primer
Picking the right paint and primer is like picking the right ingredients for a good meal. You can't make a great dish with subpar stuff, right? For walls, this means looking beyond just the color. Primer is your first line of defense, especially if you're covering up a dark color or painting over a surface that's seen better days. It helps the topcoat stick better and can even hide minor imperfections. Think of it as a solid foundation. When it comes to paint, there are a few things to consider. Sheen is a big one. Flat finishes hide imperfections best but are harder to clean. Eggshell or satin are good all-around choices for walls, offering a bit of washability without too much shine. Semi-gloss is usually reserved for trim and doors because it's super durable and easy to wipe down. And for ceilings? Flat is usually the way to go.
The Benefits of Canvas Drop Cloths
Sure, you can grab some plastic sheeting from the store, but honestly, canvas drop cloths are a game-changer. They just feel more substantial, you know? They lay flat, don't slide around as much as plastic, and they actually absorb drips instead of letting them pool and spread. Plus, they're reusable, which is a nice bonus for the planet and your wallet in the long run. You can get them in different weights, too. A heavier canvas is great for really protecting floors, while a lighter one is easier to manage. They just feel more professional and give you peace of mind that your floors and furniture are truly protected.
Essential Tools for Precision Painting
Beyond the paint and drop cloths, you'll need a few key tools to get the job done right. A good quality roller frame is important; nobody wants a squeaky one that makes painting a chore. Make sure it spins smoothly. An extension pole for your roller is also a lifesaver, letting you reach high spots without constantly climbing up and down a ladder. When it comes to brushes, having a few different sizes is helpful. A good angled brush is perfect for cutting in edges along the ceiling and trim. Don't forget a sturdy ladder if you have high ceilings, but always use it safely. A putty knife and spackling compound are your best friends for patching any holes or cracks before you start painting. And of course, painter's tape is non-negotiable for getting those crisp, clean lines.
Here's a quick rundown of what you'll likely need:
- Paint Roller Frame: Look for one that spins freely.
- Roller Covers: Choose the right nap for your wall texture.
- Paint Brushes: An angled brush for trim and edges, and a larger one for cutting in.
- Extension Pole: Makes rolling much easier and safer.
- Painter's Tape: For masking off areas you don't want to paint.
- Drop Cloths: Canvas is preferred for better grip and absorption.
- Ladder: For reaching high areas, use with caution.
- Spackling Compound & Putty Knife: For wall repairs.
When you're gathering your supplies, it's easy to just grab the cheapest option. But with painting tools, a little extra investment upfront can save you a lot of frustration and lead to a much better final result. Think about how much time you'll spend with these tools; it makes sense to have ones that work well and don't fight you every step of the way.
Optimizing Conditions for Painting Success
Getting the environment just right before you even think about opening a can of paint can make a huge difference in how smoothly the job goes and how good the final result looks. It’s not just about the walls themselves; the air, the temperature, and how you set things up all play a part. Think of it like baking – you need the right oven temperature and ingredients, right? Painting is similar.
Ideal Temperature and Humidity for Painting
The sweet spot for painting is generally between 60°F and 80°F (15°C to 27°C) with relative humidity below 60%. When it's too cold, paint can take forever to dry and might not adhere properly, leading to issues down the line. Too hot, and it can dry too quickly, making it hard to get a smooth, even finish without lap marks. High humidity is also a paint's enemy; it slows down drying and can sometimes cause problems with adhesion or the finish itself. It’s best to avoid painting during extreme weather, like a really muggy summer day or a freezing winter afternoon. Checking the weather forecast before you start can save you a lot of headaches.
Ensuring Proper Ventilation During and After Painting
Good airflow is super important, not just for your comfort but for the paint's performance. Ventilation helps the paint dry evenly and can prevent fumes from building up, which is better for your health. You don't want to be breathing in paint fumes for days on end. Opening windows and doors, or using fans to create a cross-breeze, is a good idea. This is especially true after you've finished painting. Letting the room air out properly helps the paint cure correctly and reduces that lingering paint smell. It’s a simple step that really pays off in the long run.
Calculating Paint Needs Accurately
Running out of paint mid-job is a classic painting problem, and so is having way too much left over. To figure out how much you need, you'll want to measure the square footage of the walls you're painting. A general rule of thumb is that one gallon of paint covers about 350 to 400 square feet with a single coat. However, this can change based on the paint's quality, the surface texture, and whether you're using a primer. It's always better to buy a little extra than not enough, especially if you plan on doing a second coat or need to touch up later. You can usually return unopened cans of paint if you get it right from a big box store, but it’s good to check their return policy first. For a more precise calculation, you can use online paint calculators or check the specific coverage rate listed on the paint can. This helps you buy the right amount of paint.
When planning your painting project, consider the time of year. Fall and spring often offer the most stable temperatures and humidity levels, making them ideal for interior painting. This can significantly impact drying times and the overall quality of the finish.
Getting the right conditions is key to making your paint job look great and last a long time. Think about the weather – not too hot, not too cold, and definitely no rain! Also, make sure the surface you're painting is clean and dry. These simple steps help your paint stick better and avoid problems later. Want to learn more about making your painting project a success? Visit our website for expert tips and advice!
Bringing Your Vision to Life
So, there you have it. Painting a room isn't just about slapping some color on the walls. It's about taking the time to get things right, from covering up those little dings to making sure your lines are crisp. Whether you're going for a simple coat or trying out a fancy technique, treating each wall like a blank canvas really makes a difference. A little effort upfront goes a long way, and the end result? A space that looks and feels just right. It’s pretty satisfying when it all comes together, don't you think?
Frequently Asked Questions
Why is cleaning and fixing the walls so important before painting?
Think of your walls like a canvas for a painting. If the canvas isn't smooth and clean, the paint won't look good. Cleaning and fixing any holes or bumps makes sure the new paint goes on smoothly and looks its best, just like a painter would prepare their canvas.
What's the best way to protect my furniture and floor when painting?
It's super important to cover everything up! Use thick cloths, called canvas drop cloths, for the floor because they catch drips well and don't slide around. For furniture, cover it with plastic or old sheets. Also, take off things like light switch plates and outlet covers so you don't get paint on them.
How do I get clean lines between the wall and the ceiling or trim?
The secret is painter's tape! Stick it carefully along the edge where the wall meets the ceiling or the trim (like around windows and doors). Press it down firmly so paint doesn't sneak underneath. You'll peel it off after the paint is dry to reveal a super crisp line.
What's the deal with primer, and do I always need it?
Primer is like a special base coat that helps the main paint stick better and cover the old color more easily. You really need it if you're painting over a dark color or if you have new drywall. Sometimes, paints have primer mixed in, but a separate primer often gives the best results.
How many coats of paint should I use?
Most of the time, two coats of paint are best. The first coat covers the surface, and the second coat makes the color look rich and even. If you're painting a really bright color over a dark one, or painting brand new walls, you might even need three coats.
What are some cool, easy ways to make my walls look more interesting than just plain color?
You can try using stencils to add patterns, or create stripes with painter's tape. Another fun idea is an accent wall, where you paint one wall a different, bolder color than the others. Techniques like rag rolling can also give a cool, textured look.


Comments
Post a Comment