Common Paint Removal Mistakes DIYers Make: Avoid These Pitfalls
Thinking about tackling a painting project yourself? That's great! It can really change the look of a room without costing a fortune. But, like any DIY, there are ways to mess it up. I've seen it happen, and honestly, I've made some of these blunders myself. We're going to talk about some common paint removal mistakes DIYers make, and how to avoid them so your next project actually looks good. Let's get started.
Key Takeaways
- Always prep your surfaces. Cleaning, repairing, and sanding make a huge difference in how paint sticks and looks. Don't skip this part!
- Choose the right paint and tools for the job. Using interior paint outside or cheap brushes will lead to problems down the road.
- Don't rush the process. Allow proper drying time between coats, and apply paint in thin, even layers. Patience pays off.
- Pay attention to the environment and your safety. Work in good light and ventilation, and use ladders carefully.
- Test paint colors in your actual room. What looks good on a tiny chip might be totally different on your walls.
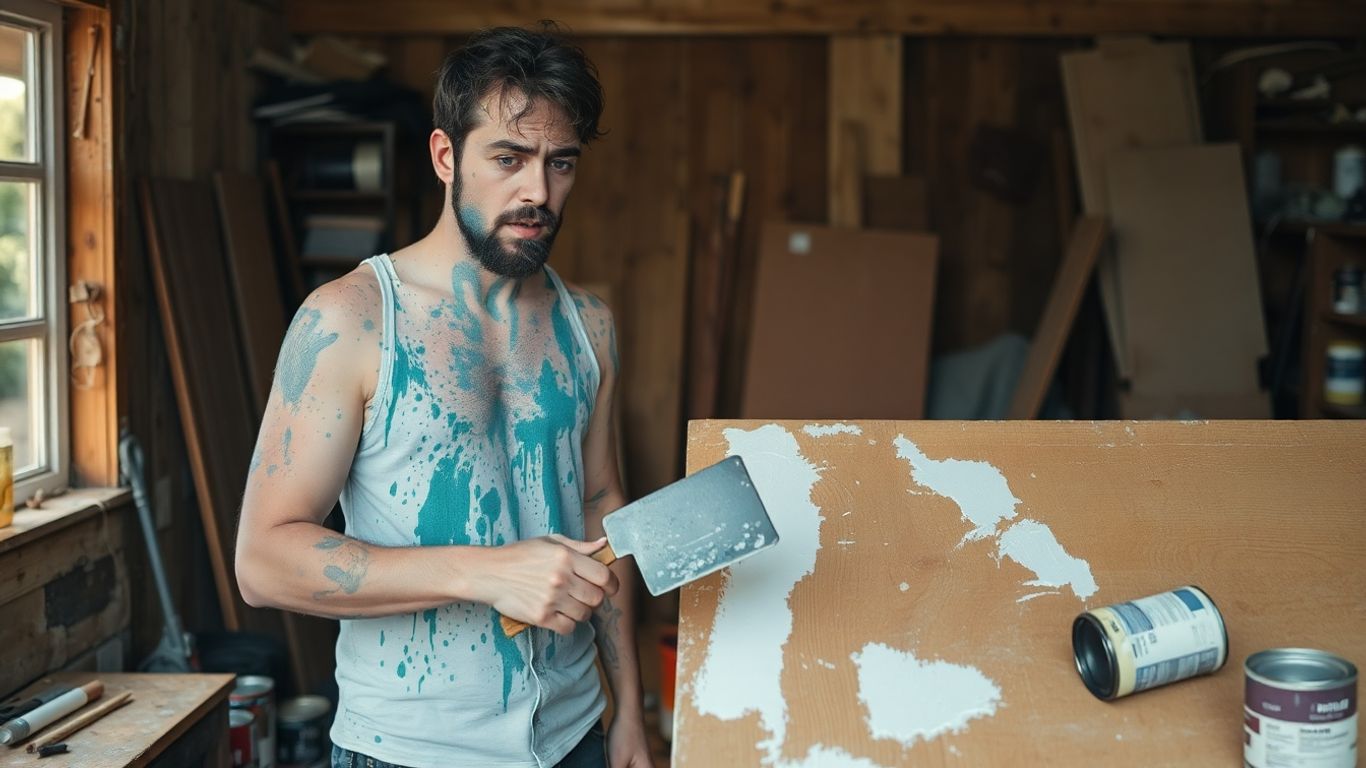
Overlooking Essential Surface Preparation
Alright, let's talk about getting ready to paint. This is the part a lot of folks, myself included sometimes, just want to skip. You've got the paint, you've got the brush, you're ready to go, right? Well, not so fast. Skipping the prep work is probably the number one reason paint jobs go south.
Failing to Clean and Repair Surfaces
Think about it: you wouldn't put a fancy tablecloth on a dusty, sticky table, would you? Same idea with painting. If you slap paint over dirt, grease, cobwebs, or mildew, it's just not going to stick properly. That beautiful finish you're dreaming of? It'll start peeling or bubbling before you know it. You really need to give the surface a good clean. For outside jobs, a good scrub with some soapy water or a dedicated cleaner works wonders. Inside, wipe down walls to get rid of any grime. Also, check for any cracks, holes, or peeling bits. Fill those holes, sand down any rough spots, and scrape off loose paint. This foundation is everything for a paint job that lasts.
Skipping Sanding for Better Adhesion
This one ties right into cleaning. Even if a surface looks clean, it might have a slick, glossy finish that paint just slides off. That's where sanding comes in. You don't need to go crazy, just a light scuffing with some medium-grit sandpaper (like 120-grit) is usually enough. It creates tiny little scratches that give the paint something to grab onto. If you're painting over a glossy surface, like old varnish or semi-gloss paint, sanding is a must. You can also use a liquid deglosser, which is a bit less work and often just as effective. It basically dulls the shine so the new paint can stick.
Neglecting to Tape Off Areas
This is all about neatness and saving yourself a headache later. Unless you're going for a really abstract look, you probably don't want paint on your window frames, light fixtures, or the edge where the wall meets the ceiling. Using good quality painter's tape is your best friend here. Press it down firmly along the edges to make sure paint doesn't seep underneath. Take your time with this step; it makes a huge difference when you pull the tape off and see those nice, clean lines. It's way easier to tape off now than to try and fix mistakes with a tiny brush later.
Honestly, I used to think prep was just busywork. But after a few paint jobs that looked okay for a month and then started looking sad, I learned my lesson. Taking an extra afternoon to really clean, sand, and tape properly saves so much frustration down the road. It's the difference between a paint job you're proud of and one you're already thinking about redoing.
Making Incorrect Paint and Tool Choices
So, you've got your paint picked out, maybe even a fancy new color. But hold on a second, are you sure you've got the right stuff for the job? This is where a lot of DIYers trip up, and honestly, it's easy to see why. There's a ton of paint out there, and even more tools. Picking the wrong ones can turn a weekend project into a frustrating mess.
Selecting the Wrong Paint Type or Sheen
This is a big one. Not all paint is created equal, and using the wrong kind can lead to problems down the road. For instance, using interior paint on an exterior surface is a recipe for disaster. It just won't hold up to the weather. Similarly, the sheen of your paint matters. A high-gloss paint will show every single imperfection on the wall, so if your surface isn't perfectly smooth, you might want to rethink that super shiny finish. Flat or eggshell finishes are more forgiving on less-than-perfect walls.
Here's a quick rundown on sheens:
- Flat/Matte: No shine, hides imperfections well. Best for ceilings and low-traffic areas.
- Eggshell/Satin: Slight sheen, more durable and washable than flat. Good for living rooms, bedrooms, and hallways.
- Semi-Gloss: Noticeable shine, very durable and washable. Great for trim, doors, and kitchens/bathrooms.
- High-Gloss: Very shiny, extremely durable. Best for trim, furniture, and high-impact areas where you want a statement.
Choosing paint based only on the color chip you see at the store is a common mistake. The lighting in your home and the actual surface can make the color look completely different. Always get a sample and test it on your wall before committing to gallons.
Choosing Inadequate or Low-Quality Tools
Don't underestimate the power of good tools. Trying to save a few bucks on cheap brushes or rollers can end up costing you more time and effort. Bristles falling out of a brush onto your freshly painted wall? Been there, done that. Rollers that leave an uneven texture? Ugh. It's worth investing in decent quality tools. They'll apply paint more smoothly, last longer, and just make the whole process less of a headache.
Think about it:
- Brushes: Look for synthetic bristles for latex paints and natural bristles for oil-based paints. A good brush will hold its shape and apply paint evenly.
- Rollers: The nap (thickness) of the roller cover should match your surface. Shorter naps are for smooth surfaces, while longer naps are for textured walls.
- Paint Trays & Buckets: Make sure they're sturdy and easy to clean. A good paint tray liner can save a lot of cleanup time.
Using Interior Paint Outdoors
This one seems obvious, but you'd be surprised how many people try it. Interior paint is formulated for indoor conditions. It doesn't have the UV protection or the flexibility needed to withstand rain, sun, and temperature changes. Using it outside means it'll likely fade, crack, or peel much faster than exterior paint. Always use paint specifically designed for the environment it will be in. Exterior paints have additives that protect against the elements, keeping your paint job looking good for longer.
Skipping Crucial Application Steps
Alright, so you've prepped your surface, picked out the perfect color, and you're ready to go. But hold on a second! Rushing through the actual painting part is a super common mistake that can really mess up your finished look. It’s not just about slapping paint on; there are a few key steps that make a big difference.
Forgetting to Apply Primer
This is a big one. Lots of people think primer is an unnecessary extra step, especially if they're painting over a similar color or a surface that's already painted. But honestly, primer is like the foundation for your paint job. It helps the new paint stick way better, especially on tricky surfaces like glossy paint, bare wood, or even if you're going from a dark color to a light one. Skipping it can lead to peeling, chipping, and colors that just don't look as vibrant as they should. It also helps cover up stains or imperfections you might have missed during prep.
- New drywall or plaster: Always prime. It seals the porous surface.
- Drastic color changes: Primer helps block the old color.
- Glossy or slick surfaces: Primer gives the new paint something to grip.
- Stained surfaces: A stain-blocking primer is your best friend.
Skipping primer might save you a little time upfront, but it often means more work down the road when you have to fix peeling or uneven paint.
Rushing the Drying Process Between Coats
This is another classic DIY error. You finish one coat, and you're eager to get the next one on so you can be done. But paint needs time to dry properly. If you apply a second coat too soon, you can actually pull up the first coat, causing streaks, uneven texture, and a generally messy appearance. Plus, the paint might not cure correctly, making it more prone to damage later on.
Check the paint can for recommended drying times. These can vary a lot depending on the type of paint, humidity, and temperature. It's better to wait a bit longer than to ruin your work.
Applying Paint Too Thickly
It might seem like applying a thicker coat will give you better coverage and save you a pass or two. However, this usually backfires. Thick coats are much more likely to drip, sag, and dry unevenly. You can end up with a lumpy, unprofessional finish that looks worse than if you'd just applied thinner, more even coats. It also takes much longer to dry, increasing the risk of smudging or picking up dust.
- Brush application: Dip your brush about a third of the way into the paint. Tap off excess gently; don't scrape it on the can's rim.
- Roller application: Load the roller evenly, but don't let paint drip off. Roll it onto the paint tray grid to distribute it.
- Aim for thin, even coats: Two thin coats are almost always better than one thick one.
Ignoring Environmental and Safety Factors
Sometimes, we get so caught up in the color and the finish that we forget about the world around us and our own well-being. This is a big mistake, especially when you're working outside or in less-than-ideal conditions.
Painting in Unsuitable Weather Conditions
Think about it: paint is a liquid that needs to dry. If it's too hot, too cold, or too humid, that drying process gets messed up. Painting when the temperature is outside the range recommended by the paint manufacturer is a recipe for disaster.
Here's a quick rundown of what happens:
- Extreme Heat: Paint can dry too fast on the surface before it really bonds. This can lead to peeling and bubbling later on.
- Freezing Temperatures: Latex paints can be ruined if they freeze. Even if they don't freeze, they won't dry properly, and the finish will be weak.
- High Humidity: This slows down drying time. If it rains soon after you paint, your hard work could literally wash away.
- Direct Sunlight: Similar to extreme heat, direct sun can make paint dry too quickly and unevenly.
Always check the weather forecast for the day you plan to paint, and for the next day or two. You want a few days of moderate temperatures and low humidity for the best results.
Working in Poor Lighting
This one might seem obvious, but it's often overlooked. Trying to paint in dim light, whether it's late in the day or in a poorly lit room, means you're not going to see what you're doing properly.
- You'll miss spots, leading to an uneven finish.
- You might apply the paint too thickly in some areas and too thinly in others.
- It's harder to see drips or runs until they've already started to set.
If you're painting indoors, make sure the room is well-lit. Open curtains, turn on extra lights, or even use a work lamp. If you're painting outside, try to do it when the natural light is good, avoiding the harsh midday sun if possible.
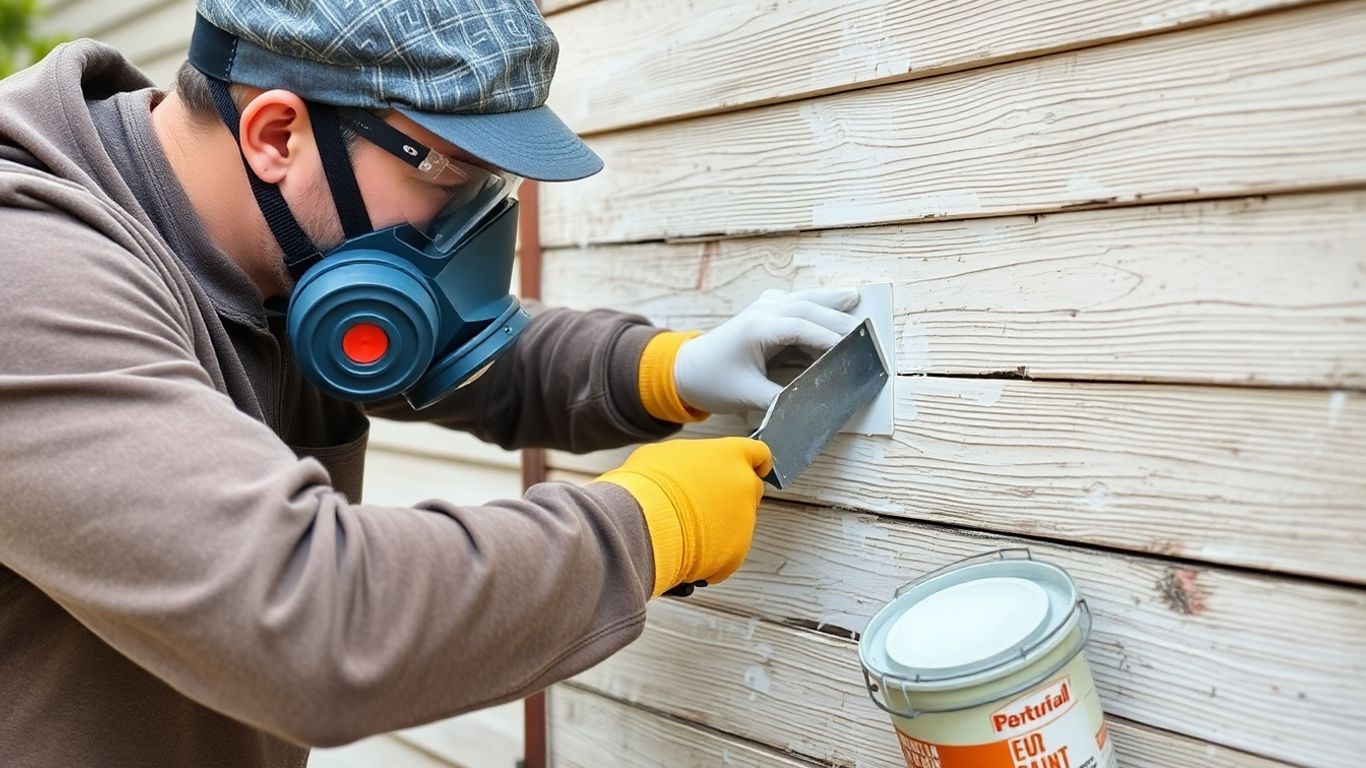
Neglecting Safety Precautions
This is probably the most important point. Paint fumes can be strong, and ladders can be wobbly. Your health and safety should always come first.
- Ventilation: Always paint in a well-ventilated area. If you're indoors, open windows and doors. If you're using strong paints, consider a respirator mask.
- Ladders: Make sure your ladder is stable and on level ground. Don't overreach; move the ladder instead. If you're not comfortable on a ladder, consider renting scaffolding or hiring someone.
- Protective Gear: Wear gloves to protect your skin from paint and solvents. Eye protection is also a good idea, especially if you're spraying paint or working overhead.
Don't let the desire to finish quickly make you cut corners on safety. A little bit of caution now can prevent a trip to the emergency room later. Always read the safety information on your paint cans and follow the recommendations.
Common Application Errors

Even with the best paint and tools, you can still mess things up during the actual painting. It's easy to get careless when you're in the zone, but a few common slip-ups can really ruin your hard work. Let's talk about some of these.
Over-Brushing Woodwork and Trim
When you're painting trim, doors, or anything made of wood, you want a smooth finish. The trick is to load your brush with enough paint and cover the area quickly. Then, use just a couple of light strokes to even it out. Don't keep going over the same spot, especially if the paint is starting to get tacky. Doing that just makes ugly brush marks and ridges that you'll definitely notice later.
Painting Over Glossy Finishes Without Prep
If you try to paint over a surface that's already shiny, like old varnish or glossy paint, your new paint just won't stick right. You'll end up with a finish that looks bad and might peel off. Before you paint, you need to rough up that shiny surface. You can do this by sanding it down a bit, or even easier, use a liquid deglosser. Pros often use deglosser because it works really well and saves time.
Bumping the Ceiling with a Roller
This one's a classic DIY disaster. One second you're rolling along, feeling good, and the next thing you know, your roller has bumped the ceiling, leaving a nice, noticeable mark. It's a pain to fix. A good way to avoid this is to start by rolling a horizontal strip of paint just below the ceiling. Then, when you roll vertically, you'll have a little buffer zone. It's a simple trick that can save you a lot of touch-up work.
Here are a few more things to watch out for:
- Leaving the paint can lid off: This lets paint dry out, gets crud in the can, and makes it easy to step on the lid and track paint everywhere.
- Not locking up pets: Dogs and cats can easily knock over paint cans or walk through wet paint, creating a huge mess.
- Painting in bad light: If it's too dark, you might miss spots or apply the paint unevenly. You won't see the problems until you turn on the lights or the sun comes up.
It's really easy to get caught up in the painting process and forget the small details. But those small details, like how much paint is on your brush or whether the surface is properly prepped, make a big difference in the final look. Taking a moment to do things right, even if it feels slow, usually saves time and frustration in the long run.
Color Selection Pitfalls
Picking the right paint color can feel like a big deal, and honestly, it is. It's one of those things that can totally make or break the vibe of a room. So many people just grab a tiny color chip from the store, thinking, 'Yep, that's the one!' But then you get it home, slap it on the wall, and suddenly it looks... different. Like, really different. That's because those little chips don't show you how the color behaves in your actual space.
Choosing Colors Based on Chips Alone
This is probably the most common mistake. Those little paper squares are just a starting point. They don't account for the light in your room, the colors of your furniture, or even the colors of the rooms next to it. What looks like a cheerful yellow in the store might look sickly green under your living room's lighting. Don't let a tiny chip dictate your entire room's mood.
Not Testing Samples in the Actual Room
This is where you save yourself from a repaint. Get sample pots of your top few color choices. Paint a decent-sized swatch (at least a 1-foot square) on a few different walls in the room. Why different walls? Because the light hits them differently throughout the day. Check them in the morning, at noon, in the evening, and with your lights on. This step is non-negotiable if you want to avoid disappointment.
Ignoring How Light Affects Color
Light is the biggest influencer of color. Natural light changes throughout the day, and artificial light (like your bulbs) has its own color temperature. A color can look warm and inviting in one light and cool and stark in another. Even the sheen of the paint plays a role; glossier finishes reflect more light and can make colors appear brighter or even slightly different than a matte finish of the same color.
Here's a quick rundown of how light can change things:
- North-facing rooms: Tend to have cooler, bluer light. Colors might appear a bit muted or cooler.
- South-facing rooms: Get warm, bright light. Colors will generally look truer and more vibrant.
- East-facing rooms: Bright in the morning, cooler in the afternoon. Colors can shift significantly.
- West-facing rooms: Cooler in the morning, warm and intense in the afternoon. Be ready for color shifts.
Remember, the color you see on the paint can or the chip is just a representation. The final look is a collaboration between the pigment, the surface it's on, and the light that hits it. Testing is key to understanding this relationship in your own home.
Think about your furniture, rugs, and even artwork too. These items have their own colors and will influence how the wall color appears. It's often a good idea to pick out your main decor pieces first, then choose paint colors that complement them, rather than the other way around.
Picking the wrong colors can really mess up how your home looks. It's easy to make mistakes when choosing paint shades, leading to a finish you don't love. Don't let color choices cause problems for your project. Visit our website to learn more about avoiding these common issues and find the perfect colors for your space.
Wrapping Up Your Painting Project
So, there you have it. Painting your own place can be a really rewarding project, but it's easy to trip up along the way. We've talked about how important prep work is, why you shouldn't just grab any old can of paint, and how the right tools can make all the difference. Remember to give primer a chance, don't rush the drying times, and always keep safety in mind. By avoiding these common mistakes, your next DIY paint job should go a lot smoother, and you'll end up with results you can really be proud of. Happy painting!
Frequently Asked Questions
Why is preparing the surface so important before painting?
Think of it like building a house. You wouldn't build on shaky ground, right? The same goes for painting. If you don't clean, fix any holes or cracks, and lightly sand the surface, the new paint won't stick well. This means it could peel or look bumpy later on, no matter how nice the paint color is.
Can I just use any kind of paint for any project?
Nope! Using paint meant for indoors outside is a big no-no. Outdoor paint is made to handle sun, rain, and temperature changes. Indoor paint just can't handle that and will break down quickly, making your paint job look bad much sooner.
Is primer really necessary, or can I skip it?
While you *can* skip primer, it's usually a good idea to use it. Primer acts like a sticky base for your paint, helping it go on smoother and look more vibrant. It's especially helpful if you're painting over a dark color or if you've patched up some holes.
How do I know if I'm choosing the right paint color?
Looking at a tiny color chip at the store can be tricky because the light in your home is different. It's best to buy small sample pots of the colors you like and paint a small section of your wall. Then, look at it at different times of day and with lights on and off to see how it really looks.
What happens if I don't let the paint dry long enough between coats?
If you put a second coat of paint on too soon, the layers underneath might not be fully dry. This can cause problems like peeling paint, uneven textures, or brush marks showing up more. Patience is key for a smooth, lasting finish!
Are there any safety rules I should follow when painting?
Definitely! Always try to paint in a room with open windows or a fan to keep the air fresh, so you don't breathe in too many fumes. If you're using a ladder, make sure it's steady. Wearing old clothes and maybe gloves is also a good idea to protect yourself and your belongings.


Comments
Post a Comment