Wall Patching Like a Pro: Mastering the Subtle Techniques for a Flawless Finish
Ever look at a wall and see that little ding or crack and think, 'Ugh, I'll fix that later'? Yeah, me too. But 'later' can turn into 'never' pretty fast. This weekend, I decided to tackle some wall damage myself, and let me tell you, it wasn't as simple as I thought. Those online videos make it look so easy, but getting that patch to blend perfectly? That's where the real trick is. It’s all about those little details, the things that make Wall Patching Like a Pro: Little Details That Make a Seamless Finish Stand Out. I'm going to walk you through how to get your walls looking like they were never damaged in the first place.
Key Takeaways
- Start by really looking at the damage. Is it just a small hole, or is something more serious going on? Knowing what you're dealing with helps you pick the right fix.
- When you apply plaster, do it in thin layers. It might take more time, but it dries better and is less likely to crack later on. Think of it like building up a good base.
- Sanding is super important for making the patch disappear. Use fine sandpaper and go easy, blending the patch into the wall so you can't feel an edge anymore.
- Don't skip priming! It helps the paint stick right and makes sure the color looks even. Then, paint with the same sheen as your wall.
- Feathering the edges means spreading the plaster out really thin into the existing wall. This wide, thin edge is what makes the patch hard to see once it's all done.
Assessing and Preparing the Damaged Wall
Before you even think about grabbing a trowel, let's get real about what we're dealing with. Fixing a wall isn't just about slapping some mud on it and hoping for the best. You gotta know your enemy, so to speak. This means taking a good, hard look at the damage and getting the area ready for repair. It’s like prepping a canvas before you paint; you wouldn't just start slinging paint, right? Same idea here.
Identifying the Type and Extent of Damage
First off, what kind of boo-boo are we looking at? Is it a tiny nail pop that’s barely noticeable, or did something heavy just take a chunk out of your drywall? Knowing this helps you pick the right materials and methods. Small dents and holes are usually pretty straightforward, often fixable with a bit of spackle or lightweight joint compound. Bigger holes, though? Those might need a patch, maybe even a whole new piece of drywall if things are really bad. Don't underestimate the importance of this initial assessment; it sets the stage for the entire repair.
Measuring the Damaged Area for an Accurate Repair
Once you know what you're dealing with, grab a tape measure. You don't need to be exact to the millimeter, but get a general idea of the size of the damaged spot. For small holes, this might just be a quick mental note. For larger areas that might need a patch, measure the width and height. This helps when you're cutting a new piece of drywall to fit or buying a pre-made patch. It’s better to have a patch that’s slightly too big and trim it down than one that’s too small and leaves gaps.
Removing Loose Plaster and Debris
This is where things can get a little messy, but it's super important. You need a clean surface to work with. Grab a utility knife or a putty knife and carefully scrape away any loose bits of plaster or drywall around the damaged area. Think of it like cleaning up a wound before you put a bandage on it. You want to get rid of anything that's not firmly attached. This ensures that your new compound or patch has a solid base to stick to, preventing future problems. You might also want to sweep or vacuum up any dust and debris that falls to the floor. Nobody likes a dusty repair job.
A clean, stable surface is the foundation of any good wall repair. Skipping this step is like building a house on sand – it's just not going to hold up.
Here’s a quick rundown of what you might encounter:
- Nail Pops: Small bumps where a nail has worked its way out. Just need a little compound.
- Dents and Scratches: Surface-level damage. Spackle or compound usually does the trick.
- Small Holes: Think doorknob impacts or accidental bumps. Often fixable with a patch or compound.
- Larger Holes: Where a significant piece of drywall is missing. These will definitely need a patch or new drywall piece.
- Cracks: Can be hairline or larger. May require tape and compound, depending on the cause.
Mastering the Application of Plaster Coats
Applying plaster isn't just about slapping it on; it's a process that needs a bit of patience and technique to get right. You're essentially building up layers, and each one has its own job. Think of it like baking a cake – you can't just throw everything in at once and expect a masterpiece.
Applying Plaster in Thin Layers for Durability
One of the biggest mistakes people make is trying to fill a big hole with one thick goop of plaster. This usually leads to cracks and a weak repair. It's way better to apply plaster in thin layers. Each layer should be no more than about 1/4 inch thick. This allows the plaster to dry properly and bond well with the layer underneath. Plus, thin layers are less likely to shrink and crack as they cure.
- Scratch Coat: This is your first layer. It's applied thinly and then roughened up a bit, almost like scratching it with a tool. This gives the next coat something to grab onto.
- Brown Coat: This is the workhorse layer. It fills out the patch and brings it closer to the level of your existing wall. You'll likely need one or two applications of this.
- Finish Coat: This is the final, smooth layer that you'll sand down to match the wall.
Remember, plaster needs time to dry between coats. Rushing this step is a recipe for disaster, leading to cracks and a repair that won't last.
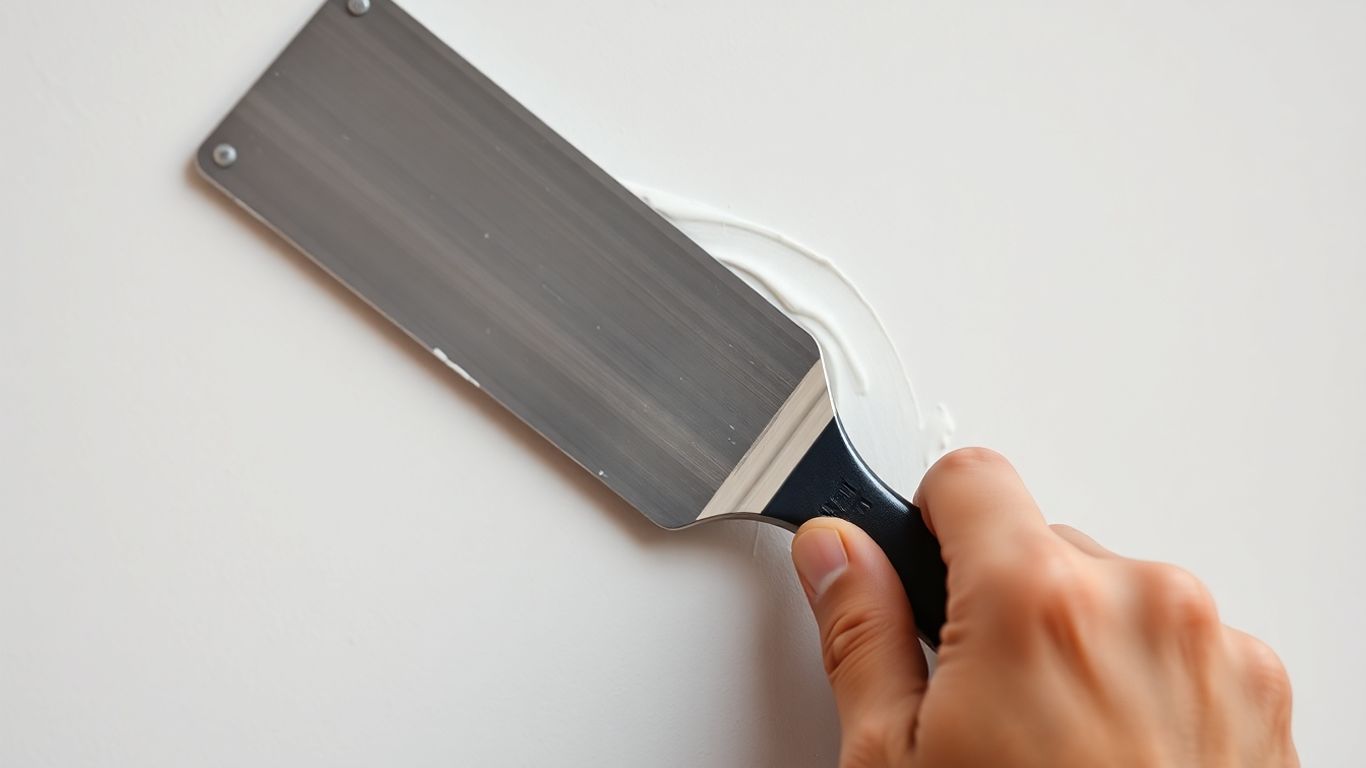
The Brown Coat: Filling the Patch to Match the Wall’s Surface
After your scratch coat has set up a bit (usually an hour or so, it should be firm but not rock hard), it's time for the brown coat. This is where you really start building up the patch to be flush with the rest of your wall. Mix your plaster to a consistency that's like thick pancake batter – smooth and workable. Use a trowel to spread it over the scratch coat, pressing it in firmly to fill any low spots or imperfections. Don't worry about making it perfectly smooth just yet; the main goal here is to get it level. You might need a couple of applications of the brown coat to get it close to the wall's surface. Let each application dry thoroughly before adding the next. Once the brown coat is dry, you'll likely have some high spots that need to be knocked down before the final coat.
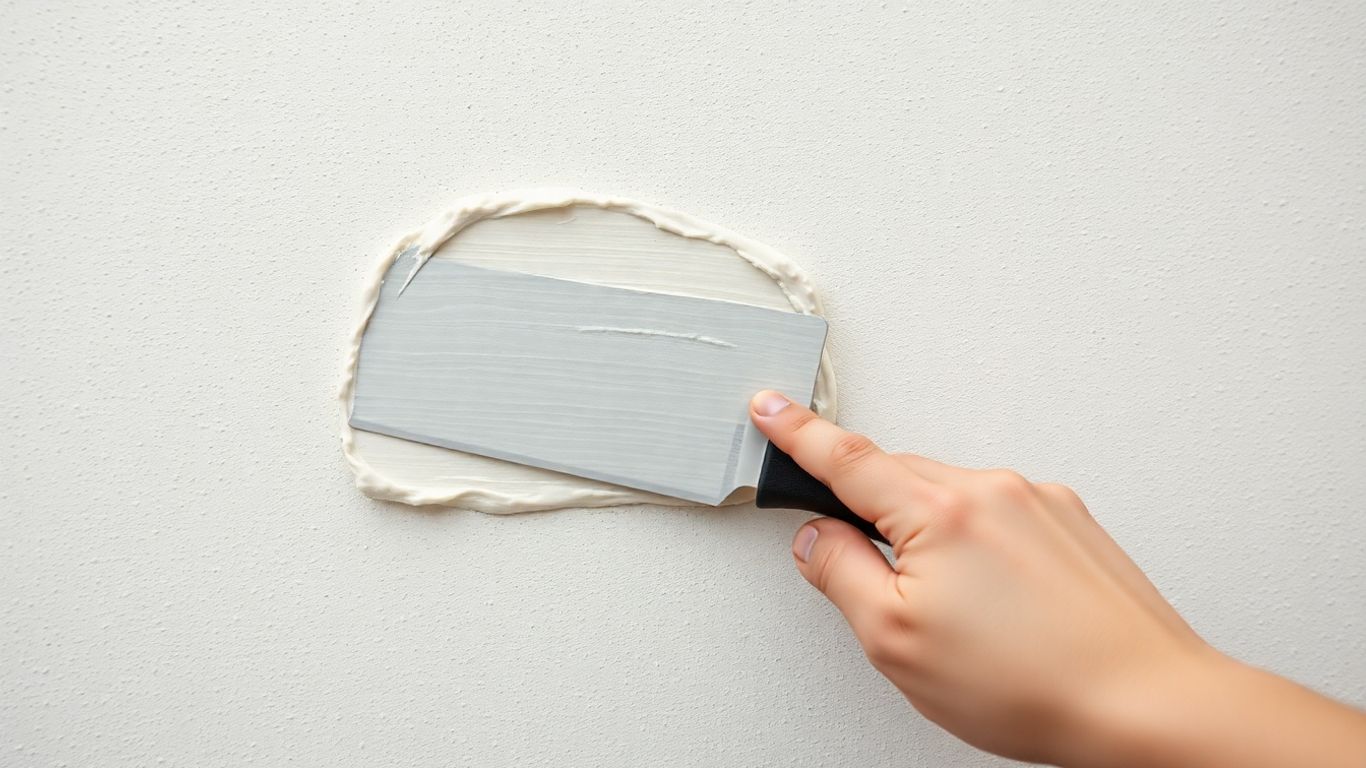
The Finish Coat: Achieving a Smooth and Even Layer
The finish coat is your last chance to make that patch disappear. This layer is applied thinly and smoothly. Use a clean trowel and spread the plaster evenly, working from the center of the patch outwards to blend with the existing wall. The key here is to keep your trowel at a consistent angle and use light pressure. You want to smooth out any ridges or imperfections left by the brown coat. Don't overwork it, though; you're just aiming for a smooth, even surface that matches the surrounding wall. Let this coat dry completely, which can take a full day or more depending on humidity. Once dry, it's ready for sanding.
Achieving a Seamless Blend Through Sanding
Alright, so you've got your plaster coats on, and they've had a good long dry. Now comes the part where you make that patch disappear. This is where sanding comes in, and honestly, it's more art than science if you want it to look like nothing ever happened.
Using Fine-Grit Sandpaper to Blend the Patch with the Wall
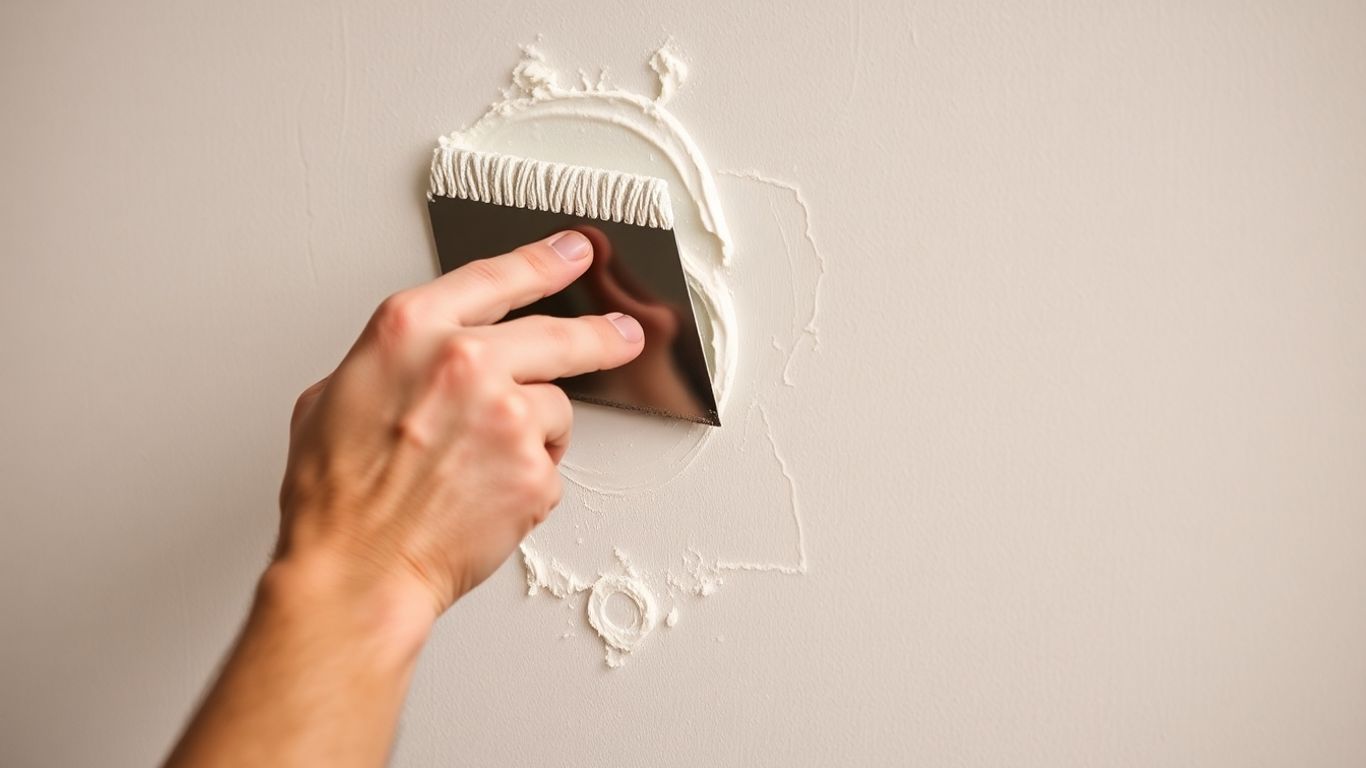
This is where the magic happens. You want to grab some fine-grit sandpaper. I usually start with something around 150-grit. It’s not too aggressive, but it’ll knock down any little high spots or rough bits left over from the plastering. You're not trying to flatten the whole wall, just gently smooth the edges of your patch so it starts to melt into the surrounding surface. Work in small, gentle circles. Don't go crazy pressing down, or you'll just create a new problem. Keep a dust brush handy because you'll want to wipe away the dust often. It's the only way to really see what you're doing and where you need to keep sanding. A good light source is your best friend here, too. It helps you spot any little bumps or low spots you might have missed.
Removing High Spots and Creating a Seamless Transition
Sometimes, even after sanding, you'll still feel a little ridge or see a bump. That's where your putty knife comes in handy again. Gently scrape off any raised bits. Be careful not to gouge the wall. Once those high spots are gone, give it another light sanding with that fine-grit paper. The goal is to get to a point where you can run your hand over the patch and the wall and not feel a difference. It should feel like one continuous surface. If you're aiming for a really smooth finish, you might need to apply another super-thin layer of joint compound to any low spots and then sand again once it's dry. It's all about getting that transition from the patch to the wall to be totally invisible. You can check out some tips on drywall repair if you need a refresher on the basics.
Best Practices for Avoiding Visible Patch Marks
- Work in Stages: Don't try to do it all in one go. Apply thin coats of compound, let them dry, and then sand. Repeat as needed.
- Feather Your Edges: When applying compound, spread it wider than the actual patch. This makes it easier to blend later.
- Use the Right Tools: A good quality putty knife and sandpaper make a world of difference.
- Patience is Key: Rushing this step is the quickest way to end up with a patch that screams
The Crucial Steps of Priming and Painting
Alright, so you've patched that hole, sanded it smooth, and it looks pretty darn good. But hold on, we're not quite done yet. The next part is where we really make that repair disappear. It’s all about getting the surface ready for paint so it looks like the damage never even happened.
Applying a Coat of Primer for Better Paint Adherence
Think of primer as the ultimate prep work for your paint. It’s like a special glue that helps the paint stick to the patched area. Without it, you might end up with a patch that looks different from the rest of the wall, even if the colors seem to match at first. Primer seals the patched material, which can be more absorbent than your existing wall. This stops the paint from soaking in unevenly. You want a nice, even base for your color. A good quality primer is your best friend here. Make sure you let it dry completely according to the product's instructions before moving on. You can find some great options for wall repair primers.
Matching Paint Color and Sheen with the Surrounding Wall
This is where you get to play detective. You need to match not just the color but also the sheen – that's the shininess or flatness of the paint. Is the rest of your wall a matte finish, or does it have a slight eggshell glow? Even a small difference can make your patch stand out. If you're unsure, it's often best to grab a small sample of your existing paint and take it to the store. They can usually mix up a batch that's a close match. Sometimes, you might need to paint the entire wall to get a truly uniform look, especially if the original paint has faded over time.
Applying Multiple Coats for an Even Look
Don't expect to get a perfect, even finish with just one coat of paint. Seriously, it rarely happens. You'll likely need at least two coats, and sometimes three, especially over a primed patch. Apply the paint in thin, even strokes. Work from the top down. Let each coat dry fully before applying the next. This layering approach helps build up the color and hide any slight variations in the surface. It's better to do several thin coats than one thick, gloppy one that might drip or look uneven.
Here’s a quick rundown of what to expect:
- First Coat: This is where you cover the primer. It might look a little streaky or uneven. That's normal.
- Second Coat: This coat should start to even things out. You'll see the patch blending in much better.
- Third Coat (if needed): If you can still see any difference in color or sheen, a third coat will likely do the trick.
Remember, patience is key. Rushing this process will only lead to a less-than-perfect finish. Take your time, let the paint dry between coats, and you'll be rewarded with a wall that looks like new.
Always test your paint in an inconspicuous spot first, like behind a piece of furniture, to make sure the color and sheen are just right before you commit to the whole patch.
Feathering Edges for a Flawless Blend
Alright, so you've patched up the hole, and the main part of the repair is looking pretty good. But if you stop there, you're going to see that patch a mile away. That's where feathering comes in. It's all about making the edges of your patch blend so smoothly into the existing wall that you can't tell where the repair begins or ends. Think of it like gently fading out the edges of a drawing instead of leaving a hard line.
Techniques for Feathering Edges with a Putty Knife
This is where your trusty putty knife or a wider taping knife becomes your best friend. The goal here is to apply the joint compound really thin at the edges of your patch, gradually spreading it out over the surrounding wall. You're not just slapping it on; you're working it out.
- Start Thin: Grab a small amount of joint compound on your knife. Apply it to the very edge of your patch.
- Spread Outward: Gently pull the knife away from the patch, spreading the compound in a wide arc. You want to make the compound layer thinner and thinner as you move away from the center of the patch.
- Work in Sections: Don't try to do the whole patch at once. Work around the edges, a little bit at a time.
- Use Light Pressure: Too much pressure will just scrape off the compound you just applied. You're aiming for a smooth transition, not a gouge.
Ensuring a Wide Feathered Area for Concealment
This is a big one. If you only feather out an inch or two, you'll still see a distinct line once it's painted. You need to feather out at least six inches, and sometimes even more, from the edge of the actual patch. This wide, thin layer of compound is what hides the repair. It's like giving the patch plenty of room to disappear into the wall.
Here's a little breakdown of why that width matters:
| Area Width | Visibility of Patch |
|---|---|
| 1-2 inches | Likely to be visible |
| 3-4 inches | May still be noticeable |
| 6+ inches | Much harder to detect |
Addressing Bumps and Dips During the Drying Process
As the joint compound dries, it can sometimes shrink a bit, or you might end up with a slight bump or dip that you didn't notice when you were applying it. Don't panic! This is totally normal.
- Inspect Carefully: Once the compound is dry to the touch, run your hand over the feathered edges. Feel for any high spots or low spots.
- Light Sanding: For small bumps, a light sanding with fine-grit sandpaper (like 150 or 220 grit) can knock them down. Be gentle; you don't want to sand through the compound and expose the patch underneath.
- Spot Repair: If you find a dip, you might need to apply another very thin layer of compound, feathering it out again. Let it dry completely before sanding.
- Check Lighting: Sometimes, the way the light hits the wall can make imperfections more obvious. Try looking at the wall from different angles.
Feathering is really about patience. It's not a race. Taking your time to get those edges smooth and wide is what separates a DIY patch from a pro job. You're essentially tricking the eye into seeing one continuous surface, not a repair.
Special Techniques for Different Textures
Alright, so you've patched the hole, and the plaster is looking pretty good. But wait, your walls aren't just smooth, are they? Most homes have some kind of texture, and if you don't match it, that patch is going to stick out like a sore thumb. Don't worry, we can handle this. It's all about mimicking what's already there.
Orange Peel Texture Application
This is a super common texture, and it looks a bit like the skin of an orange, hence the name. To get this look, you'll often use an aerosol spray can designed for texture. Hold the can about 12-18 inches away from the wall and use a sweeping, circular motion. You want to apply it in light coats. Too much at once and you'll get drips. It's better to build it up. You can adjust the spray nozzle or the air pressure if you're using a hopper gun to get the right amount of 'peel'. Once it's dry, you might need to do a little light sanding, but be gentle so you don't flatten it all out. If you're doing a larger area, practicing on some scrap cardboard first is a really good idea.
Knockdown Texture Application
Knockdown is another popular choice. It's a bit more involved than orange peel. First, you apply a thicker layer of joint compound, maybe with a roller or a sprayer, so it has peaks. Then, you wait for it to set up a little – not fully dry, but not wet either. This is where the 'knockdown' part comes in. You take a wide putty knife or a drywall knife and gently sweep it across the peaks, flattening them down. This leaves a flatter, more uniform texture. It takes a bit of practice to get the timing right, so you don't pull too much compound off or leave it too rough. You're aiming for a consistent look across the patch and the surrounding wall. For a really good guide on how to tackle textured ceilings, check out these step-by-step instructions.
Using a Stiff Brush for Matching Textures
Sometimes, you've got a unique texture that sprays or knives just won't replicate perfectly. That's where a stiff brush can be your best friend. After you've applied your final coat of joint compound and it's still a bit wet, you can use a stiff-bristled brush (like a masonry brush or a stiff paintbrush) to dab and swirl the compound. You can create all sorts of patterns this way. Try dabbing it on, then lightly dragging it. You can also twist the brush as you pull it away. The key is to experiment on a piece of cardboard or scrap drywall first to see what kind of marks your brush makes. You're trying to match the pattern and density of the existing texture. It's a bit more artistic, but it can give you fantastic results for those one-of-a-kind wall finishes.
When you're working with textures, remember that patience is key. It's always better to apply less and build up, rather than overdoing it and having to fix a mess. Take your time, and don't be afraid to practice on something other than your actual wall first.
When working with different surfaces, special methods can make a big difference. For example, learning about how to properly prepare wood before painting can help you achieve a smoother, longer-lasting finish. Want to see more tips like this? Visit our website today!
Bringing It All Together for a Flawless Finish
So, there you have it. Patching walls might seem like a big job, but with these tips, you can get a really nice result. Remember to take your time, especially when you're feathering those edges and sanding. Getting the paint color and sheen just right is also a big deal – it’s what really makes the patch disappear. Don't rush the drying times between coats, and always check your work in good light. A little patience goes a long way, and soon enough, your walls will look like they were never damaged at all. You've got this!
Frequently Asked Questions
What's the first step to fixing a hole in the wall?
Before you start patching, you need to check out the damage. See what kind of hole it is and how big it is. Then, carefully clean out any loose bits of plaster or old paint around the damaged spot. This makes sure your new patch sticks well.
How do I make sure the new plaster matches the wall?
The trick is to apply plaster in thin layers. You'll put on a 'brown coat' to fill the hole and make it level with the wall. Then, a 'finish coat' goes on top to make it super smooth. It's like building up the wall again, layer by layer.
Why is sanding so important after patching?
Sanding is what makes the patch disappear! You use sandpaper, starting with a rougher grit and then moving to a finer one. This smooths out any bumps and helps the patched area blend in perfectly with the rest of the wall, so you can't even tell it was ever damaged.
Do I really need to use primer before painting?
Yes, primer is a must! It's like a special coat that helps the paint stick to the patch much better. It also makes sure the color looks the same as the rest of your wall and helps hide any tiny imperfections you might have missed.
What does 'feathering the edges' mean?
Feathering means spreading the plaster out really thin around the edges of your patch. You use a putty knife to blend it into the existing wall. This creates a wide, soft edge that's much easier to hide when you paint, making the repair almost invisible.
How can I fix textured walls, like orange peel?
Matching textures can be tricky! For things like orange peel, you might use a spray can or a special tool to add the texture. The key is to practice on a piece of cardboard first to get the hang of it, and then apply it lightly to blend with your wall.


Comments
Post a Comment