Wall Patching Like a Pro: Mastering the Little Details for a Seamless Finish That Wows
Fixing minor dings and holes in your walls can seem like a big job, but honestly, it’s all about paying attention to the small stuff. Getting that patch to blend in so no one can even tell it was there? That’s the goal, right? It’s not just about slapping some spackle on and calling it a day. You’ve got to prep right, use the right goop, and sand it down like you mean it. This guide, 'Wall Patching Like a Pro: Little Details That Make a Seamless Finish Stand Out,' is here to help you nail those little details. We’ll walk through how to make your repairs disappear, leaving your walls looking smooth and totally refreshed.
Key Takeaways
- Proper wall preparation, including cleaning and sanding, is key to making patches invisible.
- Choosing the correct patching compound and tools makes application much easier and the finish better.
- Applying compound in thin, even layers and feathering the edges helps blend repairs seamlessly.
- Sanding with the right grit sandpaper is vital for achieving a smooth transition between the patch and the wall.
- Priming and painting carefully, matching sheen and color, are the final steps to a flawless repair.
Mastering Surface Preparation For Flawless Patches
Before you even think about grabbing a putty knife, let's talk about getting the wall ready. This step is super important, and honestly, it's where a lot of DIYers cut corners. But trust me, doing it right makes all the difference between a patch you can spot from across the room and one that just disappears. It’s all about setting yourself up for success.
First things first, you gotta figure out what you're dealing with. Is it a tiny nail hole, a bigger ding from a doorknob, or maybe a crack that's been creeping along? The size and type of damage will tell you what kind of patching compound and how much work you'll need to do. For small stuff, like nail pops or minor dents, a bit of spackle might be all you need. But if you've got larger holes or cracks, you'll probably need a heavier-duty compound and maybe even some mesh tape to give it some backbone.
- Nail Holes/Small Dents: Usually just need a dab of spackle or lightweight joint compound.
- Deeper Gouges/Impact Marks: Might require multiple layers of compound and possibly reinforcement like mesh tape.
- Cracks: Depending on the length and if they're still active (moving), you might need to cut them out slightly and use tape for stability.
Take a good look at the area. Sometimes, what looks like a simple hole is actually a sign of a bigger issue, like water damage or loose plaster. It's better to find out now than after you've patched and painted.
Okay, so you know what you're fixing. Now, let's get that area clean. Any dust, grease, or grime on the wall is going to mess with how the patching compound sticks. You want a nice, clean surface for the best adhesion. Grab a damp sponge or cloth and some mild soap or a dedicated wall cleaner. Give the area a good wipe-down, paying attention to any greasy spots, especially around light switches or in kitchens. After you wipe it, let it dry completely. Seriously, don't rush this part. A damp wall will just make your patch weaker.
Once your patch is dry (and we'll get to applying it in a bit), you'll need to sand it. But even before you apply the compound, a light sanding around the damaged area can help. If there are any loose bits of paint or wallpaper, gently sand them away. This creates a better surface for the new compound to grip onto. Think of it like prepping a surface for glue – you want it smooth and clean. A little bit of scuff sanding around the edges of the damage can make a big difference in how well the patch blends in later. You don't need to go crazy here, just enough to knock down any high spots or flaky bits.
| Damage Type | Pre-Patch Sanding Recommendation | Post-Patch Sanding Goal |
|---|---|---|
| Nail Hole/Small Dent | Light scuff | Smooth, flush with wall, no rough edges |
| Deeper Gouge | Remove loose debris | Even with surrounding wall, no ridges or valleys |
| Crack | Smooth edges of crack | Blend patch into wall, no visible seam or bump |
Choosing The Right Patching Materials
Alright, so you've got your wall damage assessed and the area prepped. Now comes the fun part: picking out what you're actually going to use to fix it. This isn't just about grabbing the first tub of spackle you see; there are actually some differences that matter. Getting this right means your patch will stick, dry properly, and blend in like it was never there. Mess this up, and you might be looking at cracks or a patch that just won't take paint.
Understanding Different Patching Compounds
Think of patching compounds like different types of glue. Some are for quick fixes, others are for bigger jobs. The main types you'll run into are spackle, joint compound (often called
Applying Patching Compound Like A Pro
Alright, so you've got your patch material ready, and now it's time to actually get it on the wall. This is where things can go from 'almost there' to 'wow, I can't even see the repair' if you do it right. It’s not rocket science, but it does take a little patience and the right touch.
Techniques For Thin, Even Coats
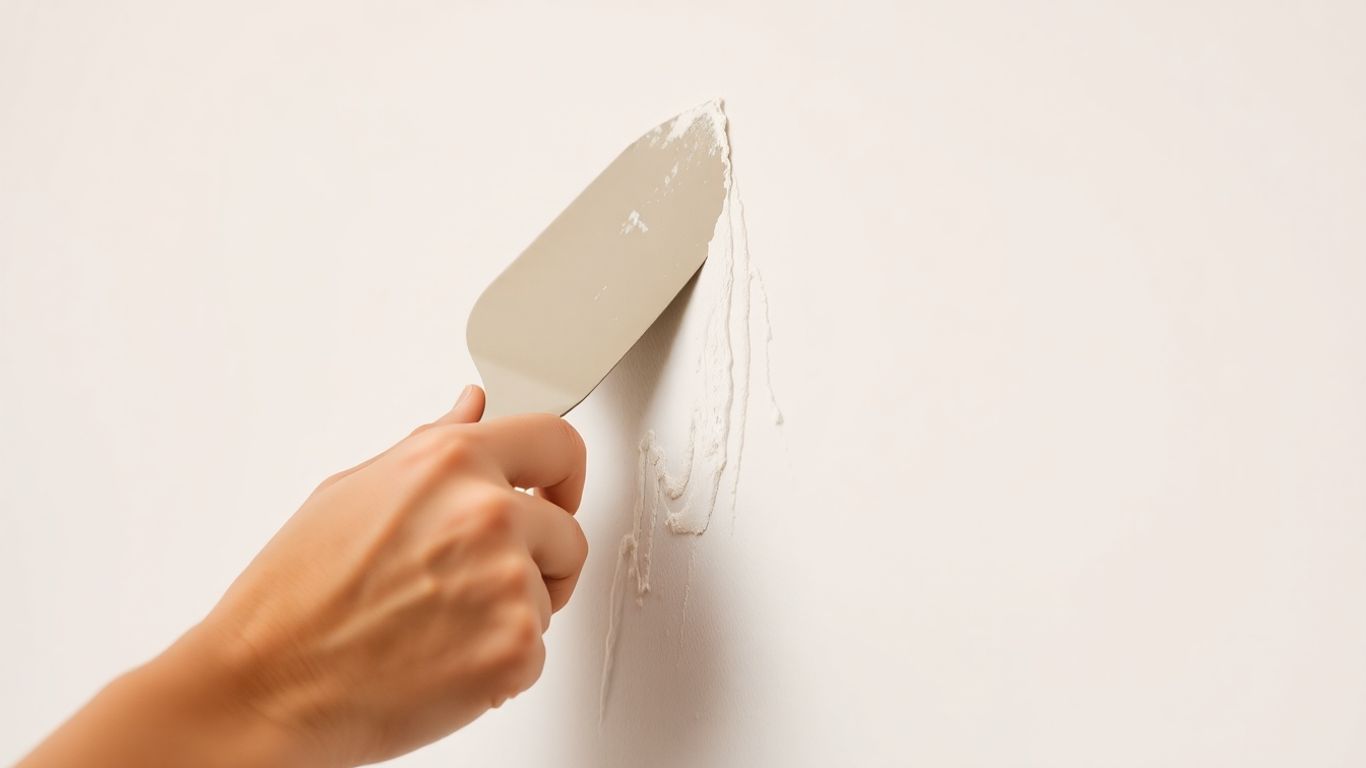
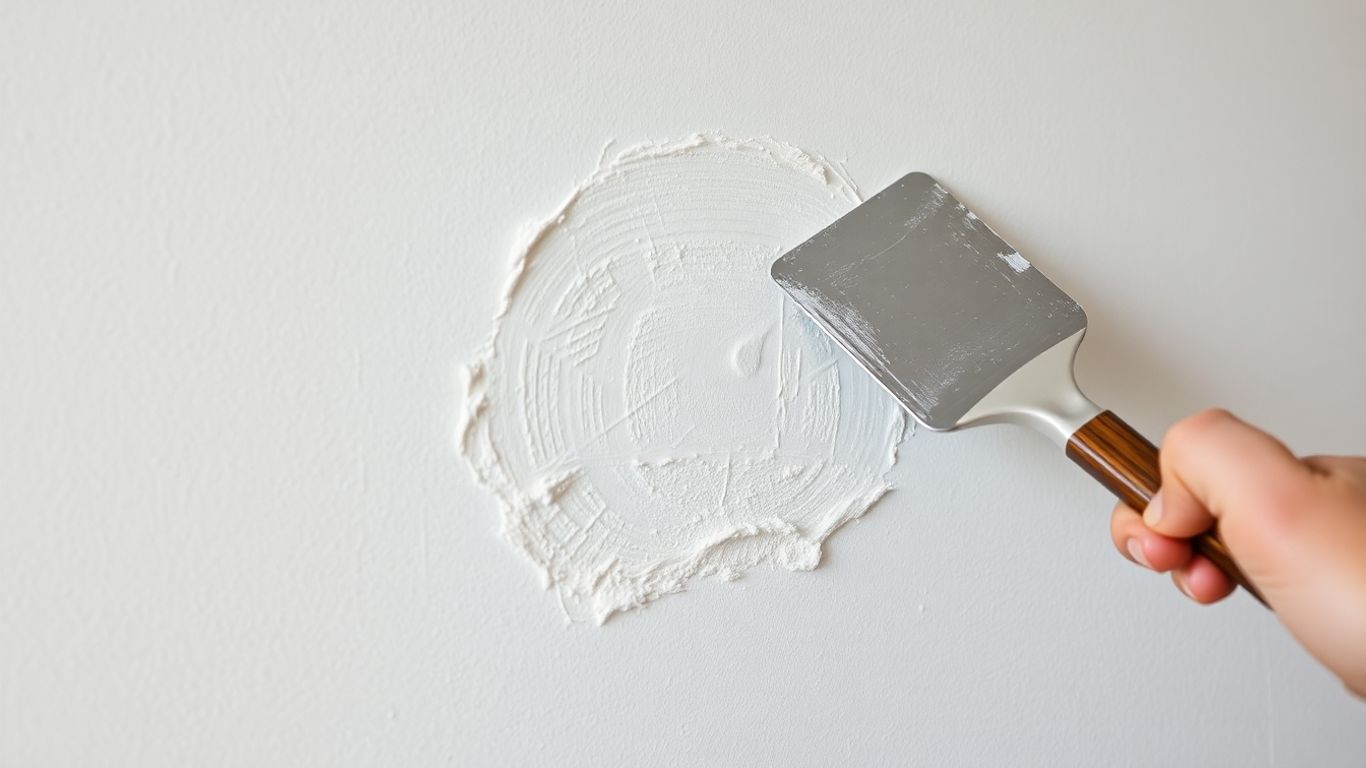
When you're applying patching compound, think thin. Really thin. It's way easier to build up layers than to try and sand down a giant blob. Grab your putty knife or trowel – whatever you decided on earlier – and scoop up a small amount of compound. You don't want to overload your tool. Start by spreading it over the damaged area, pressing just enough to get it to fill the hole or crack. Then, with a lighter touch, smooth it out, extending the compound a little beyond the edges of the patch. The goal here is to make it as flat as possible against the wall. The smoother you get it now, the less work you'll have to do later.
Feathering Edges For Seamless Blending
This is probably the most important part for making your patch disappear. Feathering means making the edges of your patch super thin so they blend right into the surrounding wall. After you've applied your first thin coat and it's starting to set up a bit (not fully dry, but not wet either), take your putty knife and gently scrape away any excess compound, especially around the edges. You want to create a really gradual slope from the thicker part of the patch out to the wall. Imagine you're trying to make the patch disappear into the wall, not just sit on top of it. A few light passes, extending the compound outwards with each one, will do the trick.
Building Layers For Deeper Imperfections
Sometimes, especially with bigger holes or deeper gouges, one thin coat just isn't going to cut it. That's totally fine. The trick is to let that first thin layer dry completely. Once it's dry, give it a light sanding if there are any high spots, and then apply another thin coat. You'll want to feather the edges of this new layer out a bit further than the last one. Keep repeating this process – apply a thin coat, let it dry, sand lightly if needed, and feather the edges – until the patch is level with the wall. It might take two, three, or even more layers depending on how deep the damage is. It's better to do multiple thin layers than one thick one that's going to crack or shrink.
Here's a quick rundown of the layering process:
- First Coat: Apply a thin layer, filling the damage and feathering the edges slightly.
- Drying: Let the compound dry completely. This can take a few hours depending on humidity and thickness.
- Second Coat (and subsequent coats): Apply another thin layer, extending the feathering further out. Focus on building up the center if needed.
- Repeat: Continue applying thin coats and feathering until the patch is flush with the wall.
Remember, patience is key here. Rushing the drying process or trying to apply too much compound at once will only lead to more sanding and a less-than-perfect finish. It's a marathon, not a sprint.
Achieving A Smooth Finish With Sanding
Okay, so you've applied your patching compound, and it's all dry. Now comes the part that separates a decent patch from a 'wow, I can't even see where it was' patch: sanding. This is where you really smooth things out and make that repair disappear. Don't rush this step; it's super important.
The Art Of Wet Sanding For Dust Control
Dry sanding can create a huge mess, sending dust everywhere. For a cleaner job, especially indoors, wet sanding is your friend. You just need a sponge or a soft cloth, some water, and your sandpaper. Dampen the sandpaper slightly – not soaking wet, just enough to keep the dust down. As you sand, the water mixes with the compound dust, creating a sort of slurry that's much easier to manage and clean up. It also helps prevent the sandpaper from clogging up too quickly. This method is a game-changer for keeping your workspace tidy.
Graduating Sandpaper Grits For Perfection
You don't just grab any sandpaper and go to town. It's all about using the right grits in the right order. Think of it like this:
- Start Coarse (around 100-120 grit): This is for knocking down any high spots or major imperfections in the dried compound. Be gentle, though; you don't want to sand away good wall.
- Move to Medium (around 150-180 grit): Once the big stuff is gone, you'll use this grit to smooth out the area further and start blending the patch into the surrounding wall.
- Finish Fine (around 220 grit or higher): This is your final polish. It gets everything super smooth, making it ready for primer and paint. You're aiming for a surface that feels like glass.
Checking For Smoothness By Touch And Sight
How do you know when you're done sanding? You gotta use your senses! After each grit, wipe away the dust and run your hand over the patched area. It should feel completely smooth, with no bumps or ridges. Your fingertips are surprisingly good at detecting imperfections that your eyes might miss. Also, look at the patch from different angles, especially with light hitting it. Sometimes, you can see subtle low spots or high spots that way. If you feel or see anything, go back to the appropriate grit and sand a little more. It's better to spend a bit more time here than to have a bumpy patch show up after you paint.
Remember, the goal is to make the patched area indistinguishable from the rest of the wall. This means not just making it flat, but also ensuring the texture and smoothness match the surrounding surface. Patience is key; rushing this stage will only lead to more work later.
Priming And Painting For The Final Touch
Alright, so you've patched, you've smoothed, and now it's time for the magic to happen. This is where your hard work really starts to pay off, making that patch disappear like it was never there. But you can't just slap paint on over a fresh patch and expect it to look right. There are a few steps to get this part done like a pro.
Selecting The Correct Primer For Patched Areas
Think of primer as the ultimate equalizer. It's going to seal that new patching compound so it doesn't soak up paint differently than the rest of your wall. If you skip this, you'll likely end up with a patch that looks dull or has a slightly different sheen than the surrounding paint, even if the color matches. You want a good quality primer that's specifically designed for drywall or patching compounds. Some primers are better for blocking stains, while others are formulated for adhesion. For patched areas, adhesion and creating a uniform surface are key. You'll want to apply a thin, even coat. Don't glob it on; a roller or a brush will work, just make sure you get good coverage without drips.
Matching Paint Sheen And Color Accurately
This is where things can get tricky. Getting the color exactly right is important, but so is the sheen. Flat, eggshell, satin, semi-gloss – they all reflect light differently. If your patched area has a different sheen, it'll stand out like a sore thumb, even if the color is spot on. Check the existing paint on your wall. If you can't find the original paint can, you might have to do a little detective work. Sometimes, holding a paint chip from the store up to the wall in different lights can help you spot a match. If you're really unsure, it's often best to repaint the entire wall. It sounds like more work, but it guarantees a consistent look. For smaller patches, though, a good color match and careful application can often save you from repainting the whole thing. Remember to test your color match in an inconspicuous spot first.
Techniques For Blending New Paint With Existing Walls
So, you've got the primer on, and your paint color and sheen are matched. Now, how do you make it blend? The goal is to avoid a visible square or rectangle on your wall. Here’s how to approach it:
- Cut In First: Use a good quality angled brush to paint a narrow strip (about 2-3 inches) around the edges of your patch and extending slightly onto the existing wall. This is called 'cutting in'.
- Feather the Edges: As you paint the main area of the patch, use light, feathery strokes as you move towards the existing paint. Don't press hard. The idea is to make the transition gradual, not abrupt.
- Use a W or M Pattern: When rolling the main area, use a pattern like a 'W' or 'M' and then fill it in with parallel strokes. This helps distribute the paint evenly and avoids those dreaded roller marks, or 'lap marks'.
- Maintain a Wet Edge: Try to work quickly and keep a 'wet edge' where your new paint meets the old. This means overlapping your strokes slightly into the still-wet paint from the previous section. This is probably the most important tip for avoiding visible lines.
When you're painting, especially when trying to blend, good lighting is your best friend. Natural light is ideal, but if you're working at night or in a dim room, bring in extra lamps. You'll spot imperfections and transition lines much easier.
If you're dealing with a larger patch or a significant repair, you might need two coats of paint. Always let the first coat dry completely according to the manufacturer's instructions before applying the second. This allows you to see how the first coat looks and where you might need to touch up or blend further. Getting this final stage right is what separates a decent patch job from one that truly looks like it was never there.
Dealing With Textured Wall Challenges
Textured walls can feel like a real headache when it comes to patching. You fix a small hole, and suddenly, it looks like a whole new problem because the texture just won't match. It's a common frustration, but don't worry, there are ways to tackle it so your repair blends in.
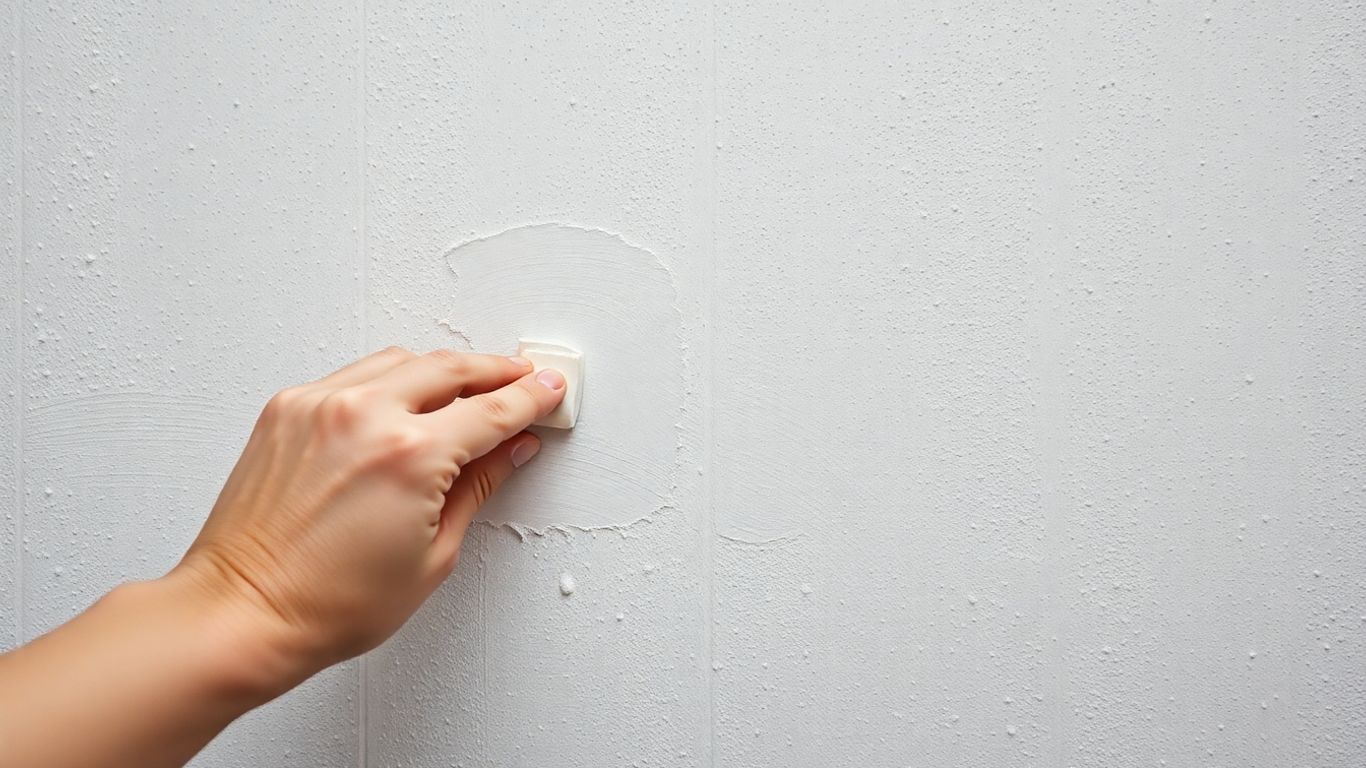
Mimicking Orange Peel Texture Patterns
Orange peel is probably the most common texture out there. Getting it right after a patch means you need to recreate that bumpy, slightly uneven surface. The trick is to use a spray texture product. You can buy these at most hardware stores. They come in cans, kind of like spray paint, but they're designed to spray out a stippled pattern.
Here's a basic rundown:
- Prep the area: Make sure your patched spot is smooth and dry. You might want to lightly sand it, but don't make it too slick, or the texture spray won't stick well.
- Practice your spray: Before hitting the wall, test the spray on a piece of cardboard. You want to get a feel for the distance and pressure needed to get that orange peel look. Different cans have different spray patterns, so a little practice goes a long way.
- Apply in light coats: Don't try to cover the whole patch in one go. Spray in light, sweeping motions. You can always add more if needed. Over-spraying can lead to drips and a texture that's too heavy.
- Feather the edges: Spray slightly beyond the patched area to help blend the new texture into the existing wall. This is key to making the repair invisible.
The goal is to build up the texture gradually, mimicking the natural variation of the surrounding wall. It's better to do several light passes than one heavy one.
Repairing Small Areas Without Visible Seams
For tiny dings or nail holes, the challenge is making the repair disappear entirely. This is where your patching compound and sanding skills really shine.
- Apply compound thinly: Use a small putty knife to apply a thin layer of spackling or joint compound. Press it into the hole and then smooth it out, feathering the edges as much as possible. You want the patch to be as flush with the wall as you can get it.
- Let it dry completely: Rushing this step will only cause problems. Make sure it's bone dry.
- Sand gently: Use fine-grit sandpaper (like 220 grit) to smooth the patch. The idea is to make it perfectly level with the wall. You shouldn't feel any bump or edge when you run your hand over it.
- Repeat if necessary: For deeper holes, you might need a second thin coat of compound after the first has dried and been sanded. Always sand between coats.
The most important thing here is patience and light sanding. You're aiming for a surface that feels like the rest of the wall, not a raised bump.
Advanced Techniques For Complex Textures
Some walls have really unique or heavy textures that are harder to replicate. Think knockdown, skip trowel, or even custom plaster finishes. For these, you might need to get a bit more creative.
- Knockdown Texture: This involves applying a heavier texture (like joint compound mixed with a bit of water) and then
Textured walls can be tricky, but don't let them stop your home improvement dreams! We've got tips and tricks to help you smooth things over. Ready to tackle those bumpy surfaces like a pro? Visit our website for expert advice and see how we can help you achieve a flawless finish. Learn more about our painting services today!
Wrapping Up Your Wall Patching Project
So, there you have it. Patching walls might seem like a small job, but getting it right really makes a difference. It’s all about those little steps – like prepping the surface properly, using the right amount of filler, and taking your time with the sanding and painting. Don't rush it. A little patience goes a long way, and before you know it, your walls will look smooth and finished, like you hired someone. It’s a satisfying feeling, knowing you tackled it yourself and got a great result. Now go admire your work!
Frequently Asked Questions
What's the first step before patching a wall?
Before you grab any tools, you need to check out the damage. Is it a tiny nail hole, or a bigger crack? Figuring this out helps you pick the right stuff to fix it and the best way to do it.
How do I make sure the patched area blends in?
To make the patch disappear, you need to apply the patching compound in thin layers. Then, carefully smooth the edges outwards so they fade into the rest of the wall. This is called 'feathering'.
What's the best way to sand a patched area?
Start with a coarser sandpaper to smooth out the main bumps, then switch to a finer grit. You want the patch to feel completely smooth, with no bumps or rough spots. You can even try wet sanding, which helps cut down on dust.
Why is priming so important after patching?
Primer acts like a sealer for the patched spot. It makes sure the new paint sticks well and that the color looks the same as the rest of the wall. Without primer, the patched area might look darker or have a different sheen.
How can I fix textured walls without making it obvious?
Textured walls are tricky! For small spots, you might need special spray texture or a technique using a sponge or roller to mimic the existing pattern. It takes practice to get it right so the patch doesn't stand out.
What tools do I absolutely need for wall patching?
You'll definitely need a putty knife or a drywall knife to spread the patching compound. A sanding sponge or sandpaper is crucial for smoothing. Depending on the damage, you might also need mesh or paper tape.


Comments
Post a Comment