Unlock Wall Patching Secrets: Contractors' Tricks for Invisible Seams

Ever stare at a wall repair and wonder how the pros make it look like nothing ever happened? It's not magic, it's technique. We're talking about Wall Patching Secrets Contractors Use to Make Seams Truly Invisible. Forget those obvious patches and uneven lines. This is about getting that smooth, seamless finish that makes your walls look brand new. We'll break down the methods, the tools, and the little tricks that make all the difference. So, grab your tools, and let's get to work making those seams disappear.
Key Takeaways
- Applying joint compound in thin, even layers is key. You want to build it up gradually, letting each coat dry.
- Feathering the edges of your compound is how you blend the repair into the existing wall, making it hard to see.
- Tackling butt seams requires special attention, often involving wider application of compound and careful blending.
- Proper surface prep, like cleaning and using a raking light, helps spot imperfections before they get covered up.
- Patience is a big part of it. Rushing the drying time or not sanding properly will show.
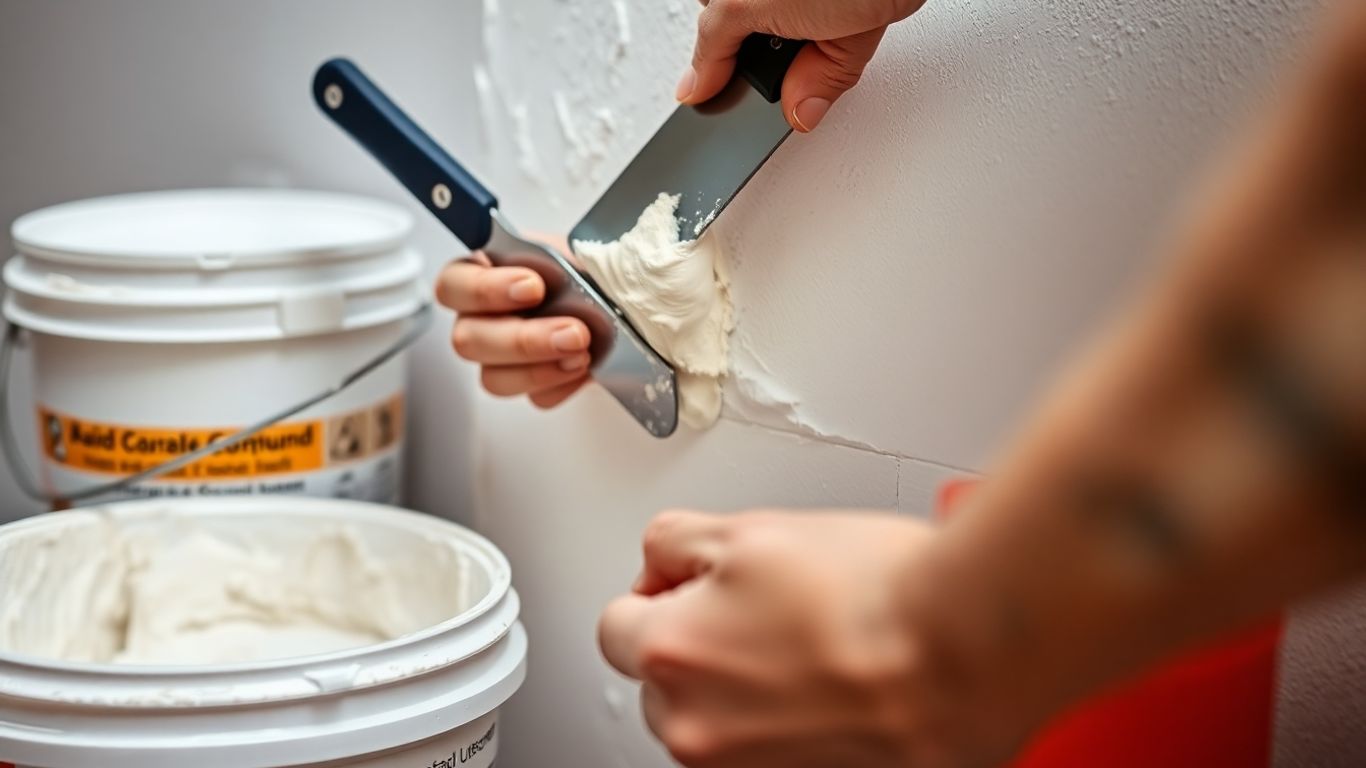
Mastering Drywall Compound Application
Getting that drywall compound to look like part of the wall, not a patch, is all about how you put it on. It’s not just slapping mud around; there’s a bit of a rhythm to it, and doing it right means fewer headaches later.
Applying Thin, Even Layers
The biggest mistake people make is trying to fill everything in one go with a thick glob of compound. That just leads to cracking and a ton of sanding. The pros know that thin, consistent layers are the way to go. You're building up the repair, not trying to hide it all at once. Think of it like frosting a cake – you start thin and smooth, then add more if needed. This approach helps the compound dry properly and makes sanding much easier.
Here’s a basic rundown:
- Mix it right: Get your compound to a smooth, creamy consistency. Too thick and it’s hard to spread; too thin and it’ll run.
- First coat: Use a taping knife (a 6-inch one is good for starters) to spread a thin layer over the tape or mesh. Make sure it covers everything.
- Subsequent coats: Each layer should be a bit wider than the last, helping to blend the repair into the wall.
The goal with each coat is to get it as flat and smooth as possible. Don't worry too much about perfection on the first pass; that's what the later coats and sanding are for.
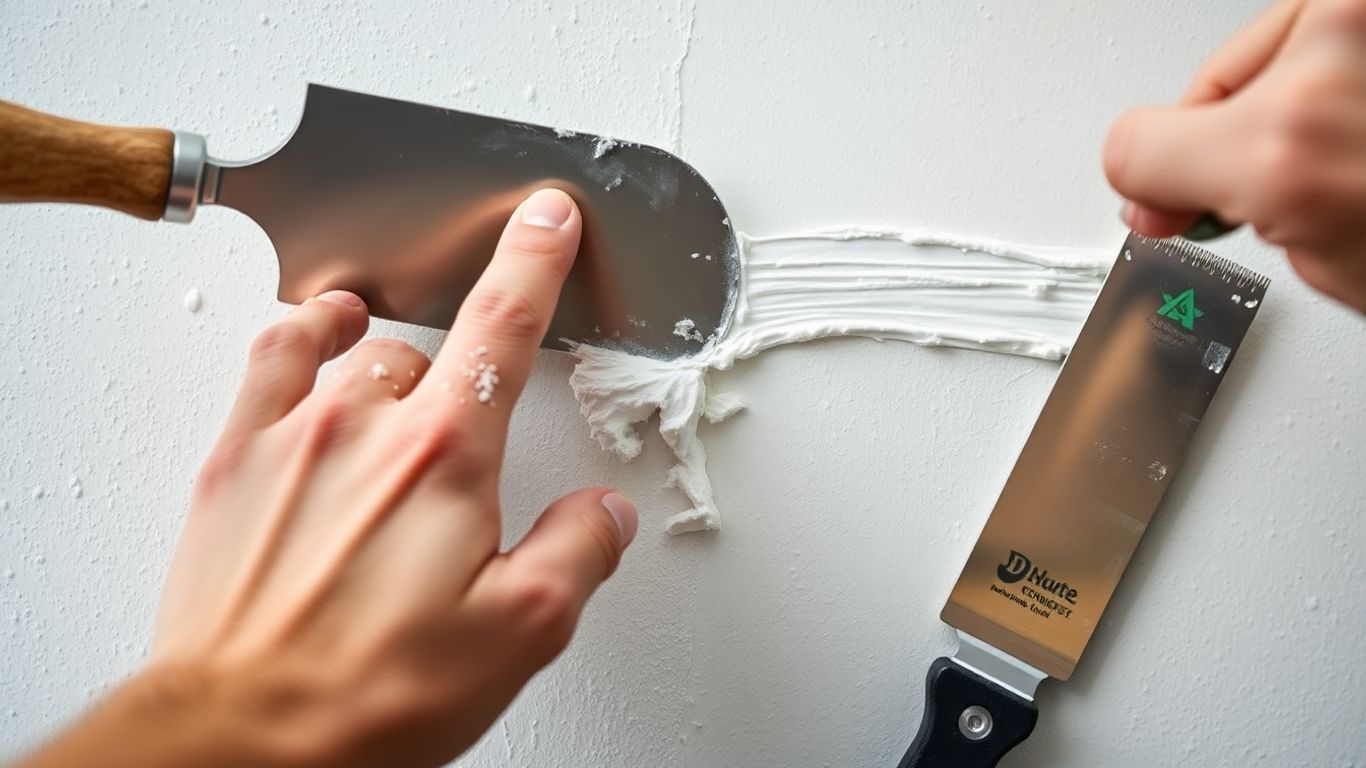
Feathering Edges for Seamless Blends
This is where the magic happens, making the patch disappear. Feathering means thinning out the edges of the compound so they blend smoothly into the existing wall. You're not leaving a hard line; you're creating a gentle slope. This takes a bit of practice with your knife or trowel. You want to pull the compound out further and thinner with each pass, especially on the final coats.
- Use a wider tool: As you build up coats, switch to a wider knife or trowel (like a 10-inch or 12-inch). This helps you feather the edges over a larger area.
- Gentle pressure: Apply light, even pressure and pull the compound outwards.
- Multiple passes: You might need a few passes, working from the center outwards, to get a really smooth transition.
The Art of the Finish Coat
This is your final layer before sanding and painting. It’s all about making the surface perfectly smooth and level. You'll use your widest knife or trowel here, applying a very thin layer of compound. The idea is to skim over the area, filling any tiny imperfections and smoothing out the feathered edges from the previous coats. This coat should be almost invisible once it's dry and sanded. If you've done your previous coats well, this final coat should require minimal sanding. Remember to let it dry completely before you even think about touching it with sandpaper.
Concealing Difficult Seams
Some drywall seams just don't want to play nice. We're talking about those tricky butt seams and inside corners that can make even experienced DIYers sweat. But with a few pro techniques, you can get them looking like they were never there.
Tackling the Challenging Butt Seam
Butt seams, where the square ends of two drywall sheets meet, are notoriously tough. They naturally sit a bit higher than the rest of the wall. The trick here is to build up the compound on either side of the seam, feathering it out so it blends smoothly. Think of it like creating a gentle ramp rather than a hump.
- Start by applying a thin layer of joint compound about 10 inches wide, centered over the seam.
- Use a wider taping knife, like a 14-inch one, to spread the compound further out, feathering the edges. The taped seam acts as a guide.
- For the final coat, you might need to widen the compound application even more, but try to keep the very center of the seam relatively thin.
Sometimes, to make things easier from the start, contractors will use a plywood backer board behind the butt joint. This pulls the drywall ends in just enough to create a slight taper, making it much more like a standard seam.
Techniques for Horizontal Seams
Horizontal seams are where the tapered edges of drywall sheets meet. These are generally easier than butt seams because the tapered edge is designed to accept tape and compound. The goal is to fill this slight depression and then feather it out so it disappears.
- Apply your first coat of compound, making sure to embed the drywall tape firmly.
- For the second coat, spread the compound a bit wider than the first. This coat should be slightly crowned, meaning it's a little higher in the middle, to account for shrinkage.
- Use a wider trowel, like a 14-inch, to feather the edges of this coat. You'll make passes over the top, then the bottom, and finally the middle to smooth it out.
Remember, each coat of compound should be wider than the last. This gradual widening is what allows you to blend the seam into the wall surface without creating a noticeable ridge.
Achieving Invisible Inside Corners
Inside corners can be tricky because you're dealing with two planes meeting at a right angle. The key is to work one side at a time and avoid building up too much compound on the adjacent wall.
- Crease your drywall tape down the middle. This helps it sit nicely in the corner.
- Apply a thin layer of compound to one side of the corner, embed the tape, and then smooth it out with a 6-inch taping knife. Don't press too hard, or you'll pull all the compound out.
- Let that side dry, then repeat the process on the other side of the corner. This two-step approach prevents a thick build-up.
- When you're doing the final coat, be mindful of any horizontal seams that meet the corner. Lighten your pressure on the knife to blend them together smoothly.
It's a bit of a dance, alternating sides and letting things dry, but it's how you get those corners looking clean and professional.
Essential Tools and Materials
Alright, let's talk about what you actually need to get this wall patching job done right. You can't just grab any old thing and expect magic to happen. Having the right gear makes all the difference between a patch you can see from across the room and one that just disappears. It’s like cooking – you need the right ingredients and utensils for a good meal, right? Same idea here.
Choosing the Right Taping Knives and Trowels
So, you've got your joint compound, but how do you spread it? That's where taping knives and trowels come in. For most small jobs, like filling nail holes or small dings, a 4-inch or 6-inch taping knife is your best friend. It's nimble and lets you get into tight spots. When you're tackling bigger seams or need to apply wider coats of compound, you'll want to step up to a 10-inch or even a 12-inch knife. Some folks prefer a drywall trowel, which is a bit different in shape and can be great for holding extra compound, but honestly, a good wide knife works wonders. The key is to have a few different sizes on hand.
Paper vs. Mesh Drywall Tape
This is a big one, and people have strong opinions. You've got paper tape and mesh tape. Paper tape is what most pros use, especially for corners, because it's strong and creates a really solid base. You have to wet it a bit and embed it in the compound, which takes a little practice. Mesh tape, on the other hand, is self-adhesive. You just stick it on, then cover it with compound. It's super convenient, especially for beginners, but it can sometimes lead to a weaker seam if not applied perfectly, and it's generally not recommended for inside corners. For most repairs, I lean towards paper tape, but mesh has its place, especially for flat seams. You can find some handy drywall repair kits that often include a mix of these.
Understanding Joint Compound Types
Joint compound, or 'mud' as everyone calls it, isn't just one thing. You've got your all-purpose stuff, which works for everything but can be a bit heavy and takes longer to dry. Then there's lightweight compound, which is easier to sand and dries faster, making it great for finish coats. If you're in a real hurry, there's setting-type compound, which comes as a powder you mix with water. It hardens up fast, like within an hour or two, and shrinks less, but you can't sand it, so you have to get it smooth the first time. For most patching, starting with an all-purpose or lightweight compound is a safe bet.
Picking the right tools and materials isn't just about making the job easier; it's about making the repair look like it never happened. Don't skimp here – good quality tools will save you time and frustration in the long run, and the results will speak for themselves.
Here's a quick rundown:
- Taping Knives: 4-inch, 6-inch, and 10-inch (or wider).
- Drywall Trowel: Optional, but handy for wider coats.
- Drywall Tape: Paper tape for strength and corners, mesh tape for convenience on flat seams.
- Joint Compound: All-purpose for general use, lightweight for easier sanding, setting-type for speed (but no sanding).
- Sandpaper: Medium and fine grit for smoothing.
- Primer: To seal the patch before painting.
- Safety Gear: Dust mask and safety glasses are a must.
Surface Preparation for Flawless Repairs
Before you even think about grabbing that joint compound, let's talk about getting the wall ready. This step is super important, and honestly, a lot of people skip it. But trust me, doing it right makes all the difference between a repair you can see and one that just disappears. It’s like prepping a canvas before you paint – you wouldn’t just slap paint on a dirty, bumpy surface, right?
Cleaning and Priming the Repair Area
First things first, you gotta clean the area you're going to patch. Get rid of any dust, dirt, or cobwebs. A soft brush or a damp cloth works well for this. If there's any loose paint or paper around the damage, gently scrape it away. You want a clean, solid surface for the new compound to stick to. After cleaning, and especially if you've sanded down to the bare paper or drywall, you need to prime. A good quality primer seals the surface, stops the new compound from soaking in unevenly, and helps your paint match later on. Think of it as a bonding agent for your repair.
Using a Raking Light to Spot Imperfections
This is a pro trick that’s surprisingly simple. Once the area is clean and dry, grab a bright light and hold it at a really low angle to the wall, almost parallel to the surface. This is called a raking light. It casts long shadows that highlight every little bump, dip, or rough spot you might have missed. You’ll be amazed at what you can see! Go over the area with your hand or a dry cloth, feeling for any texture differences. This step helps you catch problems before you start patching, saving you headaches down the line.
Sealing Exposed Drywall Paper
Sometimes, when you're cleaning up damage, you might expose the brown paper layer of the drywall. This paper is delicate and can get fuzzy or tear easily. If you're going to cover it with joint compound, it's a good idea to seal it first. A thin coat of an oil-based primer or a specific drywall sealer works best. This stiffens up the paper, prevents it from absorbing too much moisture from the compound, and stops it from bubbling up later. It’s a small step that really helps make your patch hold up over time.
Advanced Techniques for Invisible Patches
So, you've got a patch that just won't disappear, huh? It happens to the best of us. Sometimes, the standard methods just don't cut it, and you need to bring out the heavy hitters. These advanced tricks are what separate a decent patch from one that's truly invisible.
Using Backer Boards for Butt Seams
Butt seams, where two pieces of drywall meet end-to-end, are notoriously tricky. They tend to create a slight ridge. A pro move here is to use a backer board. You cut a piece of drywall slightly larger than the hole, then attach it to the back of the existing drywall, bridging the gap. This gives you a solid surface to tape and mud over, creating a much flatter plane. It’s a bit more work, but it makes a huge difference in getting that seam to vanish.
Skim Coating for Smooth Transitions
Skim coating is basically applying super thin layers of joint compound over a larger area than just the seam itself. Think of it like a very light, broad stroke of compound that feathers out way beyond the repair. This helps to blend the patched area into the surrounding wall, making any slight imperfections or texture differences disappear. You'll typically need two or three thin coats, sanding lightly between each. This is where you really start to make the patch one with the wall.
The Importance of Patience and Drying Time
Seriously, this is the biggest secret. Rushing any part of the drywall patching process is a recipe for disaster. Each layer of joint compound needs to dry completely. I mean bone dry. If you try to sand or add another coat too soon, you'll just gum up the works, create a mess, and end up with a lumpy patch. For standard joint compound, this can mean waiting 24 hours or more between coats, especially in humid conditions. Quick-setting compounds dry faster, but they still need to be fully cured before you move on. It’s tempting to speed things up, but trust me, waiting is your best friend here. You can find some helpful tips on drying times if you're unsure.
Don't underestimate the power of a good light. Once your patch is dry and sanded, hit it with a raking light – a light source held at a low angle to the wall. This will highlight any low spots or ridges you missed. It's the contractor's secret weapon for spotting imperfections you'd never see otherwise.
Avoiding Common Drywall Patching Pitfalls
Look, we've all been there. You've got a little ding in the wall, maybe a nail pop or a small hole from a doorknob. You grab some spackle, slap it on, sand it down, and think you're done. But then, when the light hits it just right, you see that faint outline, that little bump, or that weird texture difference. It's frustrating, right? Most of the time, these issues come down to a few common mistakes that even experienced DIYers can fall into. Let's talk about how to sidestep them.
The Danger of Applying Thick Joint Compound
This is probably the most frequent offender. It feels like you're getting more done by just piling on the joint compound, thinking it'll fill the hole faster. But here's the deal: thick layers are way harder to sand smooth. They tend to shrink as they dry, which can lead to cracks. Plus, they create a noticeable hump on your wall that's tough to blend in. The pro trick is to apply compound in thin, even coats. You might need two or three layers, letting each one dry completely before sanding lightly and applying the next. It takes more time, sure, but the result is a surface that's much easier to blend and looks like the damage never happened. Remember, patience is key here; rushing the drying process is a recipe for disaster.
Why Skipping Surface Prep Leads to Failure
Think of surface prep as the foundation of your repair. If you don't get it right, the whole patch can be compromised. This means cleaning the area first. You need to get rid of any dust, loose paint, or debris. If you're patching over a hole, make sure any loose paper or drywall bits are removed. For repairs that involve water damage, it's even more important to let the area dry completely and maybe even use a mold-resistant primer. Skipping this step means your new compound might not stick well, or it could trap dirt, leading to discoloration later on. It's also where using a raking light comes in handy. Shining a light across the surface at a low angle before you start can reveal all the little bumps and dips you might otherwise miss.
Consequences of Using the Incorrect Compound
Not all joint compounds are created equal, and using the wrong type can really mess up your repair. You've got lightweight all-purpose compounds, setting-type compounds (like Durabond), and patching compounds. Lightweight stuff is great for small repairs and easy to sand, but it's not as strong. Setting-type compounds harden chemically, so they're super strong and good for bigger jobs or filling deep holes quickly, but they're harder to sand. Using a heavy, hard-to-sand compound on a tiny nail hole just makes your life difficult. Conversely, using a lightweight compound on a large hole might not be strong enough. It's also important to consider the finish. Some compounds are better for the initial taping layers, while others are formulated for the final skim coats that give you that super smooth finish. Choosing the right one for the job makes sanding and achieving a smooth transition so much easier. It's worth taking a moment to read the labels and pick the compound that best suits your specific repair needs.
Dealing with drywall patches can be tricky, but avoiding common mistakes makes a big difference. Simple errors can lead to a messy finish that's hard to hide. Learn how to get a smooth, professional look every time. For more tips and to see how we can help with your next project, visit our website today!
Bringing It All Together
So there you have it. Patching walls might seem like a big job, but with these contractor tricks, you can get those seams to just disappear. It really comes down to taking your time, using the right stuff, and not being afraid to put on a few thin layers instead of one thick glob. Remember to prep your space, use those specific tools like the right taping knife or trowel, and pay attention to how you feather the compound. A little patience goes a long way, and soon enough, your walls will look like they were never touched. You've got this!
Frequently Asked Questions
What's the hardest part of patching drywall?
The trickiest part is making the seams disappear, especially the flat ends of drywall sheets called butt seams. These can stick out a bit, so you need to carefully add thin layers of goop and smooth them out so they blend right into the wall. It takes a bit of practice to get them looking like they were never there.
How do I make my drywall patches look invisible?
The secret is to use really thin layers of drywall mud, or joint compound. You want to build it up slowly, letting each layer dry completely. Feathering the edges, meaning making them super thin where they meet the wall, is key. Also, using a special light that shines across the wall can help you spot any bumps or low spots you missed.
What tools do pros use for drywall patching?
Professionals use a few key tools. They have different sized taping knives and trowels to spread and smooth the joint compound. Paper tape is often preferred because it's strong, especially for corners. They also know which type of joint compound works best for each step, like a quick-setting one for speed or a lighter one for easy sanding.
Why is cleaning the wall before patching so important?
Cleaning the wall is super important because any dirt, dust, or loose paint can mess up your patch. It won't stick well, and you might end up with bubbles or cracks later on. Making sure the area is clean and smooth helps the new patch stick tight and look seamless.
Can I speed up the drying time for joint compound?
While you can't magically make it dry instantly, some types of joint compound dry much faster than others. Quick-setting compounds are available that harden in just a few hours. However, it's always best to let it dry completely before sanding or painting to avoid problems. Patience really pays off here.
What are the biggest mistakes people make when patching drywall?
A common mistake is putting on way too much joint compound at once; thin layers are much better. Another big error is skipping the prep work, like cleaning and priming the area. Using the wrong kind of compound for the job can also lead to a messy finish. Basically, rushing and not paying attention to the details causes most problems.


Comments
Post a Comment