From Patchwork to Perfection: Avoiding Drywall Repair Nightmares with Professional Solutions
We've all been there, right? You try to hang a picture, or maybe a door swings a little too hard, and suddenly you've got a hole in your wall. Or perhaps it's those little cracks that just seem to appear out of nowhere. Trying to fix these things yourself can sometimes turn into a real headache, a genuine 'Drywall Repair Nightmares: Real-Life Fixes That Show Why DIY Isn’t Always the Answer' situation. It looks so easy on TV, but the reality? Not so much. Let's talk about how to get those walls looking good again, the right way.
Key Takeaways
- Mastering mudding and taping is key for smooth, professional-looking drywall finishes, but requires patience and thin, even layers.
- Fixing large holes involves creating a support structure and carefully patching with new drywall, ensuring it's flush with the existing wall.
- Surface cracks and nail pops can be addressed with joint compound and sanding, but it's important to remove loose material first.
- Ceiling repairs, especially those involving water damage, require addressing the leak source and using stain-blocking primers before painting.
- Recognizing when a DIY repair is likely to become a nightmare and calling professionals can save time, frustration, and lead to a better final result.
Mastering Mudding and Taping for Seamless Finishes
The Technique Behind the Magic
Mudding and taping are the backbone of any good drywall repair. It’s how you go from a patched-up mess to a wall that looks like it was never damaged. Think of it like this: the drywall sheets are the canvas, and the joint compound, or 'mud,' is your paint. You're not just slapping it on, though. It's a process that requires a bit of patience and a steady hand.
First, you'll apply a thin layer of joint compound over the seams where two pieces of drywall meet, and also over any screw or nail heads. This is where the tape comes in. You'll press drywall tape right into that wet mud. This tape is usually paper or mesh, and it bridges the gap between the drywall sheets, giving the mud something to grip onto. After that first layer dries, you'll apply more coats of mud. Each new coat needs to be a bit wider than the last, feathering out the edges so the repair blends smoothly into the surrounding wall. This feathering is super important; it’s what makes the patch disappear.
Here’s a quick rundown of the layers:
- First Coat: Covers seams and fasteners. Apply tape immediately into the wet mud.
- Second Coat: Applied after the first coat is dry. This coat is wider and feathered out.
- Third Coat (if needed): A final, even wider coat to smooth everything out.
After each coat dries, you'll do some light sanding. This isn't about getting it perfectly smooth yet, just knocking down any high spots or ridges.
Avoiding Common Pitfalls
One of the biggest mistakes people make is rushing the drying process. You absolutely have to let each layer of mud dry completely before you sand or apply the next coat. If you don't, you'll end up with a gummy mess, and the repair won't be strong or smooth. Another common issue is applying the mud too thick. It's better to apply several thin coats than one thick one. Thick mud takes longer to dry, is harder to sand, and can crack.
Trying to speed up drying with a fan or heater can sometimes cause the mud to dry too quickly on the surface, leading to cracks before it's fully cured underneath. Patience really is a virtue here.
Also, don't skimp on the feathering. If you leave the edges of your mudding too thick, you'll see a ridge on the wall, even after painting. You want the repair to blend in, not stick out like a sore thumb. And remember to clean your tools after each use; dried mud is a pain to get off.
Achieving a Flawless Finish
Once all your coats of mud are dry, it's time for the final sanding. Use a fine-grit sandpaper (around 120-220 grit) and sand gently. You're aiming for a surface that feels completely smooth to the touch, with no bumps or dips. Run your hand over it; if you feel anything, keep sanding lightly. After sanding, wipe down the area with a damp cloth to remove all the dust. Then, apply a coat of primer. Primer helps the paint stick better and ensures that the repaired area doesn't look different in color or sheen from the rest of the wall once you paint. The goal is for the repair to be invisible. If you can still see the patch after priming, you might need another thin coat of mud and more sanding. It takes practice, but when you get it right, it's incredibly satisfying.
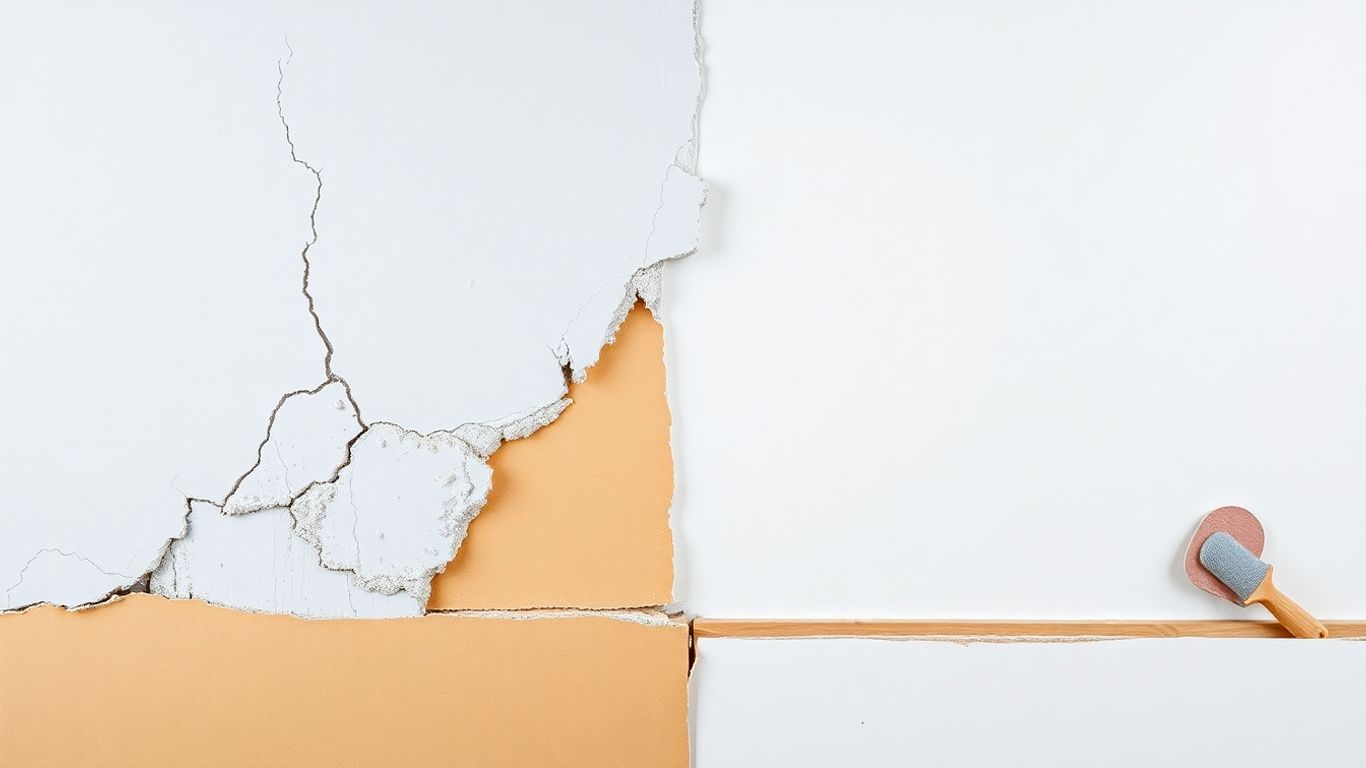
Fixing Large Holes with Drywall Patching Techniques
So, you’ve got a hole in your drywall that’s bigger than a picture hook casualty. Maybe a doorknob made an unexpected impact, or perhaps a heavy shelf decided to make a dramatic exit. Whatever the cause, staring at a gaping hole can be a bit disheartening. But don't worry, fixing these larger openings is totally doable with the right approach. It’s not as complicated as it might seem, and with a few key steps, you can get your wall looking good as new.
Gather Your Essential Materials
Before you start, make sure you have everything you need. Having your supplies ready makes the whole process go much smoother. You wouldn't want to be halfway through and realize you're missing something important, right?
Here’s a quick rundown of what you’ll likely need:
- Drywall Patch: Get one that’s a few inches larger than the hole on all sides. This overlap is key for a solid repair.
- Joint Compound (Drywall Mud): This is what you’ll use to cover the patch and blend it in.
- Putty Knife: A wider one works best for spreading the compound evenly.
- Sanding Block or Sandpaper: For smoothing everything out once it’s dry.
- Wood Strips or Furring Strips: These will act as a support behind the hole.
- Drywall Screws: To attach the wood supports and the patch.
- Utility Knife or Drywall Saw: For cleaning up the edges of the hole.
- Pencil and Tape Measure: For accurate measurements.
The Step-by-Step Patching Process
Okay, let's get down to business. Fixing a large hole involves a bit more than just slapping some mud on it. We need to make sure it's sturdy and blends in properly.
- Clean Up the Hole: Carefully trim away any loose or damaged drywall around the hole. You want clean, straight edges to work with. This helps the new patch fit snugly.
- Create a Support Structure: This is a really important step for larger holes. Cut two pieces of wood (like furring strips) that are longer than the hole. Insert them behind the drywall, one on each side of the hole, and screw them into place through the existing drywall. These will give your new patch something solid to attach to.
- Cut and Fit Your Patch: Measure the hole and cut a piece of new drywall that’s a couple of inches larger than the opening on all sides. This extra size will overlap onto the wood supports you just installed.
- Attach the Patch: Place your new drywall patch over the hole and screw it securely into the wood strips you put in place. Make sure it sits flush with the existing wall surface.
- Tape and Mud: Apply joint tape around the edges of the new patch, covering the seams. Then, use your putty knife to spread a thin, even layer of joint compound over the tape and the patch. Feather the edges out onto the existing wall. Let this layer dry completely – this can take 24 hours or more.
- Sand and Apply More Mud: Once dry, lightly sand down any rough spots. You’ll likely need to apply at least two more thin coats of joint compound, letting each one dry and sanding lightly in between. The goal is to build up the area so it’s perfectly smooth and level with the rest of the wall. This process is similar to how professionals patch medium-sized holes in drywall.
- Final Sanding and Painting: After the final coat of mud is dry and sanded smooth, you’re ready to prime and paint. Match your wall color, and your repair should practically disappear.
Creating a Support Structure for Stability
As mentioned, creating a solid backing is vital when dealing with larger holes. Without it, your patch might not be secure, and the repair could fail over time. Using wood strips or even a piece of scrap drywall as a backing board, screwed into place from the front through the existing wall, provides that much-needed stability. It’s like giving your wall a little internal scaffolding before you put the new piece in. This method ensures your repair is strong and lasts.
Remember, patience is key. Rushing the drying time of the joint compound can lead to cracks and a less-than-perfect finish. It’s better to take your time and do it right the first time.
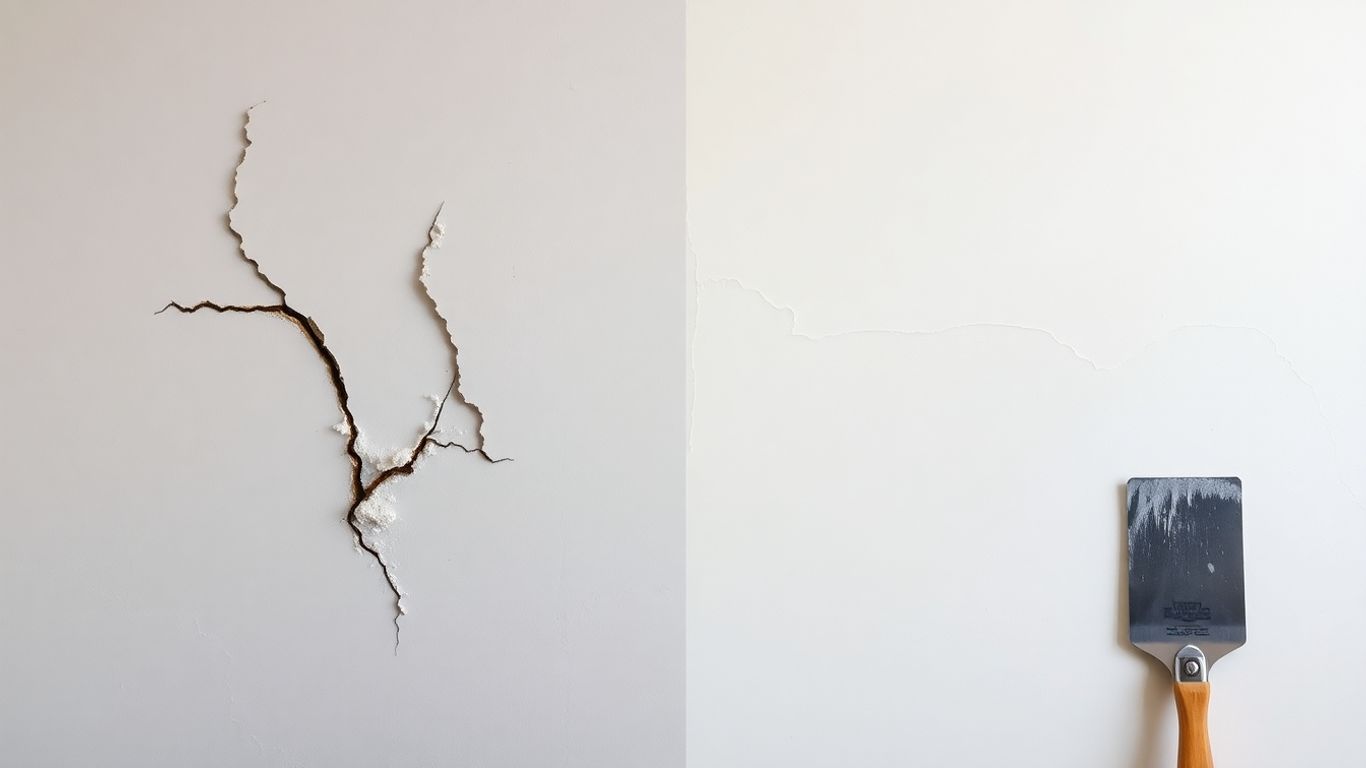
Addressing Surface Cracks and Nail Pops
Walls can develop little imperfections over time, like tiny lines or little bumps where a nail used to be. It's pretty common, especially with changes in temperature or if the house settles a bit. These aren't usually big problems, but they can make your walls look a bit rough if you don't deal with them.
Tackling Stubborn Surface Cracks
Surface cracks are those thin lines that sometimes show up. They can be a bit annoying, but fixing them is usually straightforward. First, you'll want to clean out the crack. A soft brush or even a slightly damp cloth can get rid of any dust or loose bits. Then, grab some joint compound – the stuff they use for drywall. Use a putty knife to spread a thin layer right into the crack. The trick here is to be patient. Apply it in thin coats, letting each one dry completely before you add another. This helps prevent the crack from showing up again.
Once the compound is dry, you'll need to smooth it down. A fine-grit sandpaper works well for this. You want it to be flush with the rest of the wall. After sanding, it's a good idea to put on a coat of primer. This helps the paint stick evenly and makes sure the repaired spot doesn't look different from the rest of the wall.
Navigating Pesky Nail Pops
Nail pops happen when the nails holding the drywall in place start to push out. It's like the nail is trying to escape! When you see one, you'll want to deal with it before it gets worse.
Here’s a simple way to handle them:
- First, gently tap the popped nail further into the drywall with a hammer. You want it to be just below the surface, not sticking out.
- Then, use a drywall screw. Drive a screw into the drywall just above and just below the popped nail. This helps hold the drywall more securely.
- After that, cover the popped nail and the new screws with a bit of joint compound. Just like with cracks, apply it in thin layers and let it dry.
- Once dry, sand the area smooth. You'll want it to blend in perfectly with the wall.
Ensuring a Smooth and Pristine Surface
After you've tackled those cracks and nail pops, the final step is making sure everything looks good. This means a bit more sanding to get a really smooth finish. You're aiming for a surface that feels completely flat and even to the touch. If you've used joint compound, you might need a couple of light sanding sessions to get it just right. Remember, the goal is to make the repair invisible. Once it's smooth, apply your primer and then your paint. Doing this carefully will make your walls look like new again, without any of those annoying little flaws.
Sometimes, even with the best efforts, a repair might not turn out exactly as you hoped. If you're dealing with a lot of cracks, large areas of damage, or just aren't getting the smooth finish you want, it might be time to think about calling in someone who does this for a living. They have the tools and the experience to make it look perfect.
Expert Ceiling Repair Techniques
When it comes to ceiling repair, most homeowners might prefer to just "keep their heads down" rather than look up at the daunting task above them. But don't worry! With the right methods and a bit of patience, you can fix that ceiling without pulling your hair out—or straining your neck.
Tackling Water Damage on Ceilings
Water-damaged ceilings are pretty common and, let's face it, not a good look. Whether it's from a leaky roof or an overflowing tub, water can leave ugly stains and weaken the drywall. The first thing you need to do is fix the source of the leak. Once that's sorted, you can focus on the repair.
- Cut out the damaged area using a utility knife. You might need to cut a larger section if the damage is extensive.
- Install a new piece of drywall, making sure it's attached securely to the ceiling joists.
- Apply a stain-blocking primer before you paint. This stops those stubborn water marks from showing through your fresh paint job.
Water damage isn't just about looks; it can compromise the integrity of your ceiling. Addressing the leak promptly is key to preventing further issues and ensuring a lasting repair.
Patching Holes in Drywall Ceilings
A hole in your ceiling can feel like you've got an unwanted skylight. Luckily, fixing it is usually straightforward.
- Cut a piece of drywall that's a bit bigger than the hole.
- Secure it in place using drywall screws.
- Cover the seams with mesh tape. Then, apply a few coats of joint compound, sanding lightly between each coat to get it smooth.
Smoothing Textured Ceilings for a Modern Look
If you're not a fan of popcorn ceilings, you might consider removing or refinishing them. While this can be a bit of work, the result is a much cleaner, more modern look for your home.
Matching existing textures can be tricky, but it's doable. You'll want to determine the type of texture you have and then use similar application methods. Practice on a scrap piece of drywall first to get the hang of it before you tackle the ceiling itself. This way, you can ensure the repaired area blends in perfectly with the rest of the ceiling.
When to Call Professionals for Drywall Repair
Sometimes, you look at a ding in the wall, or maybe a slightly larger hole from that time the couch decided to make a break for it, and you think, "I can totally fix this myself." And for small stuff, like a tiny nail pop or a minor scuff, you probably can. But let's be real, not every home repair project is a walk in the park. There comes a point where trying to DIY can actually make things worse, or at least a lot more frustrating.
Recognizing When DIY Isn't the Answer
So, how do you know when it's time to put down the putty knife and pick up the phone? It usually comes down to the scale of the problem and your own comfort level. If you're staring at a hole bigger than a dinner plate, or if water damage has turned your ceiling into a sagging disaster zone, that's a pretty clear sign that professional help is needed. Also, if you've already tried fixing it yourself and ended up with a lumpy, bumpy mess that looks worse than before, it might be time to call in the cavalry.
Here are a few more red flags:
- Extensive Damage: We're talking about large sections of drywall that are crumbling, cracked, or have multiple holes. This often points to underlying issues that need more than just a cosmetic fix.
- Water Damage: If you see staining, sagging, or mold growth, it's not just a drywall problem. You've likely got a moisture issue that needs to be addressed by professionals before it causes more damage.
- Structural Concerns: Any damage that seems to affect the integrity of the wall or ceiling, especially around load-bearing areas, should be handled by experts.
- Lack of Confidence: If the thought of mudding, taping, and sanding makes you break out in a cold sweat, that's okay! It's better to admit it and get help than to struggle and be unhappy with the result.
The Benefits of Professional Drywall Services
When you hire professionals, you're not just paying for someone to patch a hole. You're investing in a smooth, clean finish that blends perfectly with your existing walls. They have the tools, the experience, and the know-how to get it done right the first time. This means:
- Speed and Efficiency: Professionals can often complete repairs much faster than a DIYer, minimizing disruption to your home.
- Quality Finish: They know how to apply joint compound, sand it down, and match textures so the repair is virtually invisible.
- Durability: A professional repair is more likely to last, preventing future cracks or issues.
- Peace of Mind: Knowing the job is done correctly by experienced hands can save you a lot of stress.
Entrusting Your Home to Experienced Hands
Think of it this way: you wouldn't try to perform surgery on yourself, right? Drywall repair, especially for larger or more complex issues, is similar. It requires specific skills and a good eye for detail. Hiring a seasoned drywall professional means you're getting a repair that not only looks good but also holds up over time. They understand the nuances of different drywall types, textures, and common problems. Plus, they come equipped with all the necessary tools, so you don't have to buy a bunch of stuff you'll only use once. It's about getting that perfect, seamless finish without the headache and potential for costly mistakes that often come with a DIY attempt. Your home is a big investment, and sometimes, the best way to protect it is by calling in the pros who know exactly what they're doing.
When your drywall has seen better days, you might wonder if it's a DIY job or time to call in the pros. Small dings and nail pops are usually easy fixes. But if you're dealing with large cracks, water damage, or holes bigger than a dinner plate, it's probably best to get expert help. Trying to fix major issues yourself can sometimes make things worse. For these bigger problems, it's smart to bring in someone who knows exactly what they're doing. Visit our website to learn more about when to call the experts for your drywall needs.
Wrapping It Up
So, we've gone over a few ways to tackle those drywall headaches. From small dings to bigger holes, there are methods to make your walls look good again. It takes some patience, for sure, and maybe a bit of practice. But if you're looking at a big job, or just don't have the time or energy to mess with it, calling in the pros is always a solid choice. They've got the tools and the know-how to get it done right, so you don't have to worry about it turning into a bigger mess. In the end, a smooth, finished wall makes a house feel more like a home.
Frequently Asked Questions
What's the main difference between fixing a small hole and a big one in drywall?
Fixing a small hole is usually simple, often just needing some filler like spackle. For bigger holes, you'll need to add support behind the drywall and use a patch piece, kind of like putting a bandage on a larger cut.
How do I make sure my drywall repair blends in with the rest of the wall?
The trick is to use joint compound and spread it thinly, making the edges blend out smoothly. After it dries, you sand it down. You might need a few layers, and it's important to let each one dry completely before sanding and adding the next. Matching the wall's texture is also key.
What causes nail pops, and how can I fix them?
Nail pops happen when the nails holding the drywall loosen. To fix them, you usually drive in new screws nearby, cover the old nail and new screws with joint compound, and then sand it smooth once dry.
Is it okay to paint over drywall repairs right away?
No, it's best to let the joint compound dry completely. Then, you should sand it smooth, apply a primer coat, and let that dry before you paint. This helps the paint stick better and makes the repair look seamless.
When should I stop trying to fix drywall myself and call a pro?
If the damage is really large, like a big hole or signs of water damage that might affect the structure, it's safer to call a professional. Also, if you've tried fixing it and aren't happy with the result, an expert can often get it looking perfect.
What's the most important thing to remember when mudding and taping drywall?
Patience is super important! You need to apply the joint compound in thin, even layers and let each layer dry completely before sanding and applying the next. Rushing this process is the quickest way to end up with bumps and uneven spots.


Comments
Post a Comment