Exterior Painting That Lasts: Why Surface Prep Matters More Than the Paint Brand
Thinking about giving your home's exterior a facelift with a fresh coat of paint? It's a great way to boost curb appeal, but let's be real, the magic isn't just in the can of paint you pick. The real secret to a paint job that looks good for years and doesn't start peeling after the first rain? It's all about what happens *before* the brush even touches the wall. This article, 'Exterior Painting That Lasts: Why Surface Prep Matters More Than the Paint Brand,' is going to break down why getting the surface ready is way more important than splashing out on the fanciest paint money can buy.
Key Takeaways
- The longevity and appearance of your exterior paint job depend heavily on the preparation of the surface, often more so than the brand of paint used.
- Proper cleaning to remove dirt, mold, and grime is the first step, as paint won't stick well to a dirty surface.
- Addressing any structural issues, like rotten wood or cracks, and making repairs before painting is vital to prevent future problems and ensure a smooth finish.
- Sanding and scraping away old, loose paint is necessary for the new paint to adhere correctly and avoid peeling.
- Using a quality primer seals the surface, improves paint adhesion, and adds an extra layer of durability against the elements.
The Foundation Of A Lasting Paint Job
Why Surface Preparation Is Paramount
Think about building a house. You wouldn't just start slapping up walls without a solid foundation, right? Painting your home's exterior is kind of the same deal. That beautiful color you picked out, the smooth finish – it all depends on what's underneath. Getting the surface ready is way more important than the brand name on the paint can. If you skip the prep work, even the most expensive paint will eventually peel, crack, or fade way too soon. It's like putting a fancy new roof on a house with rotten beams; it just won't hold up.
Consequences Of Skipping Essential Steps
So, what happens when you cut corners on prep? A few things, and none of them are good. You'll likely see paint peeling off in sheets, especially after a few bad weather cycles. It can look patchy and uneven, making your whole house look worse than before. Plus, you'll end up having to do the whole job over again much sooner than you'd expect, costing you more time and money in the long run. It's a real headache.
- Peeling and flaking paint: This is the most common issue. Paint just can't stick to dirt, grime, or old, loose paint.
- Uneven color and texture: Without a smooth, clean surface, the paint won't go on evenly, leading to a blotchy look.
- Reduced lifespan: Your paint job will fail prematurely, meaning you'll be repainting in a year or two instead of five or ten.
When you rush the preparation, you're essentially setting yourself up for failure. The paint has nothing solid to grip onto, and the elements will quickly expose any shortcuts taken. It's a lesson many homeowners learn the hard way.
The Role Of Quality Paint Versus Prep
People often think that buying the priciest paint will guarantee a great finish. While good paint is important, it can't magically fix a bad surface. Imagine trying to write on a dirty, bumpy table – the words won't come out clear. It's the same with paint. A high-quality paint applied to a poorly prepared surface is a waste of money. On the other hand, a decent paint applied to a perfectly prepped surface can look fantastic and last for years. The prep work is the real hero here, giving the paint something to stick to and protecting it from the weather.
Critical Steps For Exterior Surface Preparation
Alright, let's talk about what really makes an exterior paint job stick around. It's not just about slapping on a fancy brand of paint; it's about getting the surface ready. Think of it like baking a cake – you wouldn't just throw ingredients into a pan without mixing them, right? Same idea here. Proper prep work is the secret sauce to a paint job that looks good and lasts through all sorts of weather.
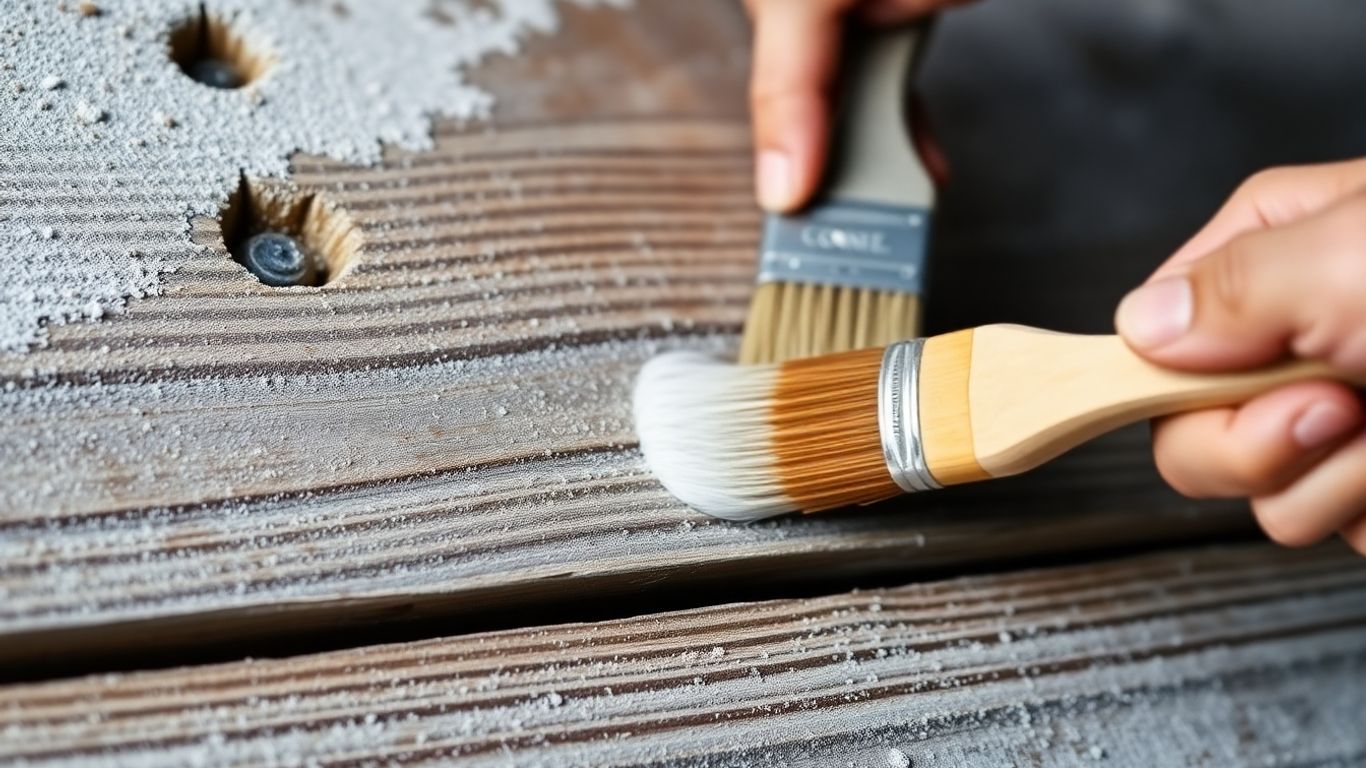
Thorough Cleaning To Remove Contaminants
First things first, you've got to get that surface clean. We're talking about washing away all the gunk that's built up over time. This includes dirt, dust, pollen, maybe even some mildew or algae if your house has been sitting in a damp spot. If you paint over this stuff, the new paint has nothing solid to grab onto. It's like trying to glue something to a greasy surface – it just won't hold.
- Power Washing: This is usually the go-to for a good, deep clean. It blasts away most of the grime. Just be careful not to use too much pressure on older wood or siding, as you can cause damage.
- Hand Scrubbing: For stubborn spots, like mildew or really caked-on dirt, a good old-fashioned scrub brush and some cleaner can do wonders.
- Rinsing: Make sure to rinse everything off thoroughly. You don't want any leftover soap or cleaner residue.
- Drying: This is super important. The surface needs to be completely dry before you move on. Painting on a damp surface can trap moisture, leading to problems down the road.
Skipping the cleaning step is a fast track to peeling paint. It's a foundational step that can't be overlooked if you want the paint to actually bond with the house.
Addressing Structural Issues And Repairs
Once everything is clean and dry, it's time to play inspector and fix any problems. Look for any wood that's rotting, especially around windows, doors, and trim. Check for loose siding, cracks, or holes. These aren't just cosmetic issues; they can let water get in, which causes bigger problems like mold and structural damage.
- Replace Damaged Wood: If you find wood that's soft or crumbly, it needs to be replaced. Trying to paint over rotten wood is like putting a band-aid on a broken bone.
- Fill Cracks and Holes: Use a good quality exterior caulk for gaps and cracks. For larger holes or gouges in wood, wood filler is your friend. Make sure these repairs are smooth and level with the surrounding surface.
- Secure Loose Items: Re-nail or re-secure any siding, trim, or railings that are loose.
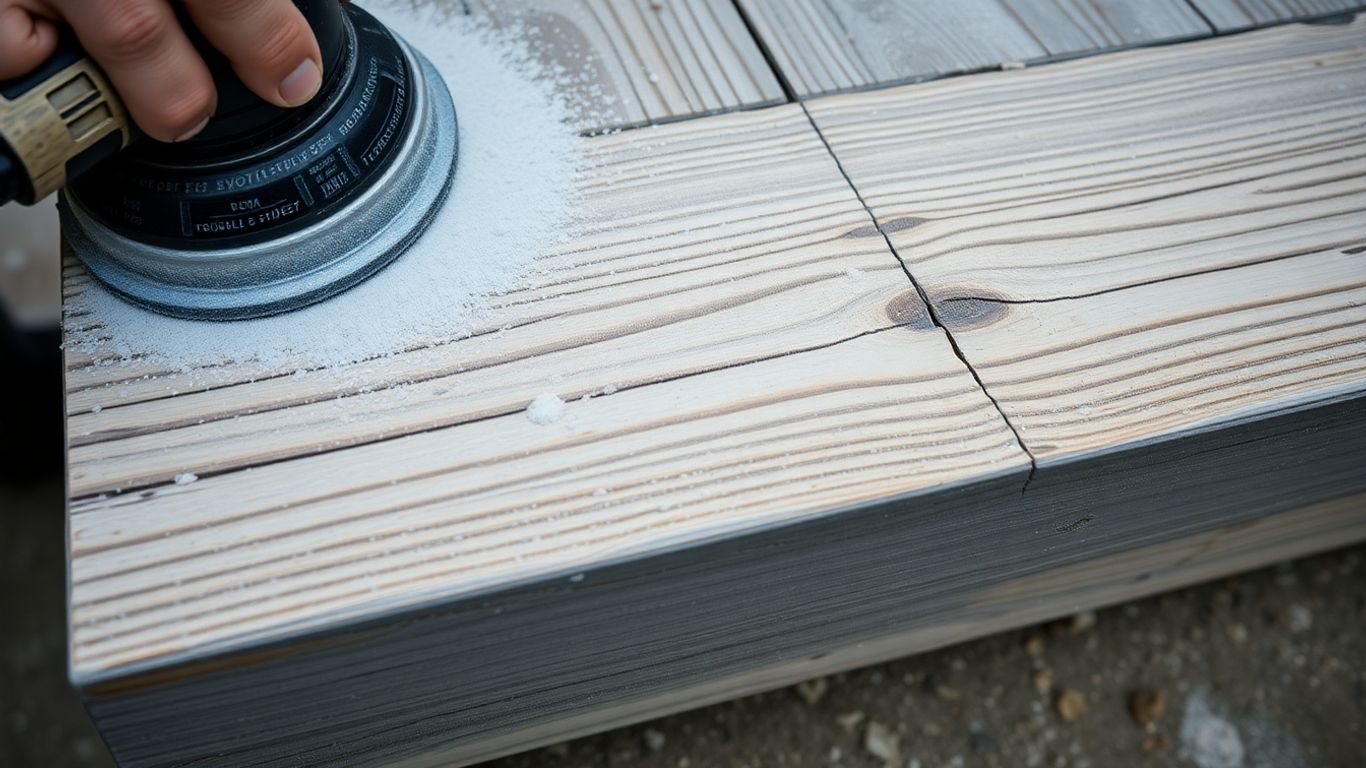
Sanding And Scraping For Optimal Adhesion
Now for the part that separates the pros from the amateurs: scraping and sanding. If there's any old paint that's peeling or flaking, you absolutely have to get rid of it. A paint scraper is your best friend here. Just get under the loose bits and peel them off. After you've scraped away all the loose paint, you'll likely have some rough edges or uneven spots.
- Scraping: This removes all the failing paint. You want to scrape until you reach a solid edge of paint.
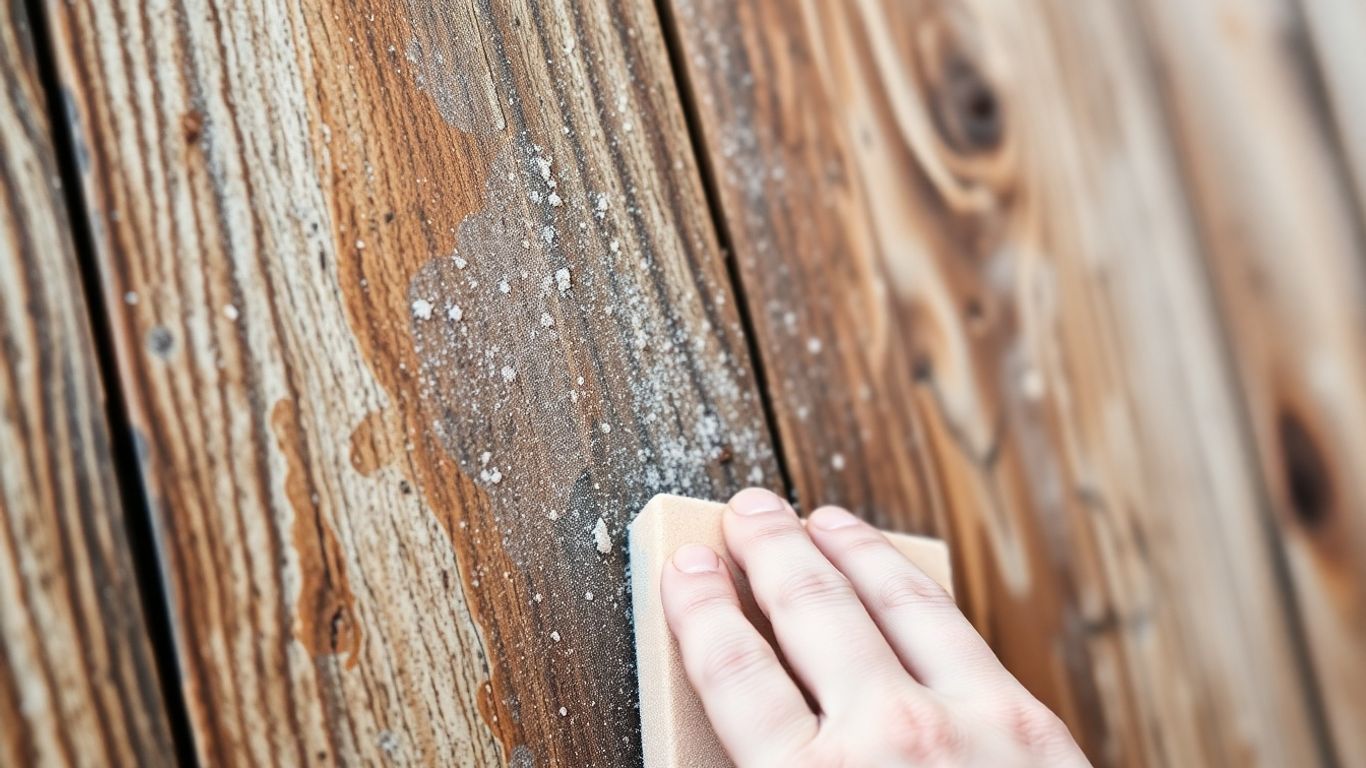
- Sanding: Once scraped, you'll want to sand the edges where the old paint meets the bare surface. This helps to feather the edges, making the transition smooth. Sanding the entire surface, especially if it's glossy, can also help the new paint grip better.
- Dust Removal: After sanding, wipe down the entire surface with a damp cloth or tack cloth to remove all the dust. Dust is another one of those things that paint just doesn't like to stick to.
Getting these steps right is what truly makes the difference between a paint job that lasts for years and one that starts looking rough after just a season or two.
The Importance Of Priming
Sealing Surfaces For Durability
Think of primer as a sealant for your home's exterior. It creates a barrier that stops moisture from getting into the wood or other materials underneath. This is super important, especially if you live in a place with a lot of rain or humidity. Without primer, water can seep in, causing wood to rot or paint to bubble up later on. It’s like giving your house a raincoat before the storm hits.
Enhancing Paint Adhesion And Longevity
Primer is the secret sauce that makes your paint stick. It gives the topcoat something to grab onto, kind of like how a good base coat helps your nail polish last longer. This improved grip means your paint is less likely to chip, peel, or fade over time. When you paint directly onto a surface, especially one that's a bit rough or has been painted before, the new paint might not bond well. Primer fills in the tiny gaps and creates a uniform surface, so the paint goes on smoothly and stays put.
Choosing The Right Primer For Your Surface
Not all primers are created equal, and picking the wrong one can be a waste of time and money. You need to match the primer to the material you're painting and the kind of paint you'll be using on top.
- For bare wood: You'll want a primer that seals the wood grain and prevents tannins from bleeding through.
- For metal surfaces: Look for a rust-inhibiting primer to prevent corrosion.
- For previously painted surfaces: An all-purpose primer usually does the trick, but if you have stains or dark colors to cover, a stain-blocking primer is your best bet.
- For chalky surfaces: A special bonding primer is needed to help the new paint adhere.
Skipping primer is a common mistake, but it's one that really comes back to bite you. It might seem like an extra step you can skip to save time, but in the long run, it just leads to more work and a less attractive finish.
Here's a quick rundown of what different primers do:
| Primer Type | What It Does |
|---|---|
| Stain-Blocking | Covers water spots, grease, and dark colors |
| Bonding | Helps paint stick to slick or difficult surfaces |
| Rust-Inhibiting | Protects metal from corrosion |
| Exterior All-Purpose | Seals and prepares most exterior surfaces |
Common Pitfalls In Exterior Painting Prep
So, you're ready to give your house a fresh coat of paint. Exciting! But before you even think about cracking open those paint cans, let's talk about what can go wrong if you skip the important prep work. It's like trying to bake a cake without measuring your ingredients – you might end up with something edible, but it's probably not going to be great, and it might fall apart.
Painting Over Unprepared Surfaces
This is a big one. Imagine slapping new paint right over dirt, grime, mildew, or even old, peeling paint. It just doesn't stick right. That shiny new coat? It's going to start looking sad and flaky way sooner than you'd like. It's not just about looks; it's about the paint actually doing its job to protect your home.
Neglecting Necessary Repairs
Got a loose board? A crack in the siding? Maybe some wood rot? If you paint over these things, you're basically just covering up a problem. That little crack can let water in, leading to bigger issues down the road. Wood rot doesn't go away just because it's painted. It's like putting a band-aid on a broken bone – it looks like you fixed it for a second, but the real problem is still there, getting worse.
Here's a quick rundown of what to look out for:
- Loose or Damaged Siding: Needs to be secured or replaced.
- Cracks and Holes: Should be filled with caulk or wood filler.
- Rotten Wood: Requires removal and replacement of the affected section.
- Peeling Caulk: Old caulk needs to be scraped out and new applied to seal against moisture.
The Mistake Of Skipping Primer
Some folks think primer is an unnecessary extra step, especially if they're using a good quality paint. But primer is like the glue that holds everything together. It seals the surface, stops stains from bleeding through, and gives your topcoat something solid to grip onto. Without it, your paint might not cover evenly, and it definitely won't last as long, especially on surfaces like bare wood or when you're painting over a dark color.
Rushing through preparation is the most common reason exterior paint jobs fail prematurely. It might save you a few hours now, but it will cost you more time and money in the long run when you have to fix the peeling, cracking, and fading.
Think of it this way: you wouldn't build a house on shaky ground, right? Painting is no different. Taking the time to clean, repair, and prime properly is the foundation for a paint job that looks good and actually lasts.
Professional Preparation Techniques
When you're looking to get your house painted, especially the outside, you might be tempted to just pick a nice color and get it on the walls. But honestly, the real magic happens before the paint even comes out of the can. Professionals know this, and they have a whole process for getting surfaces ready that most DIYers might overlook. It's not just about slapping on a new coat; it's about making sure that coat has something solid to stick to for years to come.
Expert Inspections and Issue Identification
Before any scraping or sanding begins, a pro will take a good, long look at your house's exterior. They're not just looking for obvious peeling paint. They're checking for things like:
- Moisture damage: Is there any rot in the wood? Any signs of water getting where it shouldn't?
- Mold and mildew: These need to be dealt with properly, or they'll just grow back under the new paint.
- Structural integrity: Are there any loose boards, cracked caulk, or other small issues that could become big problems later?
This initial inspection is super important because it helps them figure out exactly what needs to be done to make the surface truly ready for paint. It's like a doctor giving you a check-up before prescribing treatment.
Utilizing Professional Tools and Methods
Professionals have access to tools and techniques that make prep work more effective and efficient. Think beyond a simple putty knife and sandpaper. They might use:
- Pressure Washers: For a deep clean that removes dirt, grime, and loose paint much faster than manual scrubbing.
- Specialized Scrapers and Sanders: Different tools for different surfaces and types of old paint, from flexible scrapers for delicate areas to orbital sanders for larger sections.
- High-Quality Caulks and Sealants: To fill gaps and cracks, preventing water intrusion and creating a smooth surface.
- Specific Cleaners: For tackling mold, mildew, or chalking without damaging the underlying material.
They also know the right way to use these tools. For instance, they understand the correct pressure for power washing so they don't damage the siding, or the grit of sandpaper needed for optimal adhesion without being too rough.
Ensuring Time-Efficient and Superior Results
While it might seem like professionals take a long time on prep, they're actually working efficiently because they know the steps and have the right gear. They're not wasting time figuring things out as they go. This methodical approach means:
- Less Rework: By identifying and fixing issues upfront, they avoid having to go back and fix problems that pop up later.
- Better Adhesion: Proper cleaning, sanding, and priming mean the new paint sticks better and lasts longer.
- A Smoother Finish: A well-prepped surface leads to a more even and professional-looking final coat.
The difference between a paint job that looks good for a year or two and one that holds up for a decade often comes down to the prep work done beforehand. Professionals invest the time and use the right methods to make sure that investment pays off in the long run.
So, while you might be focused on the color, remember that the pros are focused on building a solid foundation for that color. It's the unseen work that truly makes a paint job last.
Understanding Different Preparation Approaches
When it comes to getting your house painted, there's more than one way to get the surface ready. It's not a one-size-fits-all deal, and picking the right method really depends on what you're working with and what you expect from the final job. Think of it like this: you wouldn't use the same approach to fix a leaky faucet as you would to build a whole new bathroom, right? Painting prep is similar. We can break down the common ways people get their exteriors ready for a fresh coat into three main categories.
The Basic Scrape and Paint Method
This is the most straightforward approach, often chosen when budget is a big concern or the existing paint is in relatively decent shape. Basically, you're just dealing with the obvious problems. This involves scraping away any areas where the paint is visibly peeling or flaking off. After scraping, you might do a quick wipe-down to get rid of loose dust. The goal here is to get a surface that's good enough to accept new paint, but it doesn't aim for perfection. It's the quickest and cheapest way to get paint on the wall, but don't expect miracles in terms of how long it'll last or how smooth it'll look.
The Comprehensive Surface Restoration
This method goes a bit deeper than just scraping the loose bits. Here, you're not just scraping peeling paint; you're also sanding down any rough spots or uneven areas to create a smoother transition. The idea is to make the surface as uniform as possible before painting. This approach takes more time and effort than the basic scrape, but it significantly improves how the paint adheres and how the final finish looks. It's a good middle-ground, offering a much better lifespan and appearance than the basic method without the extreme cost of stripping everything down. You're aiming for a solid, well-adhered coat that will hold up well for years.
The Full Stripping and Re-Coating Process
This is the most intensive option, and honestly, it's usually reserved for situations where the existing paint is in really bad shape or you're aiming for an absolutely flawless, like-new finish. It involves removing all the old paint down to the bare surface. This can be done through sanding, chemical strippers, or even heat guns. Once everything is stripped, the surface is then meticulously prepared, often involving repairs and priming, before the new paint is applied. It's a significant investment in terms of time and money, but you're essentially starting with a blank canvas, which means the paint job will look its best and last the longest. It’s the ultimate way to guarantee a top-tier result, but it’s not always practical for every situation.
Choosing the right preparation method is key. It's not just about slapping paint on; it's about setting the stage for a finish that looks good and lasts. Skipping proper prep, no matter the method, is a recipe for future problems and extra costs down the line. Think about the long-term value and appearance when deciding how much prep work is needed for your exterior home preparation.
Here's a quick look at what each approach typically involves:
- Basic Scrape and Paint: Scrape loose paint, quick clean.
- Comprehensive Restoration: Scrape loose paint, sand rough areas, repair minor imperfections, clean thoroughly.
- Full Stripping: Remove all old paint, repair significant damage, clean, prime bare surfaces.
There are many ways to get a job done, and each has its own benefits. Understanding these different methods can help you choose the best path forward for your project. Whether you're looking for a quick fix or a long-lasting solution, knowing your options is key. Explore the various preparation approaches available and find the one that fits your needs perfectly. Visit our website today to learn more!
So, What's the Takeaway?
Look, we get it. You want your house to look good, and maybe you think buying the most expensive paint is the magic ticket. But as we've talked about, that's just not the whole story. All that fancy paint won't stick around for long if it's slapped onto a dirty, cracked, or rough surface. Think of it like building a house – you wouldn't put up fancy wallpaper before the walls are smooth and solid, right? The same goes for your home's exterior. Taking the time to clean, fix, and prime everything properly is where the real magic happens. It's the groundwork that makes the paint job last, look great, and save you headaches (and money) down the road. So next time you're thinking about painting, remember: prep work isn't just a step, it's the whole game.
Frequently Asked Questions
Why is cleaning the outside of my house so important before painting?
Cleaning is like giving your house a good bath before its makeover! If you paint over dirt, mold, or old, flaky paint, the new paint won't stick well. This means it can start peeling or looking bumpy way sooner than you'd want. A clean surface is like a smooth canvas for the paint to grab onto, making the job look better and last longer.
What kind of repairs do I need to do before painting?
Think of repairs like fixing any holes in your favorite shirt before you iron it. You need to fix things like cracked wood, holes, or loose siding. If you don't, the paint might cover them up for a little while, but water and bugs can still get in, causing bigger problems later. Fixing these spots makes sure the paint has a solid surface to stick to and protects your house.
Does sanding really make a difference?
Yes, sanding is super important! It's like lightly scuffing up a slippery surface so something can grip it better. Sanding rough spots or old, peeling paint helps create a smoother surface. This gives the new paint something to stick to, preventing it from peeling off later and making the final paint job look much smoother and more professional.
What's the deal with primer? Do I really need it?
Primer is like a special glue that helps the paint stick better and last longer. It seals up the surface, so stains don't bleed through, and it gives the top coat of paint a really good surface to hold onto. It's especially helpful when you're painting over bare wood, metal, or if you're changing to a much lighter or darker color. Skipping primer can make your paint job less durable and might mean you need more coats of paint.
Can I just paint over the old paint if it looks okay?
It might seem like a good idea to save time, but painting over old, unprepared paint is a big mistake. Even if it looks okay, there could be dirt, grime, or tiny bits of loose paint underneath. When you paint over these, the new paint won't stick properly. This often leads to peeling and cracking much faster, making you wish you had prepped the surface correctly in the first place.
How much does surface preparation affect how long the paint job lasts?
Surface preparation is HUGE for how long your paint job lasts. It's like building a strong foundation for a house. If the foundation is weak, the house won't last. Similarly, if you don't prep the surface properly by cleaning, repairing, and priming, the paint won't have a good base to stick to. This means it's much more likely to peel, crack, or fade quickly, drastically cutting down the life of your paint job.


Comments
Post a Comment