Drywall Damage From Leaks, Cracks, and Accidents: Identifying the Best Repair Solution
Drywall is the backbone of our home's interior, but it's not invincible. Life happens, and sometimes our walls take a hit. Whether it's a stray bump from furniture, a tiny crack from the house settling, or a more serious issue from a leak, drywall damage is a common problem. But don't worry, most of these issues can be fixed. This guide will help you figure out what's wrong with your drywall and how to fix it, whether you're up for a DIY project or need to call in a pro. We'll cover everything from small dents to water-stained sections so you can get your walls looking great again.
Key Takeaways
- Small drywall issues like nail pops, dents, and hairline cracks can often be repaired with joint compound and sanding.
- Larger holes may require patching kits or cutting and replacing sections of drywall.
- Water damage needs the source fixed first, then the damaged drywall removed and replaced.
- Extensive damage, structural concerns, or if you're unsure, it's best to call a professional for a quality repair.
- Properly repairing drywall before painting is crucial for a smooth, lasting finish.
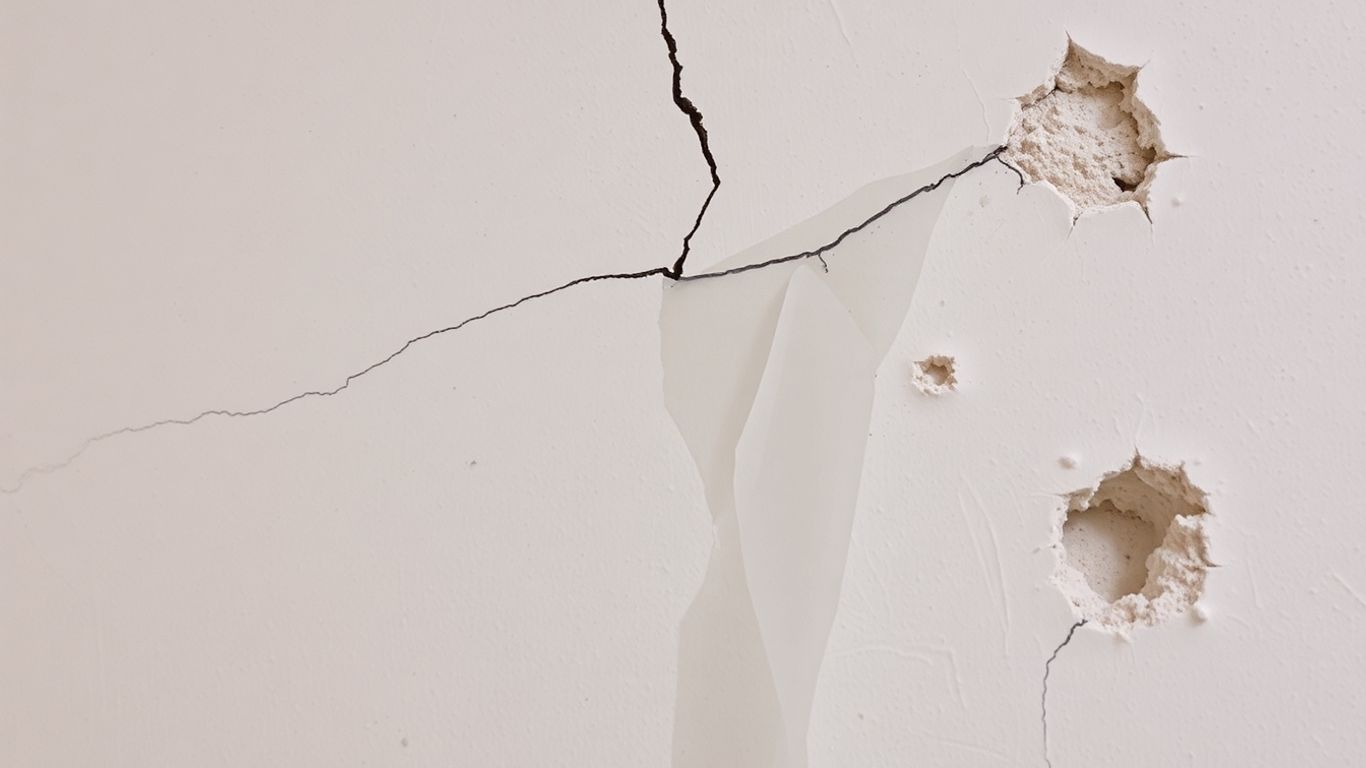
Identifying Common Drywall Damage
Drywall is pretty much everywhere in our homes, right? It's what we paint, hang pictures on, and generally just look at all the time. But, like anything in a house, it can get damaged. Sometimes it's just a little ding, other times it's a bigger deal. Knowing what you're looking at is the first step to fixing it. Let's break down the usual suspects when it comes to drywall problems.
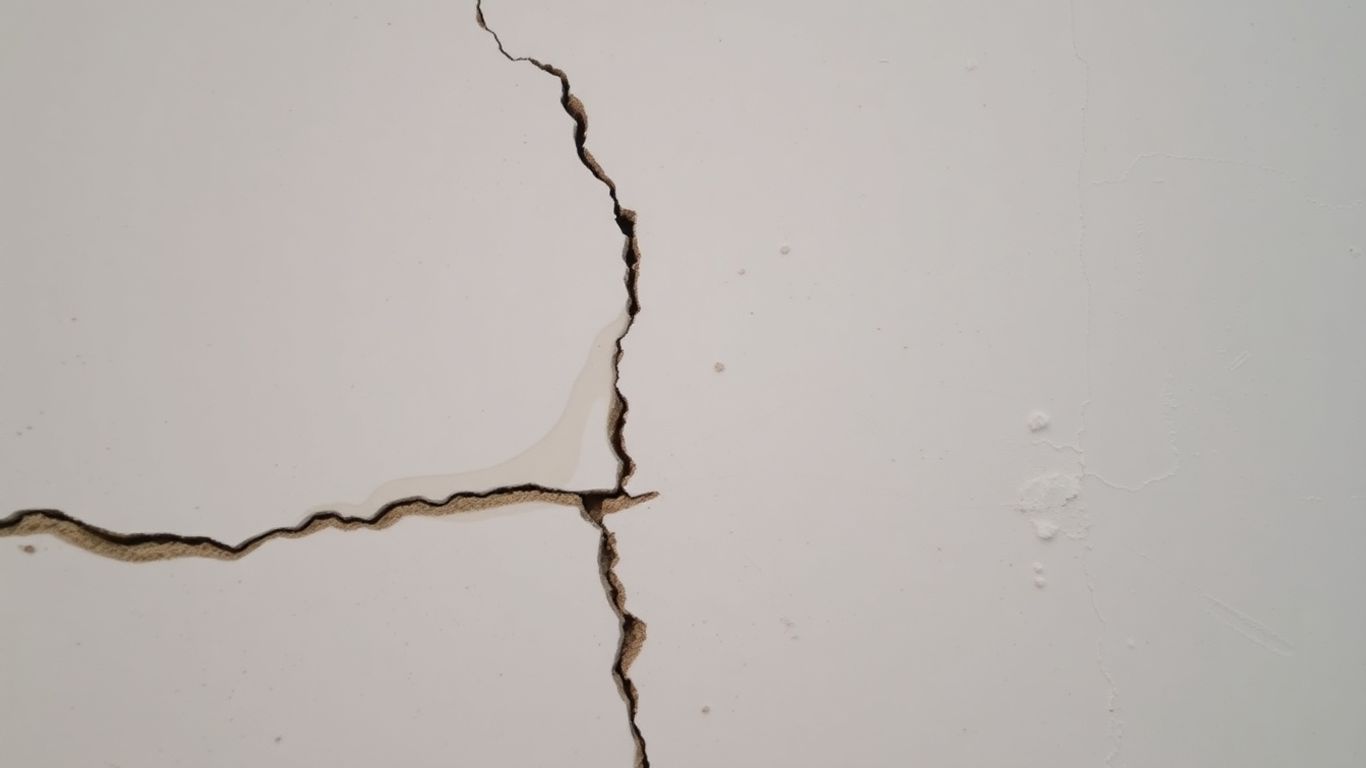
Understanding Wall Cracks
Cracks are probably the most common drywall issue people run into. You'll see them pop up along seams, near corners, or around windows and doors. These often show up because houses naturally settle over time, or even just from temperature changes making the materials expand and contract. They can be as small as a hair or a bit wider. While hairline cracks might seem harmless, they can get bigger if you ignore them.
Recognizing Holes and Punctures
Accidents happen, and sometimes that means a hole in your wall. Maybe you bumped it with furniture, or the kids were playing a bit too rough. Holes can be tiny, like from a nail, or they can be much larger, depending on what caused them. The size of the hole really changes how you'll need to fix it.
Signs of Water Intrusion
Water damage is a bit more serious. You'll know it's there if you see stains on the wall, or if the drywall feels soft or starts to bulge. This usually means water is getting in from somewhere, like a leaky pipe or maybe even outside. It's not just about how it looks; water-damaged drywall can lead to mold and weaken the wall over time.
It's easy to just slap some spackle on a crack and forget about it, but sometimes that doesn't really fix the root cause. If water is the problem, you need to stop the leak first, or the patch won't last.
Here are some common types of damage you might see:
- Cracks: From hairline to larger splits.
- Holes: Small punctures to larger openings.
- Stains: Yellow or brown marks indicating moisture.
- Soft Spots: Areas that feel spongy or weak to the touch.
- Bulges: Sections of the wall that push outward.
Assessing the Severity of Damage
So, you've spotted some issues on your drywall. Before you grab the spackle and a putty knife, it's smart to take a moment and really look at what you're dealing with. Not all drywall damage is created equal, and knowing the difference between a quick fix and a major headache can save you a lot of time and frustration. It’s about figuring out if you can handle it yourself or if it’s time to call in someone who does this for a living.
Evaluating Minor Imperfections
Sometimes, the damage is pretty small. Think little dents from a door handle hitting the wall, scuffs from furniture, or those annoying popped nails that leave a little bump. These are usually surface-level problems. You might notice them more once you've painted, especially if you're going for a matte finish where shadows can really highlight flaws. These minor issues are often the easiest to fix.
- Dents and Scuffs: Usually, a bit of joint compound or spackling paste will do the trick. Just fill it in, let it dry, and give it a light sanding.
- Popped Nails/Screws: These happen when the fastener loosens. You can often fix them by removing the old one and putting in a new screw a little higher or lower, then covering the heads with compound.
- Hairline Cracks: These are thin lines, often from the house settling. They can usually be managed with tape and compound.
Even small flaws can become really obvious once a wall is painted. Taking the time to smooth these out beforehand means your paint job will look much better and last longer.
Determining When Replacement Is Necessary
Now, when does a small problem become a big one? If the damage is more than just a surface issue, you might need to think about replacing a section of drywall. This is especially true if the drywall itself is compromised.
- Holes larger than a few inches: If you can fit your fist through it, patching might not be enough. For holes bigger than about 6 inches, you're probably looking at cutting out the damaged section and putting in a new piece.
- Soft or Spongy Spots: If you press on the drywall and it feels soft, mushy, or gives way easily, that's a bad sign. It often means moisture has gotten into the drywall paper and gypsum, weakening it significantly.
- Extensive Water Stains: While a small, dried water spot might be paintable after priming, large, spreading stains, especially if they're accompanied by softness or discoloration, mean the drywall is likely damaged beyond simple repair.
Spotting Structural Concerns
Sometimes, drywall issues are a symptom of a bigger problem happening behind the walls or with the house itself. These are the situations where you definitely want to be cautious and consider professional help. Ignoring these can lead to much more serious and expensive repairs down the road. If you see any of these, it's a good idea to get a professional opinion on the overall wall condition.
- Cracks That Keep Growing: If you notice cracks that seem to be getting wider over time, or if you see new ones appearing regularly, it could indicate the house is settling unevenly or there's a more significant structural issue at play.
- Bulging or Sagging Walls: If a section of your wall looks like it's bowing outward or sagging downward, especially near seams or corners, it's a sign that something is wrong with the structure or the drywall is failing.
- Signs of Mold or Mildew: Any discoloration that looks fuzzy or has a musty smell, especially in areas that have experienced leaks, could mean mold is growing within the wall cavity. This isn't just a drywall problem; it's a health hazard and needs to be addressed by professionals who can deal with both the mold and the underlying moisture issue.
DIY Solutions for Minor Drywall Issues
So, you've spotted a few dings and dents on your walls. Maybe a nail popped out, or there's a small hole from where that picture frame used to hang. Don't sweat it! Most of these little annoyances can be fixed yourself without calling in the pros. It's actually pretty satisfying to tackle these yourself and make your walls look good as new.
Repairing Small Holes and Dents
These are the most common drywall boo-boos. Think doorknob impacts, accidental bumps, or even just the wear and tear of daily life. For tiny holes, like those left by nails or screws, a bit of spackling paste is your best friend. Just scoop a little onto a putty knife, press it into the hole, and smooth it over. Let it dry completely – usually an hour or two, depending on how thick you applied it – and then give it a light sanding until it's flush with the wall. For slightly larger dents or shallow gouges, you'll use joint compound (often called 'mud'). Apply it in thin layers, letting each layer dry and sanding lightly in between. The key is to build up the repair slowly rather than trying to fill a deep dent all at once.
Fixing Popped Nails and Screws
Nail pops happen. The nails or screws holding your drywall to the studs can loosen up over time, especially if the house settles or humidity levels change. You'll see a little bump, and sometimes even a small crack around it. The fix is usually pretty simple. Grab a hammer and gently tap the popped nail or screw head back down, just below the surface of the drywall. Then, to make sure it stays put, drive a new drywall screw a little distance away from the old one, making sure it bites into the stud. You can then cover both the old fastener and the new screw head with a bit of joint compound, let it dry, and sand it smooth. If you see a lot of these popping up, it might be worth checking out why drywall is failing to make sure there isn't a bigger issue at play.
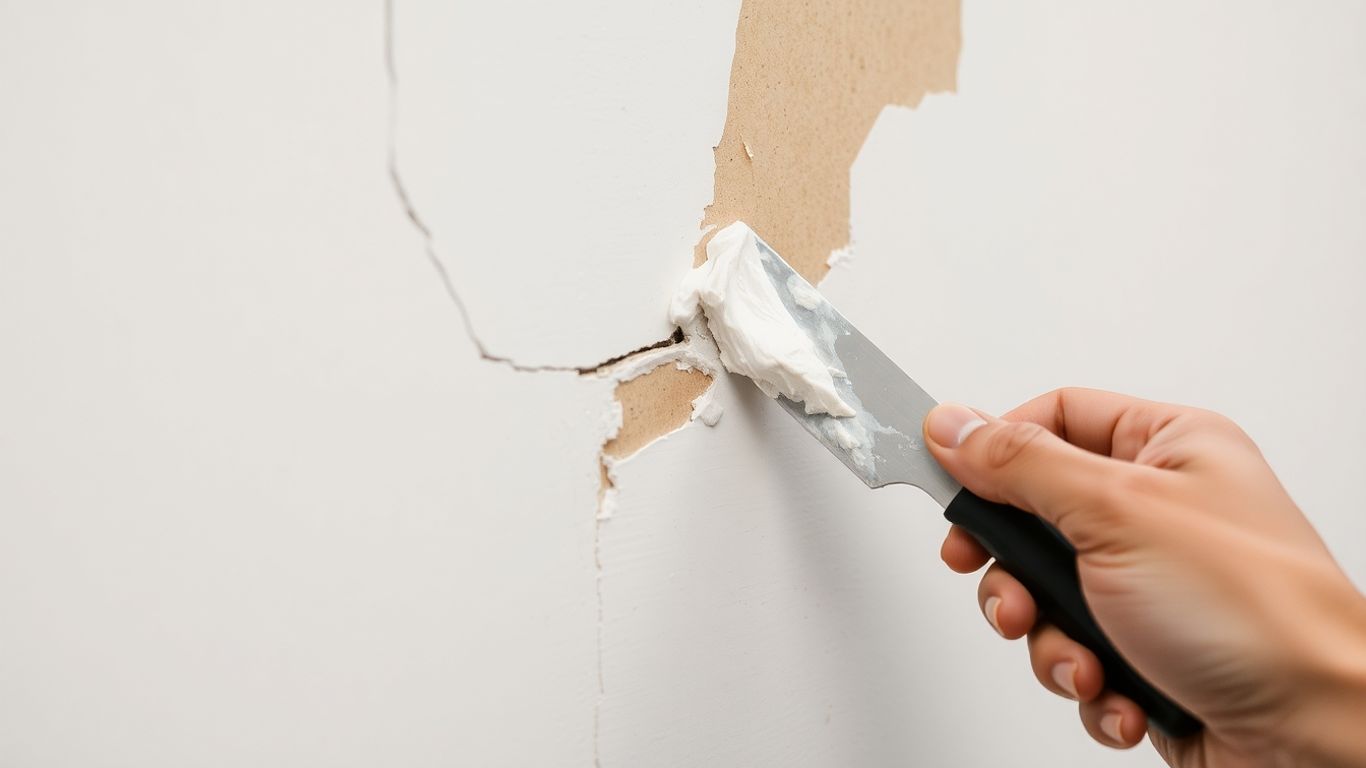
Patching Hairline Cracks
Hairline cracks are often caused by the house settling or minor shifts in temperature. They're usually not a big deal, but they can be annoying to look at, especially after you paint. To fix them, you'll want to use joint compound. First, clean out the crack a bit with a putty knife to remove any loose bits. Then, apply a thin layer of joint compound directly into the crack, feathering the edges out onto the wall. Let it dry completely. You'll likely need a second, maybe even a third, thin coat to get it perfectly smooth and level with the wall. Sand it gently after each coat dries. For cracks that seem a bit wider or you're worried might come back, you can embed a strip of drywall tape (either paper or mesh) into the first layer of joint compound before applying subsequent coats. This adds strength and helps prevent the crack from reappearing.
Remember, the goal with these DIY fixes is to make the repair blend in. Take your time with the sanding and applying the joint compound in thin, even layers. It might take a couple of tries to get it just right, but the result is worth it.
Addressing More Significant Drywall Problems
Sometimes, drywall damage goes beyond a simple nail pop or a tiny ding. We're talking about holes that are more than just a little dent, or sections of the wall that have taken a serious beating from water. These bigger issues need a bit more attention, but don't worry, they're usually still manageable without calling in the cavalry.
Repairing Medium to Large Holes
When a doorknob meets a wall a little too hard, or something heavier than expected takes a tumble, you can end up with a hole that’s too big for a simple patch. For holes roughly between 4 inches and 12 inches across, you'll want to use a drywall patch kit or cut a new piece of drywall to fit. First, clean up the edges of the hole, making sure any loose bits are gone. Then, you'll typically cut a piece of drywall slightly larger than the hole, or use a self-adhesive patch. This new piece or patch gets secured over the damaged area. After that, it's all about layering joint compound, feathering it out beyond the patch, and letting each layer dry before adding the next. Sanding between coats is key to getting a smooth surface.
Tackling Water-Damaged Sections
Water is drywall's arch-nemesis. If you've got a leak that's soaked a section of your wall, you'll notice it looks discolored, might feel soft or spongy, and could even be bulging. Ignoring water damage is a bad idea because it can lead to mold and weaken the wall structure. The first step is always to fix the leak itself. Once that's sorted, you need to let the area dry out completely. If the damage is minor and the drywall is just stained but still firm, you might be able to get away with cleaning it, priming it with a stain-blocking primer, and then repainting. However, if the drywall is soft, crumbly, or shows signs of mold, you'll need to cut out the damaged section and replace it with new drywall. This is often a good time to check the studs behind the drywall for rot too.
Restoring Bulging Seams
Bulging seams usually happen where two pieces of drywall meet. This can occur if the tape used to cover the seam has come loose, or if the drywall itself has absorbed moisture and expanded. Sometimes, the screws holding the drywall up can also loosen, causing a sag. To fix a bulging seam, you might need to carefully cut out the old joint compound and tape, re-secure the drywall with screws if needed, apply new drywall tape (paper tape is often best for seams), and then apply multiple thin coats of joint compound, feathering them out. Sanding between coats is important here too, just like with patching holes. Getting the compound smooth and level with the surrounding wall is the goal.
Dealing with larger drywall issues requires patience. Rushing the drying time of joint compound or not feathering the edges properly will just make the repair more obvious once you paint. It's better to take your time and do it right the first time.
When to Seek Professional Drywall Repair
Look, sometimes you can patch up a small ding or a tiny crack yourself. It feels good, right? Like you've conquered something. But let's be real, not every drywall issue is a weekend warrior project. There comes a point where trying to fix it yourself might actually make things worse, costing you more time and money in the long run. Knowing when to call in the pros is a sign of smart homeownership.
Recognizing Extensive Damage
If you're looking at a wall that seems to be crumbling, or if you've got a hole bigger than your fist, it's probably time to step away from the spackle. Large holes, especially those that go all the way through the wall, need more than just a quick patch. Professionals have the tools and techniques to cut out the damaged section cleanly, install new drywall, and blend it in so you can't even tell it was ever there. This isn't just about looks; it's about making sure the repair is solid.
Identifying Underlying Structural Issues
Sometimes, drywall problems are just symptoms of bigger things going on. Are those cracks getting wider over time? Does the wall feel soft or spongy in places? These could be signs of water damage that's gotten deep into the wall cavity, or even issues with your home's structure. Trying to patch over these problems without addressing the root cause is like putting a band-aid on a broken bone. A professional can help figure out what's really going on behind the scenes.
Achieving Seamless Finishes
Let's face it, getting a perfectly smooth, paint-ready finish on drywall can be tricky. Professionals have the knack for applying joint compound, sanding it just right, and matching textures so the repaired area looks like it was always part of the original wall. If you're aiming for that flawless look, especially in a high-visibility area, hiring someone with experience is often the best bet. They can save you the frustration of a repair that just doesn't look quite right.
Here's a quick rundown of when to seriously consider calling a pro:
- Large Holes: Anything bigger than a dinner plate usually calls for professional attention.
- Extensive Water Damage: If a leak has soaked a large area or if you've had multiple leaks, it's best to get an expert opinion.
- Visible Mold: If you see mold, it's a health hazard and needs to be dealt with properly by professionals.
- Structural Cracks: Cracks that are wide, jagged, or seem to be growing are a red flag.
- Ceiling Damage: Ceiling repairs are often more complex and riskier due to gravity and potential water issues from above.
When you're weighing the options, think about the time you'll spend, the tools you'll need to buy, and the potential for making a mistake. Sometimes, the cost of hiring a professional is well worth the peace of mind and the guarantee of a job done right.
Preparing Walls for a Flawless Finish
The Importance of Proper Repairs Before Painting
So, you've patched up those holes, smoothed out the cracks, and maybe even tackled some water-damaged sections. That's great! But before you even think about grabbing that paint roller, there's a really important step: making sure the repairs are totally ready for paint. If you skip this, all your hard work could end up looking worse once the new color goes on. Think of it like this: you wouldn't paint over a bumpy, uneven surface on furniture and expect it to look good, right? Walls are the same way. Getting the prep work right is what makes the difference between a repair that blends in and one that screams 'I was fixed!'
Essential Steps After Drywall Repair
After your joint compound has dried completely – and I mean completely dry, not just mostly dry – it's time for the magic touch: sanding. You want to get that patched area as smooth as the rest of the wall. A fine-grit sanding block works wonders here. The goal is to eliminate any bumps or ridges left from the compound. Once you've sanded it smooth, wipe away all that dust. Seriously, get it all off. A clean surface is key.
- Sanding: Use a fine-grit sandpaper or sanding block. Work gently over the repaired area until it feels flush with the surrounding wall. Don't over-sand, though!
- Cleaning: Wipe down the sanded area with a slightly damp cloth or a tack cloth to remove all dust particles. Dust left behind can mess up your paint job.
- Inspection: Take a good look. Does it feel smooth? Are there any low spots or high spots? Sometimes a second, thin coat of compound is needed, followed by more sanding and cleaning.
Priming for Optimal Paint Adhesion
Now, about priming. This step is non-negotiable. Primer does a couple of really important things. First, it seals the repaired area. Drywall compound and new drywall paper soak up paint differently than old, painted drywall. Primer evens this out, so you don't end up with shiny spots or dull patches where the paint absorbed too much. Second, it helps your paint stick better. This means fewer coats of paint might be needed, and the paint job will last longer without peeling or bubbling.
Skipping primer after drywall repair is a common mistake. It might seem like an extra step, but it's what prevents those patched areas from showing through your paint later on, especially when the light hits the wall just right. It's the secret to making repairs truly disappear.
When you're choosing a primer, look for one that's good for drywall repairs. Some are specifically designed to cover patches and stains. Apply it evenly, just like you would paint. Let it dry completely according to the manufacturer's instructions. Once the primer is dry, give the wall one last light sanding if needed, clean it again, and then you're ready for paint. This careful process, from repair to sanding to priming, is what gives you that beautiful, flawless finish you're aiming for.
Getting your walls ready is super important for a great paint job. Think of it like prepping a canvas before you paint a picture. We'll show you how to clean, fix any holes, and make sure the surface is smooth. This step makes a huge difference in how the final paint looks. Want to learn more about making your walls perfect? Visit our website today!
Wrapping It Up: Keeping Your Walls Looking Great
So, we've gone over a bunch of drywall issues, from those annoying little cracks to bigger problems caused by leaks or accidents. Remember, most of these things aren't the end of the world. With the right approach, you can totally fix them up yourself and make your walls look good as new. Just take your time, use the right materials, and don't be afraid to sand things down until they're smooth. If you run into something that seems too big or complicated, like major water damage or cracks that just keep coming back, it's always okay to call in someone who does this for a living. They've got the tools and the know-how to get it done right. Either way, tackling these drywall repairs yourself or hiring help means you'll end up with walls you're happy with, ready for a fresh coat of paint or just looking great on their own.
Frequently Asked Questions
What are the most common reasons drywall gets damaged?
Drywall can get damaged in a few main ways. Sometimes, the house settling or changes in temperature can cause cracks to appear, especially near doors and windows. Accidents, like bumping into walls with furniture or doors, can create holes and dents. Water leaks from pipes, roofs, or even condensation can cause stains, make the drywall soft, or lead to bulging.
How can I tell if a drywall problem is serious or just minor?
Minor issues are usually small holes, shallow dents, or hairline cracks that don't seem to be getting bigger. You can often fix these yourself. Serious problems include large holes (bigger than a dinner plate), widespread water stains, soft or crumbly drywall, or cracks that are getting wider over time. These could mean there's a bigger issue like a leak inside the wall or a problem with the house's structure.
Can I fix small holes and cracks in my drywall myself?
Yes, for small holes, like those from nails or screws, you can use spackling paste or joint compound. Just fill the hole, let it dry, and sand it smooth. For hairline cracks, applying a thin layer of joint compound and sanding it down usually works well. For slightly larger cracks, using a piece of drywall tape over the crack before applying the compound can make the repair stronger.
What should I do if my drywall has water damage?
If you see water stains or the drywall feels soft, the first thing to do is find and fix the source of the leak. You can't just cover up water damage. You'll likely need to cut out the wet, damaged section of drywall and replace it with a new piece. Make sure the area dries out completely before you put in the new drywall and finish it up.
When is it better to hire a professional for drywall repair?
It's a good idea to call a pro if the damage is extensive, like a very large hole or widespread water damage. Also, if you see cracks that are getting bigger, it might mean there's a structural problem with your house that a professional needs to check. If you want a perfectly smooth finish, especially on textured walls, a professional can achieve that better than most DIYers.
Why is it important to repair drywall before painting?
Repairing drywall before painting is crucial for a good-looking finish. If you paint over cracks, holes, or bumps, they will still be visible, and the paint might even crack later. Proper repairs create a smooth, even surface, which helps the paint go on evenly and last longer. It makes your walls look clean and professional.


Comments
Post a Comment