Beyond Wall Patching: Unveiling the Secrets to a Flawless Paint Finish

Getting a paint job that looks like it came straight out of a magazine isn't just about picking a pretty color. There's a whole lot more that goes into it, and honestly, most of it happens before the paint even touches the wall. We're talking about the nitty-gritty prep work that painters use to get that super smooth, professional look. If you've ever wondered how they get those perfect lines and why your DIY paint job never quite measures up, stick around. We're going to break down the hidden steps behind a smooth paint job, from wall patching to the final flawless finish.
Key Takeaways
- Proper wall preparation, including cleaning, patching, and sanding, is the starting point for any great paint job.
- Using painter's tape and sealing its edges, often with caulk, is vital for achieving crisp, bleed-proof lines.
- Primer plays a big role in how well paint sticks and how vibrant the colors look, so choose the right one and apply it evenly.
- Advanced tricks like using a plastic bag for patching or a lid as a brush shield can make the job cleaner and easier.
- Paying attention to environmental factors like ventilation and temperature, along with using quality tools, makes a big difference in the final outcome.
Mastering Wall Preparation: The Foundation of a Flawless Finish
Alright, let's talk about getting your walls ready for paint. This part might not be the most exciting, but honestly, it's where the magic happens. If you skip this, you're basically asking for trouble later on. Think of it like building a house – you wouldn't start putting up walls without a solid foundation, right? Same idea here.
The Crucial Role of Surface Cleaning
Before you even think about patching or sanding, you've got to clean those walls. Seriously. It sounds simple, but dirt, grease, and even just dust can really mess with how your paint sticks. You might not even see it, but it's there. Grab a sponge, some mild soap, and water, and give your walls a good wipe-down. Rinse well so you don't leave any soap residue behind. This step is super important for making sure your new paint actually sticks and looks good.
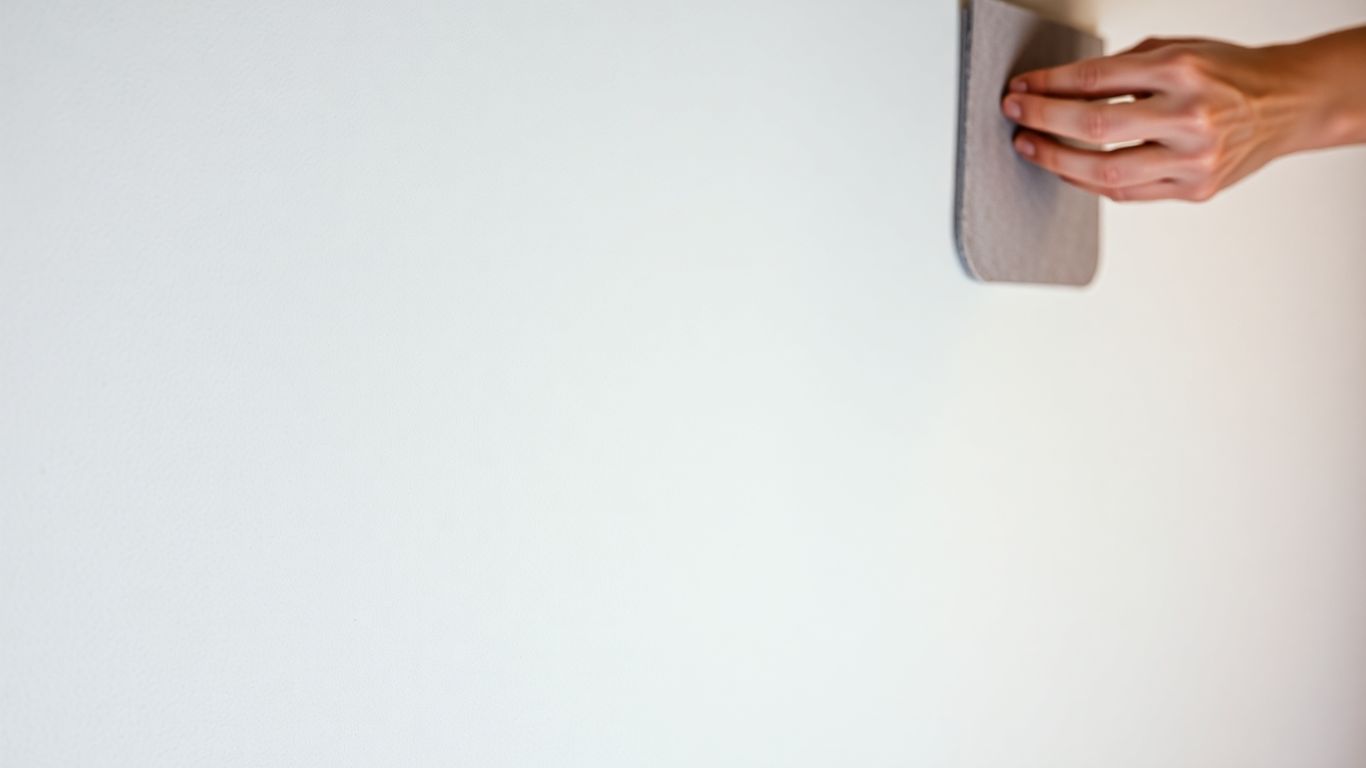
Achieving a Smooth Canvas Through Patching and Repair
Now for the fun part – fixing all those little dings and dents. Look closely at your walls. See those tiny holes from nails? Or maybe a small crack from the house settling? You'll want to fill those in. A bit of spackle or joint compound works wonders. Apply it with a putty knife, making sure it's smooth and level with the wall. You might need a couple of thin coats, letting each one dry completely. Don't rush this; patience pays off here.
Sanding for Optimal Paint Adhesion
Once your patches are dry, it's time to sand. This is what really makes the surface smooth and ready for paint. Use a fine-grit sandpaper – something like 120 or 150 grit is usually good. You're not trying to take off a lot of material, just knock down any bumps from the patching and create a slightly rough surface. This roughness gives the primer and paint something to grip onto. After sanding, wipe down the walls again with a damp cloth or a tack cloth to get rid of all the dust. You want a clean, smooth surface, free of any grit.
Skipping any of these prep steps is like trying to run a marathon without stretching. You might get started, but you're going to feel it later, and the results won't be as good as they could have been.
Here's a quick rundown of what you're aiming for:
- Clean Surface: No dirt, grease, or grime.
- Smooth Patches: All holes and cracks filled and level.
- Dust-Free Walls: Thoroughly wiped down after sanding.
Getting this right means your paint job will look way better and last a lot longer. It's the secret sauce, really.
Elevating Edges: Achieving Crisp Lines and Protected Surfaces
The Art of Precision Taping
Getting those clean lines where walls meet trim, ceilings, or other colors is a big part of making a paint job look really good. It’s not just about slapping tape on; there’s a bit of skill involved. You want a tape that sticks well but doesn't pull off paint when you remove it. For most jobs, a good quality painter's tape, the kind that's blue or green, works fine. Press it down firmly, especially along the edge where you'll be painting. A putty knife or even your fingernail can help here. The goal is to make sure there are no gaps for paint to sneak under. It sounds simple, but taking your time with this step makes a huge difference later on.
Sealing Tape for Bleed-Proof Results
Even with the best tape and careful pressing, sometimes paint finds a way underneath, especially on textured walls. This is where a pro trick comes in handy. After you've applied your painter's tape, run a thin bead of clear, paintable acrylic latex caulk along the edge that meets the surface you're painting. Use a damp finger or a small brush to smooth it out. This caulk fills in any tiny gaps that the tape couldn't seal. Once it dries, it creates a solid barrier. When you paint, the paint sits on top of the caulk, not under the tape. This method is a game-changer for getting those super sharp, professional-looking lines without any fuzzy bleed-through. It’s a little extra work, but the results are worth it.
Protecting Hardware with Protective Barriers
When you're painting trim, doors, or anything with hardware like doorknobs, hinges, or light fixtures, you don't want to get paint on them. Masking them off with tape can be tricky and time-consuming, and sometimes paint still gets on them. A simple, old-school trick is to use petroleum jelly, like Vaseline. Apply a thin, even layer to the hardware you want to protect. Be careful not to get it on the surfaces you're painting. Paint as you normally would. If a little paint lands on the jelly, it won't stick. Once the paint is dry to the touch, you can easily wipe away the petroleum jelly, and the paint on top will come right off with it, leaving your hardware clean. It’s a quick way to protect those details.
This technique of sealing tape edges with caulk is particularly effective on surfaces that aren't perfectly smooth. Textured walls, for example, present many small crevices that standard tape can't fully cover. The caulk acts as a flexible filler, creating a continuous seal that paint cannot penetrate. It's a small step that prevents a common and frustrating painting mistake.
Here's a quick look at why these steps matter:
- Tape Application: Pressing tape down firmly creates a better seal and reduces the chance of paint seeping underneath.
- Caulk Sealant: Using caulk along tape edges fills microscopic gaps, acting as a dam against paint bleed.
- Hardware Protection: Petroleum jelly offers a simple, effective barrier against accidental paint splatters on metal or plastic fixtures.
The Power of Primer: Enhancing Color and Durability
You know, sometimes I look at a freshly painted wall and think, "Wow, that color just pops!" And then I remember that it wasn't just the paint itself, but what went on before the paint. That's where primer comes in, and honestly, it's a total game-changer. It’s like the unsung hero of a good paint job.
Understanding Primer's Role in Paint Adhesion
So, why bother with primer? Think of your wall as a surface that might have tiny little pores or might be a bit slick. Paint needs something to grab onto, right? Primer creates that perfect sticky surface. It's the foundation that helps your top coat stick properly, preventing peeling and chipping down the road. Without it, especially on tricky surfaces or when you're going from a dark color to a light one, you might end up needing way more coats of paint than you planned. This is where primer plays a crucial role in making sure your paint job lasts.
Selecting the Right Primer for Your Walls
Not all primers are created equal, and picking the wrong one can be a bummer. You've got different types for different jobs:
- Latex or Water-Based Primers: These are great for general use on drywall, plaster, and previously painted surfaces. They dry fast and clean up easily with soap and water.
- Oil-Based or Alkyd Primers: These are tougher. They're really good at blocking stains (like water marks or crayon scribbles) and sealing in odors. They work well on wood, metal, and even glossy surfaces, but they take longer to dry and require mineral spirits for cleanup.
- Specialty Primers: Need to cover dark colors, seal in smoke damage, or paint over slick surfaces like tile or laminate? There are specific primers for that, too.
Choosing the right primer is about matching its properties to your wall's needs and the type of paint you'll be using on top. It's a small step that makes a big difference in the final look and how long it stays looking good.
Applying Primer for Uniform Coverage
Once you've picked your primer, applying it is pretty straightforward, but there are a few things to keep in mind. You want to get an even coat everywhere. Use a roller for the main wall areas and a brush for the edges and corners, just like you would with paint. Pay extra attention to any areas you patched or repaired, as these spots often soak up primer differently. Let it dry completely according to the manufacturer's instructions before you even think about putting on your paint. This waiting period is important for the primer to do its job effectively. A good primer coat means your final paint color will look truer and more vibrant, and you might even save yourself a coat of paint, which is always a win.
Advanced Techniques for a Professional Touch
So, you've prepped, primed, and you're ready to lay down some color. But how do you get that really polished look, the kind that makes people ask if you hired someone? It's all about a few smart tricks that pros use. These aren't super complicated, just clever ways to avoid common headaches.
The No-Mess Patching Method
Forget about dust clouds when you need to fill a small hole or crack. You can actually mix your patching compound right in a plastic bag. Just snip a corner off a sturdy zip-top bag, put your spackle or joint compound inside, and then use that snipped corner like a piping bag to apply the filler precisely where you need it. It keeps things way cleaner, and you use just the right amount.
- Mix in a bag: Use a heavy-duty zip-top bag.
- Snip a corner: Cut off a small piece of one corner.
- Pipe it on: Squeeze the compound directly into the imperfection.
- Smooth and clean: Wipe away excess and let it dry.
This method is a game-changer for small repairs, especially in rooms where you don't want dust everywhere, like a finished basement or a bedroom.
De-Linting Rollers for a Fuzz-Free Finish
Ever notice tiny little fibers stuck to your freshly painted wall after using a new roller? That's because new rollers often shed. Before you even dip your roller in paint, give it a quick once-over. The easiest way? Grab some packing tape. Wrap it around your hand, sticky side out, and press it all over the new roller cover. This picks up any loose fuzz. Alternatively, you can just roll the dry roller over a clean floor a few times. This simple step prevents those annoying little specks from ruining your smooth finish.
DIY Brush Shields for Overhead Painting
Painting a ceiling or the top of a wall can be tricky. You want to keep your lines clean, but drips are a real possibility. For those tight spots where a steady hand is needed, you can make a quick brush shield. Take a piece of cardboard or even a plastic lid. Cut a slit in the middle, just wide enough to fit your brush handle through. When you load your brush with paint, slide the shield down the handle. It acts as a barrier, catching any stray drips before they land on your clean surfaces below.
| Tool Modified | Purpose |
|---|---|
| Roller | Remove loose fibers |
| Brush | Catch drips during overhead work |
| Cardboard/Lid | Create a shield for brushes |
Optimizing Conditions for Superior Paint Application
You know, painting isn't just about slapping color on a wall. The environment you're painting in makes a huge difference, and honestly, I learned that the hard way. My first attempt at painting my living room happened during a heatwave, and the paint just wouldn't dry right. It was sticky for days! Pros know that timing and conditions are everything.
The Importance of Proper Ventilation
Good airflow is super important, especially when you're using paints that have fumes. It helps the paint dry evenly and keeps the air in your home from getting too thick with paint smells. Plus, it's just healthier for you while you're working. You don't want to feel lightheaded halfway through cutting in the ceiling, right?
- Open windows and doors on opposite sides of the room for cross-breeze.
- Use fans to push stale air out and pull fresh air in.
- Consider air purifiers if you're sensitive to smells or working with strong-smelling paints.
Proper ventilation isn't just about comfort; it's a safety measure. It helps dissipate volatile organic compounds (VOCs) released by many paints, reducing potential health risks and improving the overall drying process.
Timing Your Paint Job for Ideal Results
When you paint really matters. Trying to paint when it's super humid or freezing outside is just asking for trouble. The paint won't stick or dry properly, and you'll end up with a finish that looks bad and doesn't last.
- Ideal Interior Temperatures: Aim for 65-75°F (18-24°C) with moderate humidity.
- Avoid High Humidity: Days with high moisture can make paint dry slowly and unevenly, leading to drips and poor adhesion.
- Exterior Considerations: For outside jobs, check the paint can for specific temperature ranges, but generally, avoid painting in direct, hot sun or when rain is expected.
Understanding Surface Specifics for Tailored Approaches
Different surfaces need different treatment. You wouldn't paint a metal door the same way you'd paint a plaster wall, would you? Knowing what your surface is made of helps you pick the right paint and prep it correctly.
- Wood: Might need priming to block stains and sanding for smoothness.
- Drywall: Usually straightforward, but needs a good primer for even color.
- Masonry (Brick/Stucco): Requires breathable paints and specific primers to handle moisture.
- Metal: Needs rust-inhibiting primers and paints that can handle expansion and contraction.
Choosing the Right Tools and Materials
Picking the right stuff for painting isn't just about grabbing the cheapest can off the shelf. It really makes a difference in how the final job looks and how long it lasts. Think of it like cooking – you wouldn't use a dull knife for fine chopping, right? Painting is similar.
Selecting High-Grade Paints for Longevity
When you're looking at paint, you'll see a huge range of prices. The cheaper ones might seem like a good deal, but they often have less pigment and weaker binders. This means the color might not be as rich, it might fade faster, and it won't hold up as well to scrubbing or general wear and tear. Higher quality paints, on the other hand, have more of the good stuff in them. They go on smoother, cover better with fewer coats, and resist things like stains and moisture much better. For walls that need to look good for years, especially in busy areas or places with lots of light, spending a bit more on a good paint is usually worth it.
Expert Use of Rollers and Brushes
It's not just about the paint itself, but how you put it on. The tools you use matter a lot.
- Rollers: For large wall areas, a good roller cover is key. Different naps (the thickness of the fuzzy part) are for different surfaces. A shorter nap is good for smooth walls, while a thicker nap works better on textured surfaces. Always de-lint new rollers before you use them – just give them a quick wipe with a damp cloth or even some packing tape to pick up any loose fibers. Nobody wants little fuzz balls stuck in their paint.
- Brushes: For trim, corners, and cutting in edges, you need a good brush. An angled sash brush is a favorite for a reason; the angle helps you get nice, straight lines. If you find your brush is a bit too wide for a tight spot, you can actually modify it. Wrap some painter's tape tightly around the bristles, starting a few inches from the metal band and going towards the tip. This makes the brush narrower and stiffer, perfect for detailed work. Just peel the tape off when you're done.
- Other Tools: Don't forget things like roller trays, extension poles for reaching high spots, and drop cloths to protect your floors and furniture. Good quality tools make the job easier and the results better.
The Value of Professional Painting Services
Sometimes, even with the best tools and paint, you might not get the finish you're hoping for. That's where hiring professionals comes in. They have the experience to know exactly which paint is best for your specific walls and climate, and they've got the knack for applying it perfectly. They also know how to handle tricky situations, like painting in humid weather or dealing with old, uneven surfaces. While it costs more upfront, a professional job can save you time, hassle, and the cost of fixing mistakes later on. They often have access to paints and techniques that aren't readily available to the average DIYer, leading to a finish that truly lasts.
Picking the right stuff for your project is super important. Think about what you need and what will last the longest. We can help you figure out the best options for your painting or repair job. Visit our website to see all the choices available!
Bringing It All Together
So there you have it. Painting isn't just about slapping color on a wall. It's about taking the time to get things ready, fixing those little nicks and cracks, and paying attention to the small stuff like taping edges just right. These pro tricks, like using caulk for super-sharp lines or that simple bag trick for patching, aren't really that complicated. They just make a big difference in how the final job looks. By putting in a little extra effort upfront, you can skip the frustration and end up with walls that look like they were done by someone who really knows their stuff. It’s about making your space look its best, and honestly, it feels pretty good when you nail it.
Frequently Asked Questions
Why is cleaning the walls so important before painting?
Think of it like washing your hands before you eat. If your walls have dirt, grease, or dust on them, the new paint won't stick well. This can lead to paint peeling or looking uneven. A good wash makes sure the paint sticks tight and looks great.
What's the best way to fix small holes or cracks in the wall?
You can use something called spackle or putty to fill in those little bumps and cracks. After it dries, gently sand it down until the wall feels super smooth. This makes sure the paint goes on evenly and hides any old damage.
Why should I use primer before painting?
Primer is like a special coat that helps your main paint color look its best. It makes the color brighter and helps the paint stick better, especially if you're painting over a dark color or a patched spot. It also helps your paint job last longer.
How can I get really straight lines when painting near trim or ceilings?
Painter's tape is your best friend here! Press it down firmly along the edges where you don't want paint. For super-sharp lines that don't let any paint sneak under, some pros even use a tiny bit of clear caulk along the tape's edge before painting.
Does the weather really matter when I'm painting?
Yes, it really does! Painting when it's too hot, too cold, or too humid can make the paint dry weirdly. This can cause problems like bubbles or a finish that doesn't last. It's best to paint when the temperature is mild and the air isn't too damp.
What's the secret to a smooth, fuzz-free paint roller finish?
New paint rollers can sometimes leave little fuzzy bits on your wall. Before you use a new roller, wrap it with packing tape and then peel the tape off. This removes any loose fuzz, so you get a nice, smooth coat of paint instead of a fuzzy one.


Comments
Post a Comment