Beyond Holes: Uncovering Strange Drywall Damage Professionals Can Fix
When you think about drywall damage, you probably picture a hole punched through the wall, right? It's the most common type of drywall problem. But what if I told you there are other, stranger issues that can mess up your walls? Things like moisture warping the material or seams that just won't lay flat. These aren't always obvious problems, and they can make your home look less than perfect. Luckily, professionals can fix these kinds of drywall damage too, even if they're not simple holes. Let's talk about some of the weird drywall problems you might not know can be fixed.
Key Takeaways
- Moisture, not just impacts, can weaken drywall over time, especially if humidity is consistently too high.
- Professionals can create clean, precisely sized patches for a nearly invisible repair.
- Structural support, sometimes using extra wood backing, is important for secure drywall patches.
- Proper drywall seam installation avoids bumps and ensures trim and fixtures fit correctly.
- Drywall plays a role in fire safety, and correct installation methods contribute to fire resistance.
Beyond Impact: Addressing Unexpected Drywall Weaknesses
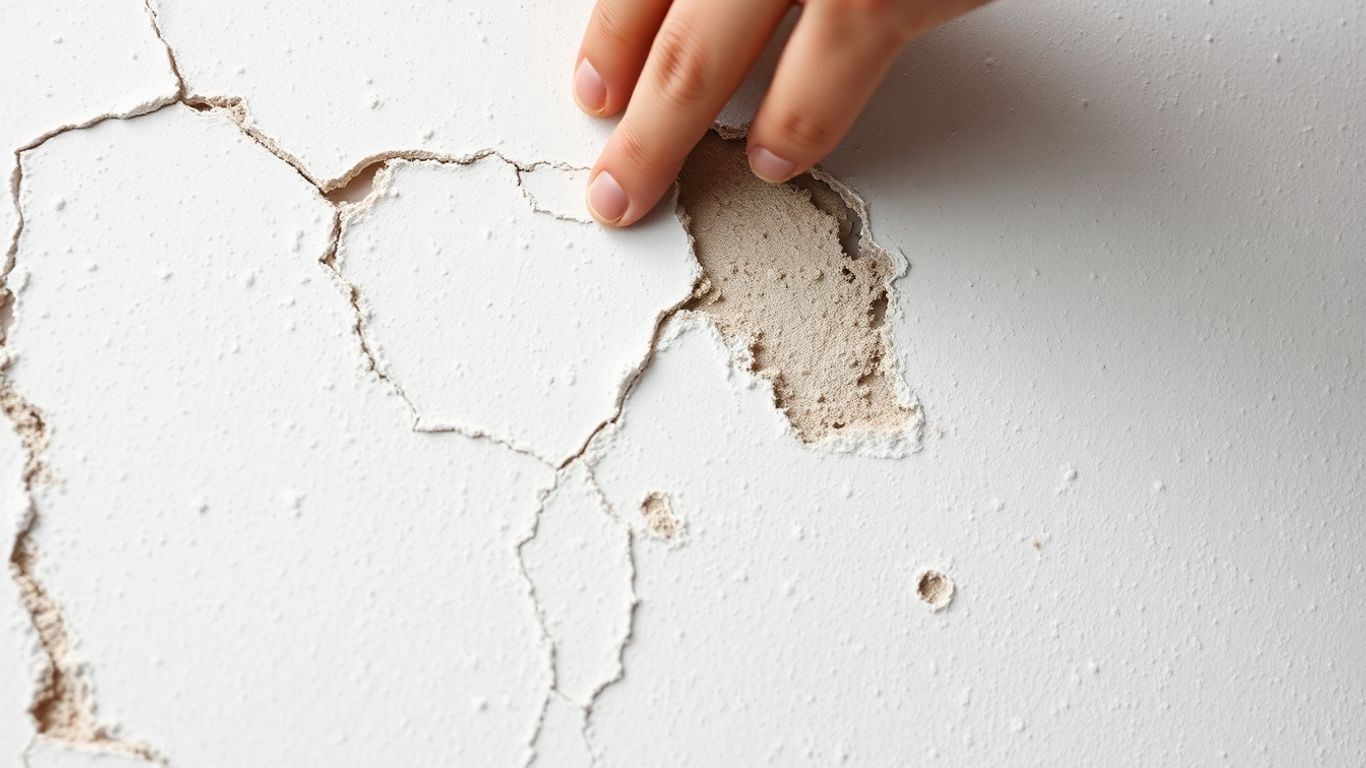
When we think about drywall damage, most of us picture a fist-sized hole from a rogue basketball or a door handle gone wild. But drywall can weaken and fail in ways that aren't so obvious. It's not always about a direct hit; sometimes, it's a slow, creeping problem that compromises the integrity of your walls. Professionals know how to spot and fix these less common issues.
Moisture's Subtle Erosion of Drywall Integrity
Water is a drywall's worst enemy, and not just from a burst pipe. Even small, persistent leaks from plumbing, a poorly sealed window, or condensation can slowly soak into the drywall. Over time, this moisture breaks down the paper facing and the gypsum core. The material can become soft, crumbly, and lose its structural strength. You might notice discoloration, a musty smell, or even a slight sag in the wall or ceiling. Ignoring these signs can lead to much larger problems down the line, including mold growth and structural damage.
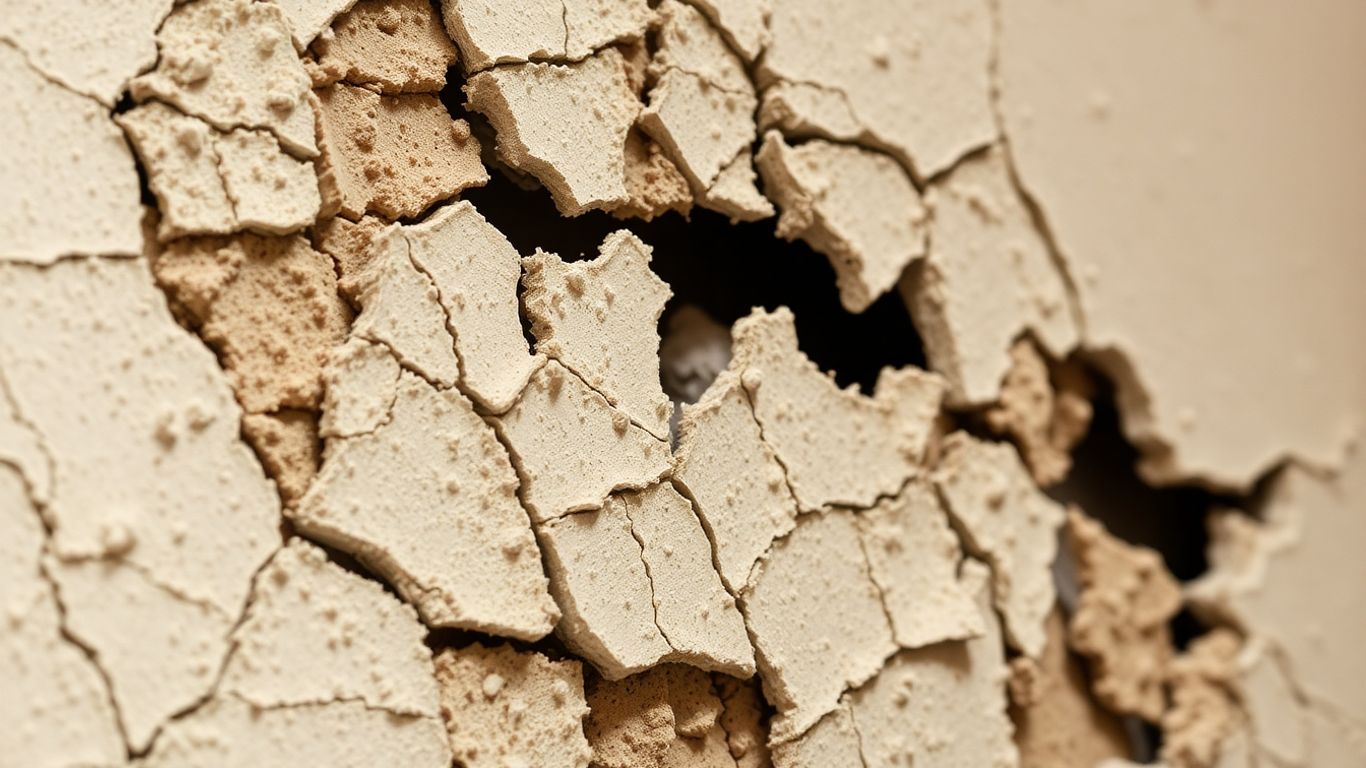
The Hidden Dangers of High Humidity Levels
It's not just direct water contact that's the issue. Consistently high humidity in your home, often found in bathrooms, kitchens, or basements, can also take a toll. When the air is constantly damp, the drywall absorbs that moisture. This can cause:
- Swelling: The gypsum core expands slightly, which can lead to cracks or buckling.
- Weakening: Similar to direct moisture, prolonged humidity makes the material less sturdy.
- Paint Peeling: The moisture can get behind the paint, causing it to bubble and peel away.
While it might not look like a gaping hole, this constant exposure to moisture weakens the drywall, making it more susceptible to other types of damage. If you're dealing with persistent dampness, it's worth looking into drywall repair contractors to assess the situation.
When Drywall Becomes Compromised
Sometimes, drywall can become compromised without any visible signs of impact or water damage. This can happen due to:
- Poor Installation: If drywall wasn't hung correctly, with insufficient support or improper joint treatment, it can start to sag or crack over time.
- Settling of the House: As buildings age, they naturally settle. This movement can put stress on drywall seams, leading to cracks.
- Pest Infestations: In rare cases, pests like termites can damage the structural integrity of the drywall paper.
These issues require a professional eye to diagnose. They can assess the extent of the compromise and determine the best course of action, which might involve reinforcing the area or replacing sections of the wall. It's about more than just patching a hole; it's about restoring the wall's original strength and stability.
Professionals have the tools and knowledge to identify the root cause of drywall weakness, not just the symptom. This prevents recurring issues and ensures a lasting repair.
The Art of the Drywall Patch: Precision Beyond Simple Holes
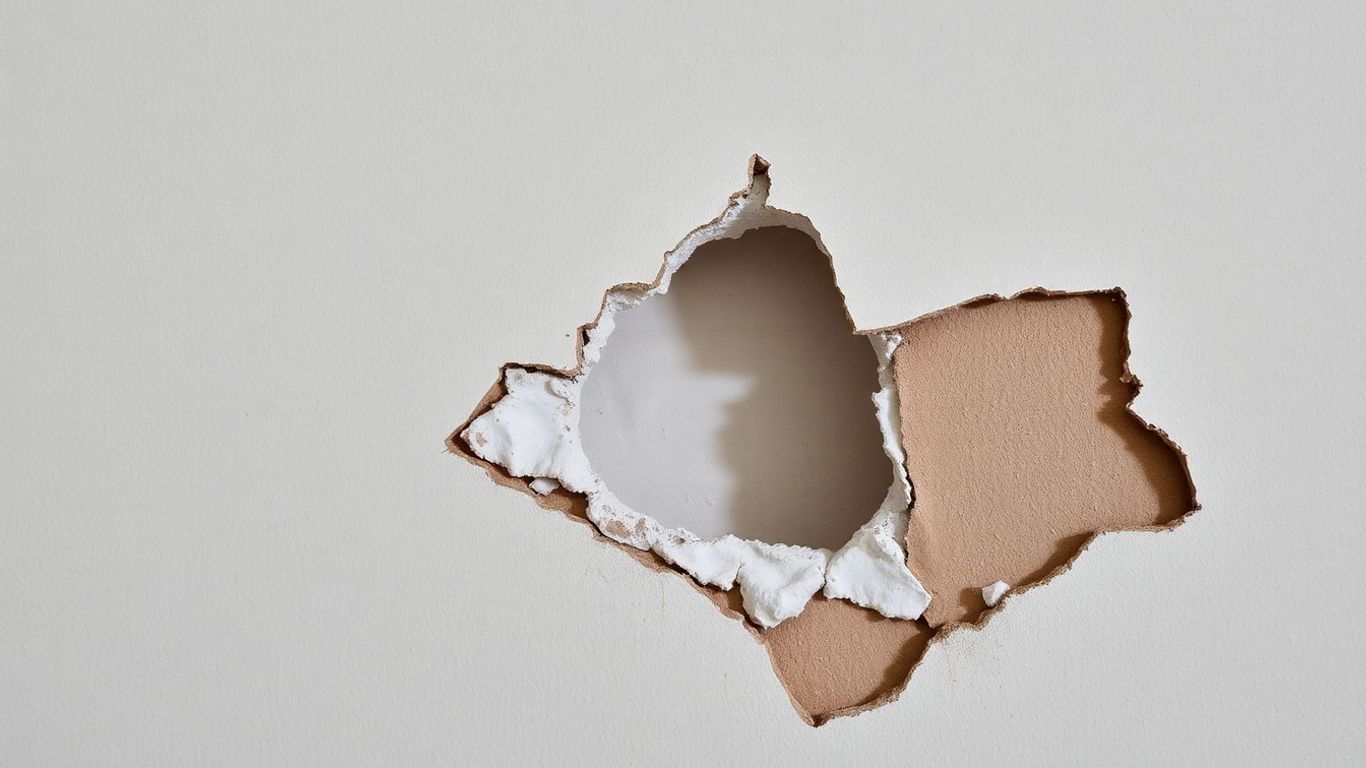
When drywall gets damaged, it's not always a clean hole. Sometimes, it's more like a tear, a dent that's pushed in, or even a section that's started to crumble. Fixing these isn't as simple as just slapping some spackle on it. Professionals know that the way you cut out the damaged part and prepare the area makes a huge difference in how the final patch looks and holds up.
Creating Clean Edges for Seamless Repairs
Getting a good patch starts with a clean cut. If you just try to smooth over jagged edges, the repair will always show. Pros use sharp utility knives or even oscillating tools to cut out the damaged section into a neat square or rectangle. This gives them a solid, straight edge to work with. It might seem like extra work, but this clean edge is the foundation for a repair that you won't even notice later.
The Importance of Perfectly Sized Patches
Cutting out the bad stuff is only half the battle. The new piece of drywall you put in needs to fit just right. Too big, and you'll have to force it, which can cause more damage. Too small, and you'll have a gap that's hard to fill without making a mess. Professionals measure carefully to get a piece that slides in easily but doesn't wiggle around. It's like fitting puzzle pieces – precision matters.
Achieving a Flawless Finish with Spackle and Paint
Once the new piece is in and secured, the real artistry begins. This involves taping the seams and applying multiple thin layers of joint compound, often called
Structural Solutions for Drywall Instability
Sometimes, drywall isn't just about filling a hole. You might notice your walls feeling a bit… soft, or maybe a section just doesn't feel solid anymore. This can happen for a few reasons, and it's not always about a direct impact. When the studs behind the drywall aren't perfectly placed, or if the drywall itself has weakened over time, you need more than just a simple patch. Professionals have ways to add support where it's needed, making sure your walls are sturdy.
Reinforcing Drywall When Studs Aren't Ideal
It's not uncommon for drywall to be installed where the framing isn't perfectly straight or where there are gaps. If you're trying to repair a section and the existing studs are off-kilter or too far apart, you can't just screw a new piece of drywall directly into them. This is where adding extra support comes in. Pros might use a thin piece of wood, like a furring strip, and screw it to the existing stud. This creates a new, solid surface to attach the drywall to. It's like giving the drywall something new to grab onto, making the repair much stronger.
Adding Backing for Secure Patch Installation
When you have a larger hole or a section that's lost its rigidity, you need something behind the drywall to hold the patch in place. This is often called adding backing. A common method is to cut a piece of wood, maybe a 1x4, and slide it behind the existing drywall. You screw through the drywall into this wood piece, securing it firmly. Then, the new drywall patch can be screwed into this added backing, creating a really solid connection. It's a bit like building a small internal frame just for your patch.
The Role of Wood Support in Drywall Repair
Wood support is pretty much the backbone of many drywall repairs, especially when the original framing is less than perfect. Think about it: drywall itself isn't super strong on its own. It needs something solid to attach to. When studs are missing, damaged, or just not in the right spot, adding wood blocking or furring strips gives the repair the stability it needs. This isn't just about making the wall look good; it's about making it structurally sound. Without proper wood support, patches can sag, crack, or even come loose over time. Professionals know exactly where and how to add this support to make the repair last.
Here's a quick look at common backing materials:
- Wood Strips (1x3, 1x4): Versatile for adding support behind edges or creating a surface for screws.
- Plywood or OSB Scraps: Good for larger areas or when a wider backing surface is needed.
- Metal Furring Channels: Sometimes used in specific situations for a lighter-weight support system.
Sometimes, the simplest solutions are the most effective. Adding a bit of wood behind a weak spot might seem basic, but it makes a huge difference in how strong and long-lasting a drywall repair will be. It's all about giving the new material something solid to connect with.
Understanding Drywall Seam Challenges
Drywall seams, those lines where two panels meet, can be a real headache if not handled right. It's not just about covering them up; it's about making sure they don't cause problems down the road. Think of them as the weak points if they aren't done properly.
Avoiding Humpty Seams with Proper Installation
When drywall panels are installed horizontally, meaning they run across the wall studs instead of vertically, you often end up with what some folks call 'humpty seams.' This happens because the edges of the panels don't always sit perfectly flat against the framing. It's like trying to stack uneven blocks – you get gaps and bumps. These humps aren't just ugly; they make it tough to hang things like pictures or install trim. The covers for outlets and light switches might not sit flush either, which looks pretty sloppy. Professionals aim for flat, even seams by using vertical installation whenever possible, or by carefully preparing horizontal seams to minimize these issues.
Ensuring Supported Seams for Lasting Repairs
A seam that isn't properly supported is basically a crack waiting to happen. When drywall panels are installed, they need to be screwed into wall studs or other framing. If a seam falls between studs, it needs extra support. Sometimes, a piece of wood backing is added behind the seam to give the screws something solid to grip. Without this, the seam can flex and crack over time, especially if there's any movement in the house. This is where good prep work really pays off.
The Impact of Seams on Trim and Fixtures
Poorly done seams can really mess with how your trim, cabinets, and other wall fixtures look and fit. If a seam is bumpy or uneven, your baseboards or crown molding won't sit flat against the wall. This leaves gaps that collect dust and look unfinished. Similarly, if you're installing a shelf or a cabinet, an uneven seam underneath can make it look crooked. It's these little details that separate a professional job from a DIY disaster.
Drywall seams are more than just lines on a wall; they're critical points that affect the overall look and structural integrity of your wall. Proper installation and repair of these seams prevent future problems like cracks and make sure your finishes, like paint and trim, look their best.
Fire Safety and Drywall Installation
Drywall isn't just about making walls look smooth; it plays a surprisingly big role in how safe your home is, especially when it comes to fire. You might not think about it, but the way drywall is put up can actually affect how well it holds up if a fire breaks out. It's not just about slapping panels on the wall; there are specific ways to install it that make a real difference in protecting your family and property.
Drywall's Role in Fire Resistance
Think of drywall as a fire retardant layer for your home. The gypsum core inside drywall contains water in its chemical structure. When exposed to heat, this water turns into steam, which absorbs a lot of heat before it can spread. This process, called calcination, slows down the fire's progress. This built-in fire resistance is a key reason why drywall is a standard building material. Different types of drywall offer varying levels of protection, with some specifically designed for enhanced fire resistance. Choosing the right type for your home is a smart move for safety.
Achieving Actual Fire Ratings with Vertical Installation
When it comes to getting the most out of drywall's fire-fighting abilities, how you hang the panels matters. Professionals often talk about installing drywall vertically. This method is generally considered superior for achieving actual fire ratings. When installed vertically, the seams between the panels line up more effectively, creating a more continuous barrier. This continuity is important because it limits the pathways for fire and smoke to travel through the wall.
- Vertical installation helps create a more solid barrier against fire spread.
- It aligns seams in a way that is better for fire containment.
- This method is often required for commercial buildings to meet strict fire codes.
The Importance of Airtight Seams for Safety
Even with the best drywall and proper vertical installation, gaps or poorly sealed seams can be weak points. Fire and smoke can easily travel through these openings, reducing the protective time drywall provides. That's why proper taping and mudding of seams are so important. When done right, these steps create an airtight seal, significantly boosting the wall's ability to resist fire and smoke. This attention to detail is what professionals focus on to maximize the safety benefits of drywall. For more on how professionals handle repairs, you can check out professional drywall expertise.
Making sure your drywall is installed correctly, especially with an eye towards fire safety, is a job best left to those who know the ins and outs. It's not just about looks; it's about building a safer home.
Efficient Drywall Repair Processes
When you're dealing with drywall damage, especially those weird cracks or soft spots that aren't just simple holes, the repair process can seem a bit daunting. It's not just about slapping some mud on it and hoping for the best. Professionals have a whole system down to make sure the fix lasts and looks good. They know how to handle different types of damage, not just the obvious impacts.
Streamlining Taping and Mudding Techniques
Taping and mudding are the heart of any drywall repair. It's where the magic happens to make the patched area blend in. Professionals use specific techniques to apply joint compound, also known as mud, in thin, even layers. This isn't a one-and-done deal; each layer needs to dry completely before the next is applied. Sanding between layers is also key to getting a smooth surface. This meticulous layering and sanding process is what prevents visible seams and creates that smooth wall finish you expect. They're skilled at feathering the edges of the mud so it transitions naturally into the existing wall, making the repair almost invisible.
Choosing the Right Materials for Drywall Finishing
There's more to drywall finishing than just grabbing any old tub of spackle. Professionals know that different situations call for different materials. For instance, some repairs might need a specific type of joint compound that dries faster or is more durable. They also understand the importance of the right tape – paper tape or fiberglass mesh tape – and when to use each one. Using the correct materials means the repair won't crack or shrink later on, which is a common problem for DIY attempts. Getting the right primer and paint to match the existing wall is the final step to making the repair disappear. You can find a good overview of drywall repair steps to see what's involved.
The Benefits of Professional Drywall Expertise
Why hire a pro? Well, for starters, they've seen it all. They know how to deal with moisture damage that's weakened the drywall, or those odd structural issues that make patching tricky. They have the tools and the know-how to cut out damaged sections cleanly, install backing if needed, and apply patches that are perfectly sized. This saves you time and, honestly, a lot of frustration. Plus, they can often complete the job much faster than you could on your own, and the finish is usually much better. It's about getting a lasting repair that looks like the damage never happened in the first place.
Professionals approach drywall repair with a systematic process. They don't just fix the visible damage; they assess the underlying cause and use techniques and materials designed for a durable, seamless outcome. This attention to detail is what separates a quick fix from a proper repair.
Here's a quick look at what a professional process might involve:
- Assessment: Identifying the type and extent of damage.
- Preparation: Cleaning the area and cutting out damaged sections.
- Reinforcement: Adding backing or support if the area lacks structural integrity.
- Patching: Applying new drywall pieces and securing them.
- Finishing: Taping, mudding in multiple layers, sanding, priming, and painting.
Tackling drywall damage doesn't have to be a headache. Our methods make fixing holes and cracks quick and easy, leaving your walls looking smooth again. Want to learn more about how we get the job done right? Visit our website today for all the details on our efficient drywall repair services!
Don't Let Drywall Woes Get You Down
So, we've talked about how drywall can get messed up in ways you might not expect, way beyond just a simple hole. Things like water damage or even just weird cracks can really make a wall look rough. It's easy to think you can just slap some spackle on it and call it a day, but honestly, that usually doesn't end well. Trying to fix these kinds of issues yourself can sometimes make things look even worse, or the fix just won't last. That's where calling in the pros really makes a difference. They know how to handle all sorts of drywall problems, making sure the repair is solid and looks good. It's usually a pretty quick process for them, and you end up with walls that look like new again. So, if your drywall is looking a bit sad, don't stress too much – there are people who can sort it out for you.
Frequently Asked Questions
What kind of damage can happen to drywall besides holes?
Drywall can get damaged in ways you might not expect. For instance, too much moisture in your home, like from leaks or high humidity, can make the drywall weak and crumbly. Sometimes, even without a big impact, the material itself can start to break down, making it sag or become soft.
Why is it important to fix drywall damage quickly?
It's best to fix drywall problems right away. If you leave a hole or weak spot, it can get bigger over time. If the damage is in a busy area, it might get hit again. Also, moisture can make the problem much worse, leading to more costly repairs down the line.
What's the first step a professional takes to fix drywall?
Professionals usually start by carefully cutting out the damaged section. They'll make a clean, straight-edged shape, like a square or rectangle. This makes it easier to fit in a new piece of drywall perfectly.
How do professionals make patch repairs look seamless?
After putting in a new piece of drywall, pros use joint compound, often called 'mud,' to cover the seams. They apply it in thin layers, letting each one dry. They then smooth it down perfectly and paint over it so you can't tell where the repair was made.
Can drywall help with fire safety?
Yes, drywall plays a role in fire resistance. When installed correctly, especially vertically, it can slow down the spread of fire. Making sure the seams are sealed tightly helps keep fire and smoke from traveling through walls.
What's the benefit of hiring a professional for drywall repair?
Professionals have the tools and experience to do the job right. They know how to cut out damage cleanly, create perfectly fitting patches, and finish the repair so it looks smooth and blends in. They can also handle more complex issues, like reinforcing weak areas, ensuring a lasting and good-looking fix.


Comments
Post a Comment