How Paint Quality and Technique Impact Your Home’s Look: A Comprehensive Guide

Thinking about painting your home? It's a big job, but it can really change how your place looks. We're going to break down how choosing the right paint and using good techniques can make a huge difference. It's not just about slapping some color on the walls; it's about making your home look its best. Let's get into it.
Key Takeaways
- Picking the right type of paint and finish is important for how your home looks and how well the paint holds up.
- Getting the walls and surfaces ready before you paint is a big part of making sure the final job looks good and lasts.
- Using the correct painting methods, like how you hold your brush or use a roller, really affects the final appearance.
- Special areas like doors, windows, and cabinets need specific approaches to get a nice finish.
- Knowing when your painting project is too big or complicated for a DIY job and calling in someone who does it for a living is a smart move.
Choosing The Right Paint For Your Home
Picking the right paint is more than just grabbing a can off the shelf; it's the first big step toward making your home look its best. Think of it as the foundation for everything else you'll do. Getting this part right means your paint job will look good and last longer.
Understanding Different Types Of Paint
So, what's actually in those paint cans? Mostly, you'll run into two main types: water-based (like latex or acrylic) and oil-based. Water-based paints are generally easier to work with. They clean up with soap and water, dry pretty fast, and don't have that strong chemical smell. They're great for most walls and ceilings. Oil-based paints, on the other hand, tend to be tougher and give a smoother, harder finish, which is why they're often used for trim, doors, and cabinets. But, they take longer to dry, cleanup requires solvents, and the fumes can be pretty intense. There are also specialty paints out there, like ones that resist mold for bathrooms or ones that offer fire protection, but for most rooms, you'll stick with the basics.
The Role Of Color Schemes
Color is a huge deal, right? It totally changes how a room feels. A soft blue might make a bedroom feel calm, while a bright yellow could liven up a kitchen. It's not just about picking a color you like; it's about how it works with the rest of your stuff. Think about the furniture, the curtains, even the light coming in. A well-thought-out color scheme ties everything together. If you're unsure, start by looking at colors that complement your existing decor. You can also test out colors by painting small swatches on your walls to see how they look at different times of day. This helps avoid surprises later on.
Selecting The Right Finish
Paint finishes, often called sheens, affect both how the paint looks and how it performs. Here's a quick rundown:
- Flat/Matte: This finish has no shine at all. It's really good at hiding small bumps and imperfections on walls, making it a popular choice for living rooms and bedrooms. However, it can be a bit harder to clean if you get marks on it.
- Eggshell: It has a very slight sheen, like an eggshell. It's a bit more durable and easier to wipe down than flat paint, making it a good all-around choice for most walls.
- Satin: This finish has a bit more sheen than eggshell and is quite durable. It's a good option for areas that get a lot of traffic, like hallways or kids' rooms, because it cleans up well.
- Semi-Gloss: You'll notice a definite shine with semi-gloss. It's very durable and easy to clean, which is why it's often used for trim, doors, and cabinets. It can highlight imperfections, though, so good surface prep is key.
- Gloss/High-Gloss: This is the shiniest finish you can get. It's super durable and the easiest to clean, but it will show every single flaw on the surface. It's usually reserved for trim or decorative elements where you want a really striking look.
Choosing the right paint finish is about balancing looks with practicality. For high-traffic areas or surfaces that need frequent cleaning, a finish with more sheen is usually better. For walls where you want to hide minor flaws and create a softer look, a matte or eggshell finish is often the way to go.
When you're picking out paint, don't forget to check out brands known for quality, like Benjamin Moore or Sherwin-Williams. While they might cost a bit more upfront, the better coverage and durability often save you money and hassle in the long run. You can find some great paint options at places like Home Depot.
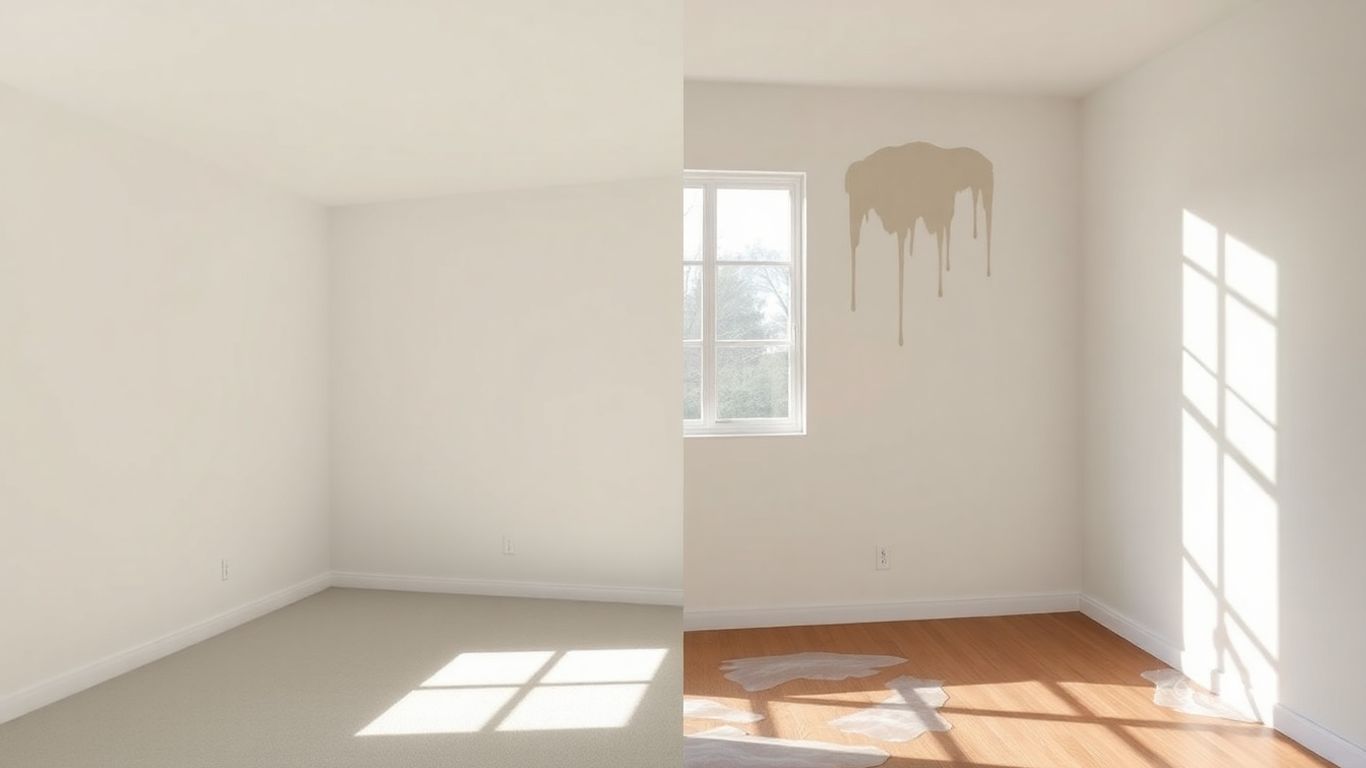
Essential Preparation For A Flawless Finish
Getting ready to paint is probably the least exciting part, but honestly, it’s where the magic really happens. Skipping these steps is like trying to bake a cake without preheating the oven – it just won't turn out right. A good paint job relies heavily on what you do before the brush even touches the wall.
Cleaning Surfaces Thoroughly
Think of cleaning your walls like washing your face before applying makeup. You wouldn't put foundation on a dirty face, right? Same idea here. Dust, grease, cobwebs, and any grime will stop your new paint from sticking properly. This can lead to peeling or an uneven look later on.
- Vacuum: Start by vacuuming walls and ceilings to get rid of loose dust and cobwebs. Don't forget corners!
- Wash: Use a mild detergent mixed with water. A sponge or a soft cloth works well. For tougher spots, like kitchen grease or bathroom soap scum, you might need a stronger cleaner, but always test in an inconspicuous area first.
- Rinse: After washing, wipe down the walls with a clean, damp cloth to remove any soap residue. This is important because leftover cleaner can also affect paint adhesion.
- Dry: Let everything dry completely. Painting over damp surfaces is a big no-no.
Repairing Wall Imperfections
Once the walls are clean and dry, it’s time to play detective and find all the little flaws. These are usually things like nail holes from pictures, small dings, or hairline cracks.
- Fill Holes: Use a putty knife to apply spackling compound to nail holes and small dents. Overfill slightly, as it can shrink a bit when drying.
- Smooth: After the spackling is completely dry (check the product instructions), sand it smooth with fine-grit sandpaper. You want the surface to be perfectly flat, so you can't feel the repair.
- Cracks: For larger cracks, you might need a paintable caulk or a specific crack filler. Again, sand smooth once dry.
The goal here is to create a perfectly smooth canvas. Any bump or hole you don't fix will show up even more once the paint is on, especially with lighter colors or glossy finishes.
Caulking Baseboards And Trim
This step makes a huge difference in the final look. Caulk fills small gaps, like the tiny space between your baseboards and the wall, or around window and door frames. It gives a really clean, finished edge.
- Choose the right caulk: Look for paintable latex caulk. It's flexible and easy to work with.
- Apply a thin bead: Load a caulking gun and apply a steady, thin line of caulk into the gap. Don't go overboard.
- Smooth it out: Immediately after applying, use a damp cloth, a sponge, or even your finger (wear a glove if you prefer) to smooth the caulk into the gap. Wipe away any excess. It’s best to do this quickly before the caulk starts to skin over.
Properly prepared surfaces are the secret to a professional-looking paint job, no matter who is holding the brush.
Mastering Painting Techniques
So, you've picked out the perfect color and prepped your walls like a pro. Now comes the fun part: actually putting the paint on! But just slapping it on won't give you that magazine-worthy look. It's all about the technique. Getting this right makes a huge difference, turning a DIY job into something that looks like it was done by a seasoned pro.
Applying Paint to Walls and Ceilings
When you're tackling walls and ceilings, the goal is even coverage without those annoying roller marks or drips. Start with your ceiling if you're doing both at the same time – gravity is not your friend here. For walls, work in sections. Load your roller with paint, but don't drown it. A good method is to roll in a "W" or "M" pattern across a section of the wall, then fill it in with overlapping, parallel strokes. This helps spread the paint evenly. Keep a wet edge as you go; this means overlapping your strokes slightly with the next section you paint to avoid visible lines where one section ends and another begins. For corners and edges where the roller can't reach, you'll need a brush.
Achieving Smooth Finishes with Rollers
Using a roller effectively is more than just rolling it back and forth. The type of roller cover you use matters – a thicker nap is good for textured walls, while a finer nap works best on smooth surfaces. When you load the roller, make sure it's evenly coated but not dripping. Roll it onto the paint tray's grid to remove excess. As you apply paint to the wall, use light, consistent pressure. Avoid pressing too hard, as this can lead to uneven application and drips. Rolling in a consistent direction, usually top to bottom, also helps create a uniform finish. If you're doing multiple coats, let the first coat dry completely according to the manufacturer's instructions before applying the next.
Using Brushes for Precision and Detail
Brushes are your best friend for cutting in around trim, windows, doors, and in corners. The way you hold the brush makes a difference. Grip it like you would a pencil or a driver, closer to the metal ferrule (the part holding the bristles) for more control, especially when cutting in. Load the brush with paint, but don't dip it more than halfway up the bristles. Tap off any excess; don't wipe it on the rim of the can, as this can create drips. When cutting in, use smooth, steady strokes. For edges, you want to aim for a clean line. You can use painter's tape for extra crisp lines, but make sure it's applied firmly and removed while the paint is still slightly wet to prevent peeling.
Proper brush technique involves loading the brush correctly, using steady strokes, and maintaining a consistent angle to achieve clean lines and avoid drips. It takes a little practice, but the results are worth it for those detailed areas.
Special Considerations For Doors And Windows
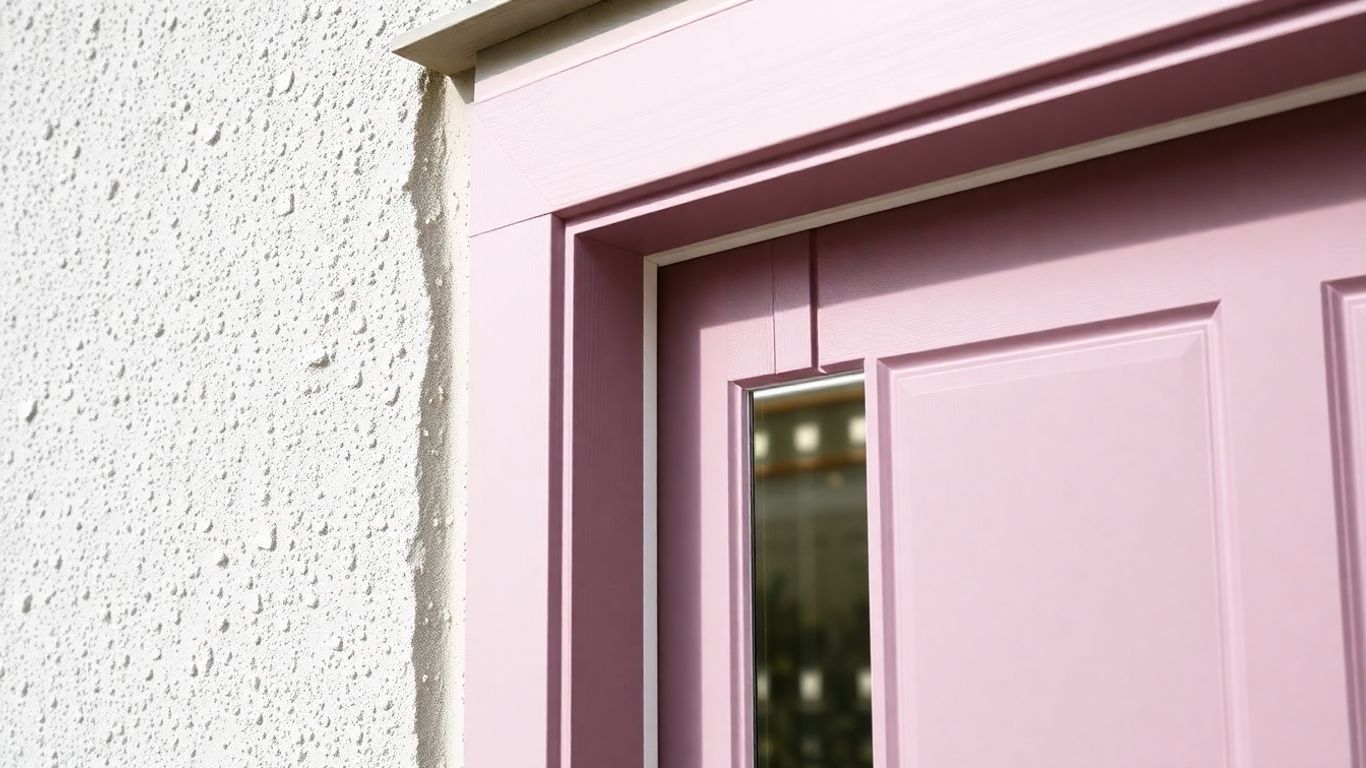
Painting Interior Doors For A Clean Look
When it comes to interior doors, you want a finish that looks sharp and holds up to daily use. For these, a water-based latex paint is usually the way to go. It doesn't have that strong smell, which is nice when you're working inside. A semi-gloss or gloss sheen is often recommended because it's easier to clean and has a bit of a shine. Getting a smooth finish on doors means taking your time with prep and application.
Here's a quick rundown:
- Cleanliness is key: Make sure the door is free of dust, grease, and old wax. A good wipe-down with a mild detergent and water, followed by a clean rinse, works wonders.
- Sanding for grip: Lightly sand the surface with fine-grit sandpaper (around 220-grit) to give the new paint something to stick to. Wipe away all the dust afterward.
- Prime if needed: If you're going from a dark color to a light one, or if the door has been heavily repaired, a coat of primer will make a big difference in coverage and the final look.
- Brush or roll: For flat areas, a small roller works well. Use a good quality brush for the edges and any panels. Work in the direction of the wood grain.
Techniques For Painting Exterior Doors
Exterior doors face the weather, so durability is a big factor. You might consider an oil-based enamel for this type of door. It's tougher and can handle more wear and tear. Just like interior doors, a semi-gloss or gloss finish is a good choice for protection and ease of cleaning. Remember to paint from the inside out if possible, to avoid messing up fresh paint.
- Surface prep is even more important outside: Beyond cleaning and sanding, check for any peeling paint and scrape it away. Fill any cracks or holes with exterior-grade caulk or wood filler.
- Protect surrounding areas: Use painter's tape and drop cloths to shield the door frame, hardware, and any nearby walls or walkways.
- Consider the hardware: You can either remove doorknobs and hinges before painting or carefully tape around them. Removing them usually gives a cleaner result.
- Apply thin, even coats: Multiple thin coats are better than one thick one. Allow each coat to dry completely according to the paint manufacturer's instructions.
Achieving Perfect Window Panes
Painting around windows can be tricky, especially the glass itself. If you have a steady hand, you can let the paint lap slightly onto the glass (about 1/16 inch). Once the paint is set but not fully dry, you can use a rag wrapped around a putty knife to carefully remove the wet paint from the glass. After the paint has fully dried, a flat razor blade can be used to gently scrape away any remaining dried paint. This method often looks cleaner than using tape, but be careful not to scratch the glass. If you're unsure, using high-quality painter's tape is a reliable alternative. Just be sure to remove the tape while the paint is still slightly wet to avoid peeling.
When painting windows, it's often best to tackle the muntins (the strips that divide the glass) first, then move to the sash and frame. If the window opens, make sure to open it slightly while painting to prevent it from getting sealed shut. For a really clean look on window panes, you can use a razor blade to carefully scrape off any dried paint drips after the job is done. Just be mindful of your window's warranty, as some might void it.
For more on choosing the right paint, check out understanding different types of paint.
Elevating Cabinets And Built-Ins With Paint
Preparing Cabinets For Painting
Getting cabinets ready for a fresh coat of paint is probably the most important step. If you skip this, your paint job might not stick well or look as smooth as you want. First things first, take off all the hardware – knobs, handles, the whole deal. If you can, lay the cabinet doors flat on sawhorses; it makes painting way easier. For wood cabinets, give them a good wipe-down with a cleaner like TSP substitute. Then, you'll want to scuff up the surface with sandpaper. This gives the primer something to grab onto. After sanding, make sure to wipe away all that dust. A clean surface is key here.
Applying Paint To Built-In Features
When you're painting built-in shelves or other features, think about the type of paint you're using. For cabinets and trim, a semi-gloss or gloss finish is usually best. It's durable and easy to wipe clean, which is great for areas that get a lot of use. Apply paint in thin, even coats. Trying to slap on a thick coat often leads to drips and an uneven finish. Let each coat dry completely before applying the next one. Patience really pays off here.
Choosing Durable Finishes For High-Use Areas
For cabinets and built-ins that see a lot of action, like in kitchens or family rooms, the finish matters. You want something that can stand up to wiping and general wear and tear. Semi-gloss paints are a popular choice because they offer a nice sheen and are quite washable. High-gloss finishes are even more durable and easier to clean, but they also show imperfections more readily, so your prep work needs to be top-notch. Eggshell or satin finishes can work for less trafficked built-ins, but for cabinets, sticking with semi-gloss or gloss is usually a safer bet for longevity and ease of maintenance.
Remember, the prep work is where the magic really happens. Don't rush through cleaning, sanding, and priming. A little extra time spent here will make a huge difference in the final look and how long your paint job lasts.
When To Call In The Professionals
So, you've prepped your surfaces, picked out the perfect shade, and you're ready to roll. But wait a second. Before you dive headfirst into that paint can, it's worth considering if this is a job you should tackle yourself or if it's time to bring in the pros. Sometimes, the DIY route just isn't the best path for a truly polished outcome.
Evaluating Project Complexity
Let's be honest, not all painting jobs are created equal. A small accent wall is one thing, but painting an entire multi-story house, especially if it's older or has tricky architectural features, is a whole different ballgame. If your home has high ceilings, lots of intricate trim, or surfaces that are difficult to reach, it might be time to call in experts. They have the right equipment, like extension poles and scaffolding, and the experience to handle these challenging situations safely and effectively. Don't risk a fall or a botched job on a project that's beyond your comfort level.
Assessing Costs Versus Quality
It's easy to think DIY always saves money, but that's not always the case. When you factor in the cost of quality paint, primer, brushes, rollers, trays, drop cloths, and any necessary repair materials, the expenses can add up quickly. Plus, if you make mistakes, you might end up buying more paint or even needing to hire someone to fix your work. Professionals often get bulk discounts on materials, and their skill means less waste and fewer errors. While hiring painters is an upfront cost, it can sometimes be more economical in the long run when you consider the time you save and the superior finish you get. For a truly professional look, hiring professional interior painters can be a smart investment.
Understanding Professional Guarantees
One of the biggest advantages of hiring professionals is the peace of mind that comes with a guarantee. Most reputable painting companies stand behind their work. If something isn't right, they'll come back and fix it. This kind of assurance is something you simply can't get when you paint it yourself. It's a commitment to quality that ensures you'll be happy with the final result. When you're looking at a big project, or if you just want the job done right the first time, getting quotes from a few different painting contractors is a good idea. It helps you compare not just prices, but also their approach and what they include in their service.
When your home improvement tasks feel too big or tricky to handle yourself, it's smart to get some expert help. Don't let those projects linger! Visit our website today to see how we can help.
Wrapping Up Your Painting Project
So, we've gone over a lot about paint and how to put it on walls. It really comes down to picking the right stuff and doing it carefully. Whether you're a seasoned DIYer or just starting out, taking the time to choose good paint and use the right methods will make your home look so much better. It’s not just about slapping some color on; it’s about making your space look its best. Remember, a little effort goes a long way in making your home feel like home.
Frequently Asked Questions
What's the main difference between latex and oil-based paint?
Latex paint is water-based, making it easy to clean up with soap and water and quick to dry. Oil-based paint, on the other hand, gives a tougher, glossier finish and is more durable, but it's harder to clean and takes longer to dry.
Why is preparing the walls so important before painting?
Getting the walls ready is super important because paint sticks best to clean, smooth surfaces. If you don't clean off dirt, grease, or fix holes, the new paint might peel or look bumpy, and it won't last as long.
What's the best way to paint a room to avoid mistakes?
It's usually best to start from the top and work your way down. Paint the ceiling first, then the walls, and finally the trim and baseboards. This way, if you drip paint, you won't ruin a part you've already finished.
How do I get a smooth finish when using a paint roller?
To get a smooth finish with a roller, don't overload it with paint. Roll in a steady, even pattern, like 'W' or 'M' shapes, and then fill them in without pressing too hard. Overlapping your strokes slightly helps avoid roller marks.
Can I paint over wallpaper?
While you can paint over some wallpaper, it's often better to remove it first. If you paint over it, any damage to the wallpaper or adhesive issues can show through the new paint, and it might not look as good or last as long.
When should I think about hiring a professional painter?
You might want to hire a pro if your project is really big, you don't have much time, or if you need special techniques, like spraying paint on tricky surfaces. Professionals also often guarantee their work, ensuring a high-quality finish.


Comments
Post a Comment