Beyond the Brush: Why Preparation is the Unsung Hero of Professional Painting
Getting a paint job that looks like it was done by a pro can feel like a mystery. You pick out the colors, buy the paint, and think you're ready to go. But then you end up with drips, streaks, or paint that peels way too soon. The truth is, the real magic of a professional paint job doesn't happen with the brush, it happens long before. It's all about the preparation. Why Preparation Matters More Than Paint: Inside the Work of True Professionals is about understanding those steps that most people skip, but that make all the difference.
Key Takeaways
- Proper surface preparation is the bedrock of any lasting paint job, involving cleaning, repairing, sanding, and priming.
- Cleaning walls thoroughly removes dirt, grease, and grime, allowing paint to stick properly and avoid problems later.
- Priming walls creates a uniform surface for better paint adhesion, truer color, and a smoother overall finish.
- Professional techniques like the 'W' method for rolling and careful 'cutting in' around edges lead to even coverage and clean lines.
- Patience is vital; applying multiple thin coats and respecting dry times between layers builds a durable, high-quality finish.
The Crucial Role Of Surface Preparation
Understanding The Importance Of Surface Preparation
Alright, let's talk about the part of painting that most people want to skip: the prep work. It’s easy to get excited about picking out colors and slapping paint on the walls, but honestly, that’s like trying to run a marathon without stretching. You’re just asking for trouble down the line. Proper surface preparation is the foundation of any good paint job. It’s all about making sure the surface you’re painting is clean, smooth, and ready to accept the paint. Without it, you’re setting yourself up for peeling, bubbling, and a finish that just doesn’t look right. Think about it – if you’re trying to stick a sticker onto a dusty, greasy surface, it’s not going to hold very well, right? Paint is kind of the same way. It needs a clean slate to really grab onto.
The Foundation Of A Smooth Interior Paint Finish
Getting a smooth finish isn't just about the paint itself; it's heavily influenced by what's underneath. If your walls have bumps, holes, or old, flaky paint, no amount of careful rolling is going to hide that. You’ve got to deal with those imperfections first. This means filling in any cracks or holes with spackle, sanding down rough spots until they’re smooth to the touch, and wiping away all the dust that sanding creates. It’s a bit of a process, but it makes a huge difference in the final look. A well-prepared surface means the paint goes on evenly, and you get that professional, polished look instead of something that looks like it was done in a hurry.
Benefits Of Proper Surface Prep
So, why go through all this trouble? Well, the benefits are pretty significant. For starters, good prep work makes the paint last way longer. When paint adheres properly to a clean, smooth surface, it’s much less likely to chip or peel later on. This saves you time and money in the long run because you won’t have to repaint as often. Plus, it just looks better. A smooth, even finish is way more appealing than one with visible flaws. It also makes the actual painting process easier. Paint glides on more smoothly over a prepped surface, which means less frustration for you.
- Increased Durability: Paint lasts longer and resists damage.
- Improved Aesthetics: Achieves a smoother, more professional-looking finish.
- Cost-Effectiveness: Reduces the need for frequent touch-ups and repainting.
- Easier Application: Paint applies more smoothly and evenly.
Skipping surface prep is like building a house on a shaky foundation—it’s bound to fail sooner or later. By investing time in proper prep, you’re setting yourself up for success and saving yourself from costly repairs down the road. Proper surface preparation is the bedrock upon which the durability and beauty of a coated surface are built.
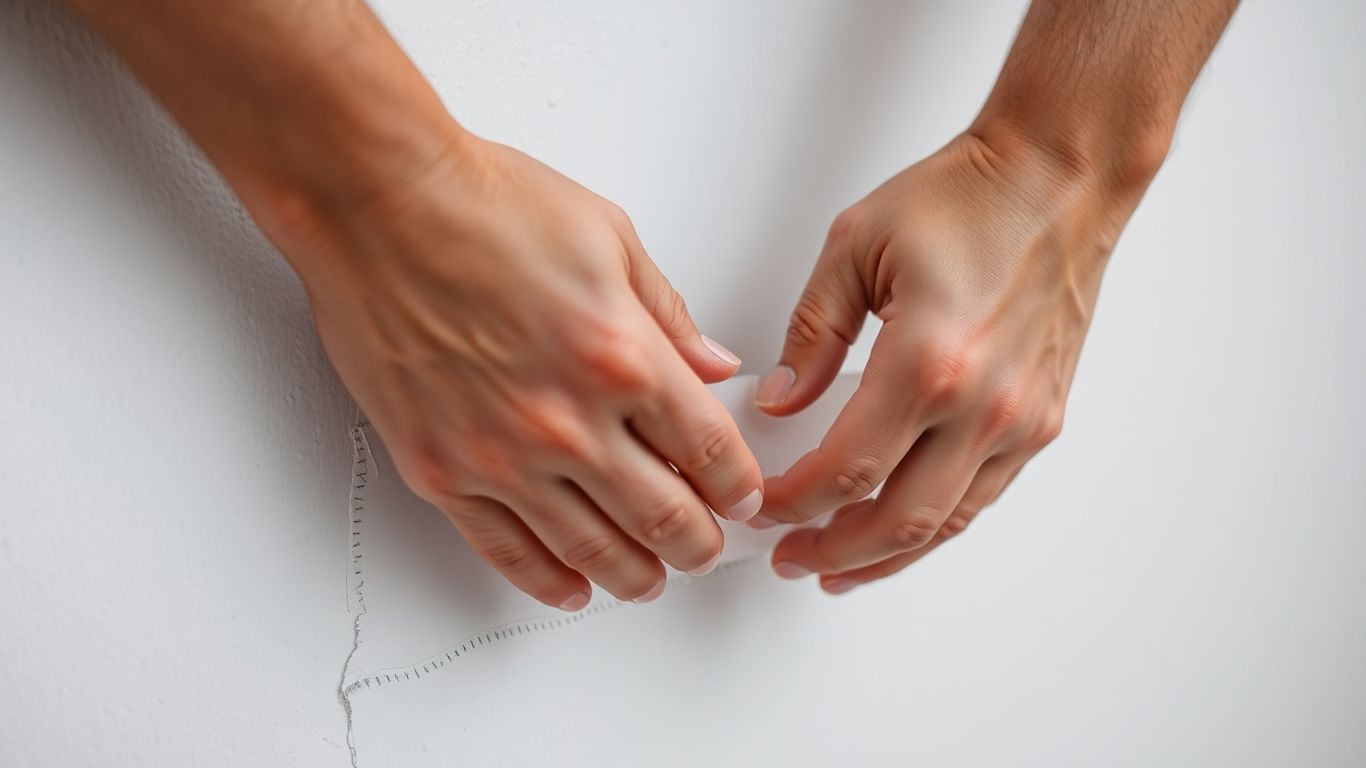
Mastering The Art Of Wall Surface Cleaning
Before any paint can even think about sticking, your walls need a good scrub. Seriously, this step is so important, and it's where a lot of DIY paint jobs go wrong. You can have the best paint and the fanciest brushes, but if the wall is still dusty, greasy, or grimy, your paint job is going to look… well, not great. It might peel, bubble, or just not stick right. So, let's get down to how to actually clean these walls properly.
Essential Steps For Wall Surface Cleaning
Cleaning walls isn't just about wiping them down. It's a process. Here’s a breakdown of what you should be doing:
- Dusting: Start by getting rid of all the loose stuff. Use a dry cloth, a soft brush, or even a vacuum with a brush attachment to get dust, cobwebs, and any other light debris off the walls and ceilings. Don't skip this; it makes the next steps easier.
- Washing: Mix up a cleaning solution. A little bit of mild dish soap or a dedicated wall cleaner mixed with warm water usually does the trick. Avoid using too much soap, or you'll have a hard time rinsing it all off.
- Rinsing: This is super important. After you wash a section, go back over it with a clean sponge or cloth dipped in plain water. You want to get all the soap residue off. If you leave soap behind, it can mess with how the paint adheres.
- Drying: Walls need to be completely dry before you even think about painting. Use clean, dry towels to speed things up, or just let them air dry. Open windows if you can to get some air circulation.
Dealing With Grease And Grime
Kitchens and bathrooms are the usual suspects for grease and grime. Cooking splatters, soap scum, and general humidity can leave a sticky film on your walls that paint just won't stick to. For these tougher spots, you might need something a bit stronger than just soap and water.
- Degreasers: For greasy areas, especially in kitchens, a good degreaser is your best friend. You can buy specific wall degreasers, or sometimes a solution of TSP (trisodium phosphate) and water works wonders. Just be sure to follow the product instructions carefully and wear gloves.
- Stubborn Stains: For things like crayon marks or dark scuffs, you might need to spot-treat. A magic eraser can work on some marks, but test it in an inconspicuous spot first to make sure it doesn't damage the wall surface.
The goal here is to create a surface that's not just visually clean, but chemically clean too. Any leftover residue, even if you can't see it, can cause problems down the line. Think of it like trying to stick a sticker onto a greasy surface – it just won't hold.
Ensuring Walls Are Completely Dry
I can't stress this enough: Your walls must be bone dry before you apply primer or paint. Painting over damp walls is a recipe for disaster. Moisture trapped behind the paint can lead to:
- Bubbling: The paint can lift off the wall in blisters as the moisture tries to escape.
- Peeling: The paint simply won't adhere properly and will start to flake off.
- Mold and Mildew: Trapped moisture creates a perfect environment for mold to grow, which is not only unsightly but also bad for your health.
So, after washing and rinsing, give your walls ample time to dry. If you're painting in a humid area or during a damp season, consider using fans or a dehumidifier to speed up the drying process. It might take an extra day, but it's way better than having to redo the whole job because you rushed this critical step.
Priming Walls: The Unsung Hero Of Paint Jobs
Okay, so you've picked out that perfect shade of blue, maybe something calming for the bedroom or a bold accent for the living room. You're ready to roll, right? Well, hold on a second. Before that beautiful color hits your walls, there's a step that often gets skipped, but it's honestly where the real magic happens: priming.
Why Primer is Essential for Paint Adhesion
Think of primer as the ultimate wingman for your paint. It's not just an extra coat; it's a special formula designed to create a surface that paint can really grab onto. Without it, especially on new drywall or over tricky surfaces, your paint might just sit there, looking a bit dull or, worse, start peeling off down the line. Primer seals up those tiny pores in the wall material, making sure the paint doesn't soak in unevenly. This means you get a truer color and a finish that actually lasts.
Choosing the Right Primer for the Job
Not all primers are created equal, and picking the wrong one is like trying to use a screwdriver as a hammer – it just won't work right. You've got a few main types to consider:
- Latex-based primers: These are your go-to for most interior walls, especially new drywall or surfaces you've patched. They dry fast and clean up easily with water. Good for general use.
- Oil-based primers: If you're dealing with stubborn stains (like water marks or crayon scribbles that just won't quit) or painting over glossy surfaces, an oil-based primer is your best bet. They're tough stain blockers and create a really solid base.
- Shellac-based primers: These are the heavy hitters for really tough jobs. They dry super fast and are amazing at blocking odors and stains. Great for spot priming specific problem areas.
So, if you're painting over a dark color with a light one, or if you've got some questionable marks on the wall, a good primer is going to save you a lot of headaches. It’s the foundation that makes everything else look better.
When to Apply Multiple Coats of Primer
Most of the time, one coat of primer is plenty. It does its job of creating a uniform surface and improving adhesion. However, there are a few situations where a second coat really makes a difference:
- Drastic Color Changes: If you're going from a very dark, bold color (think deep red or navy blue) to a light pastel, a second coat of primer can help block out the old color more effectively. This means you'll need fewer coats of your top paint color to get full coverage.
- Porous or Uneven Surfaces: Sometimes, even after patching and sanding, a wall can still be quite porous or have a slightly uneven texture. A second primer coat can help even this out further, leading to a smoother final finish.
- Stain Bleed-Through: If you're using a stain-blocking primer and you notice a faint shadow of the stain still peeking through after the first coat, definitely apply a second. You want to be sure that stain is completely covered before you put your final paint on.
Applying an extra coat of primer might seem like more work, but it's a small investment that pays off big time in the final look and durability of your paint job. It's all about building that perfect base.
Honestly, skipping primer is one of those things that seems like a time-saver at first, but it almost always leads to more work later. It’s the quiet professional move that makes your paint job look truly polished.
Techniques That Separate Amateurs From Artists
Once you’ve got your surface ready and your tools in hand, the actual painting technique becomes the star of the show. A professional finish isn’t just about slapping on coats; it’s about how you apply them. It might sound simple, but the way you move that roller or brush makes a huge difference.
Achieving Even Coverage With Rolling Techniques
One hallmark of a polished paint job is even coverage. Professionals use something called the “W” or “M” technique when rolling walls. Instead of starting at the top and rolling straight down, they create a zigzag pattern to distribute the paint, then fill it in without lifting the roller off the wall too much. It might sound fussy, but it prevents visible roller marks and ensures an even coat that dries beautifully. This method helps spread the paint more uniformly across the surface, reducing the chances of thick spots or thin patches.
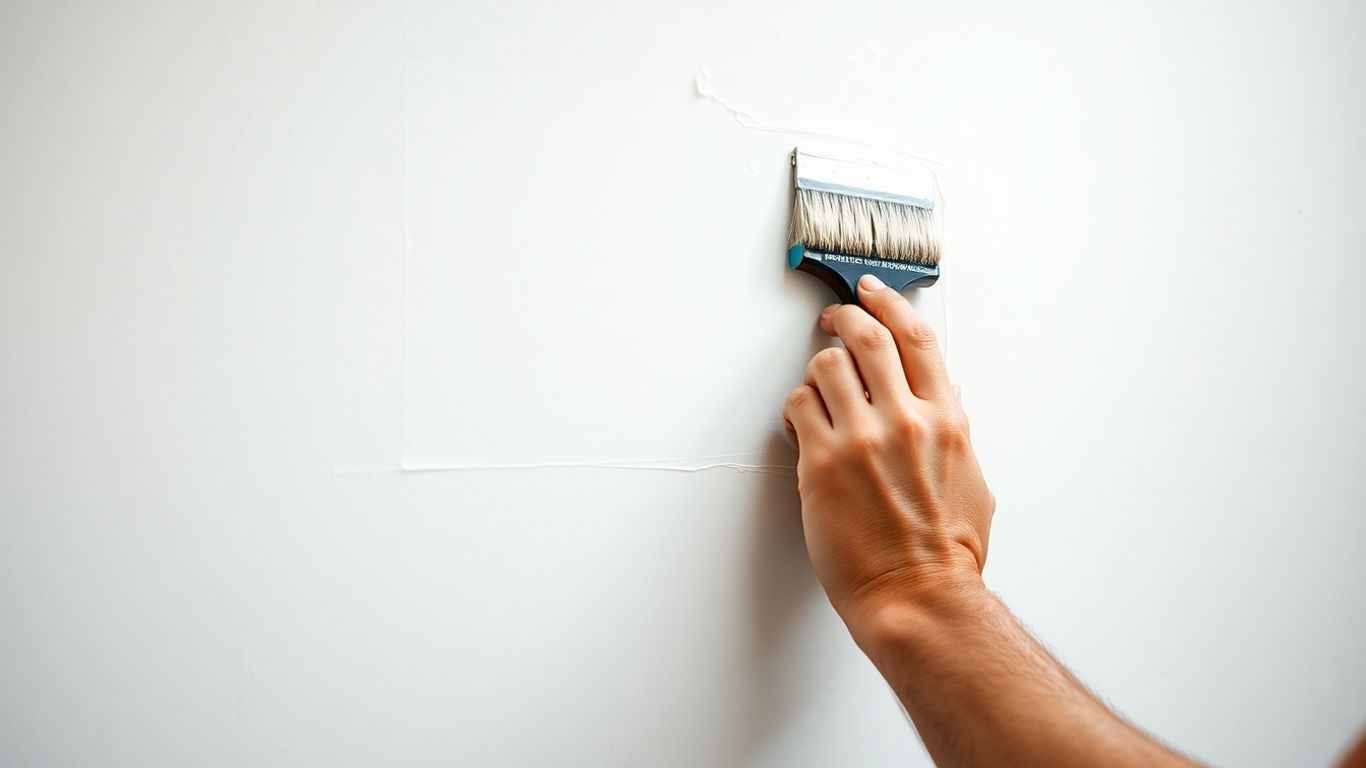
Mastering The Art Of Cutting In Edges
Cutting in, which is painting the edges around ceilings, trim, and corners, is another skill that demands a light touch. Pros often ditch painter’s tape altogether, relying on a steady hand and a quality angled brush to make sharp lines freehand. If you take your time and keep your brush at the right angle, you’ll find it’s surprisingly satisfying to glide along the edges with smooth precision. This technique requires practice, but it’s what gives a room that clean, finished look.
The Importance Of A Wet Edge
Another subtle but powerful technique is maintaining a “wet edge.” This simply means working quickly enough that you’re always brushing or rolling into wet paint, not dried edges. Doing this avoids the telltale ridges and streaks that happen when partially dried paint overlaps new paint. It’s a simple principle, but mastering it transforms your results. You want to keep a continuous flow of paint going so that each stroke blends into the last without a visible seam.
Professionals also pay attention to environmental factors like temperature and humidity. Paint behaves differently depending on the weather. Too hot, and the paint can dry too fast, leading to lap marks. Too humid, and paint can sag or take forever to cure. A little planning around the weather forecast can mean the difference between a mediocre and an exceptional outcome.
Here’s a quick rundown of what to keep in mind:
- Rolling Pattern: Use the “W” or “M” method for even distribution.
- Cutting In: Practice freehand with a good angled brush for sharp lines.
- Wet Edge: Always work into paint that is still wet to avoid visible seams.
- Environment: Consider temperature and humidity for optimal paint application.
Layering And Patience: The Virtues Of Professionals
So, you've prepped the walls, you've got your tools, and you're ready to slap on some paint. Hold on a second! Professionals know that the real magic happens not just in the application, but in the way you apply it, and that means patience. Rushing through a paint job is the quickest way to end up with something that looks... well, not so great.
The Power Of Multiple Thin Coats
Forget about trying to get perfect coverage with one thick, gloppy coat. Pros know that building up the finish with several thin layers is the way to go. It might seem like it takes forever, but each thin coat cures properly, creating a surface that's not only smoother but also way more durable. Think of it like building a strong foundation – you don't just dump all the concrete at once, right?
- Thin coats prevent drips and sags.
- They allow for better color depth and richness.
- The final finish is much more resistant to wear and tear.
Respecting Dry Times Between Coats
That little note on the paint can about dry times? It's not a suggestion, it's a rule. Even if the paint looks dry to the touch, the chemicals inside are still doing their thing. If you slap on another coat too soon, you can mess with adhesion, create weird textures, or even cause the paint to bubble later on. Professionals wait. They might be itching to finish, but they know waiting is part of the process.
Skipping proper drying times is a common mistake that leads to premature paint failure. It's tempting to speed things up, but the integrity of the finish depends on allowing each layer to cure adequately.
Patience As A Key Professional Trait
Honestly, patience is probably the most underrated tool in a painter's kit. It's not just about waiting for paint to dry; it's about taking your time with each step. It's about not getting frustrated when you have to go back and fix a small mistake. It's about understanding that a job done right, even if it takes longer, is always worth it in the end. When you step back and see that smooth, even finish, you'll be glad you didn't rush.
Fine Details That Elevate A Paint Job
Once the main walls are looking good, it's the little things that really make a paint job go from okay to amazing. Professionals know this, and they don't skip these steps. It’s all about that polished look that says, "Yeah, a pro did this."
The Impact Of Small Touch-Ups
Think about a room you've seen that just looked right. Chances are, the edges were sharp, and there weren't any smudges around light switches or outlets. Pros are meticulous about these small areas. They'll carefully tape off trim and fixtures, and if any paint does get where it shouldn't, they're quick to fix it. It might seem minor, but these little fixes stop the eye from noticing mistakes and keep the whole room looking clean and intentional.
Achieving Silky Smooth Finishes On Trim
Trim, like baseboards, door frames, and window casings, often gets a lot of wear and tear. Getting trim to look its best takes a bit more than just slapping on some paint. It usually involves a few extra steps.
- Cleaning: Make sure the trim is free of dust and grime.
- Filling: Small holes or cracks from nails should be filled and smoothed.
- Sanding: A light sanding before painting helps the new paint stick and creates a smoother surface.
- Cutting In: Using a good brush to get a clean line where the trim meets the wall is key.
Professionals understand that trim is like the jewelry of a room. It needs to be clean, well-defined, and perfectly finished to really make the space shine. It's not just about color; it's about the crispness of the lines and the feel of the surface.
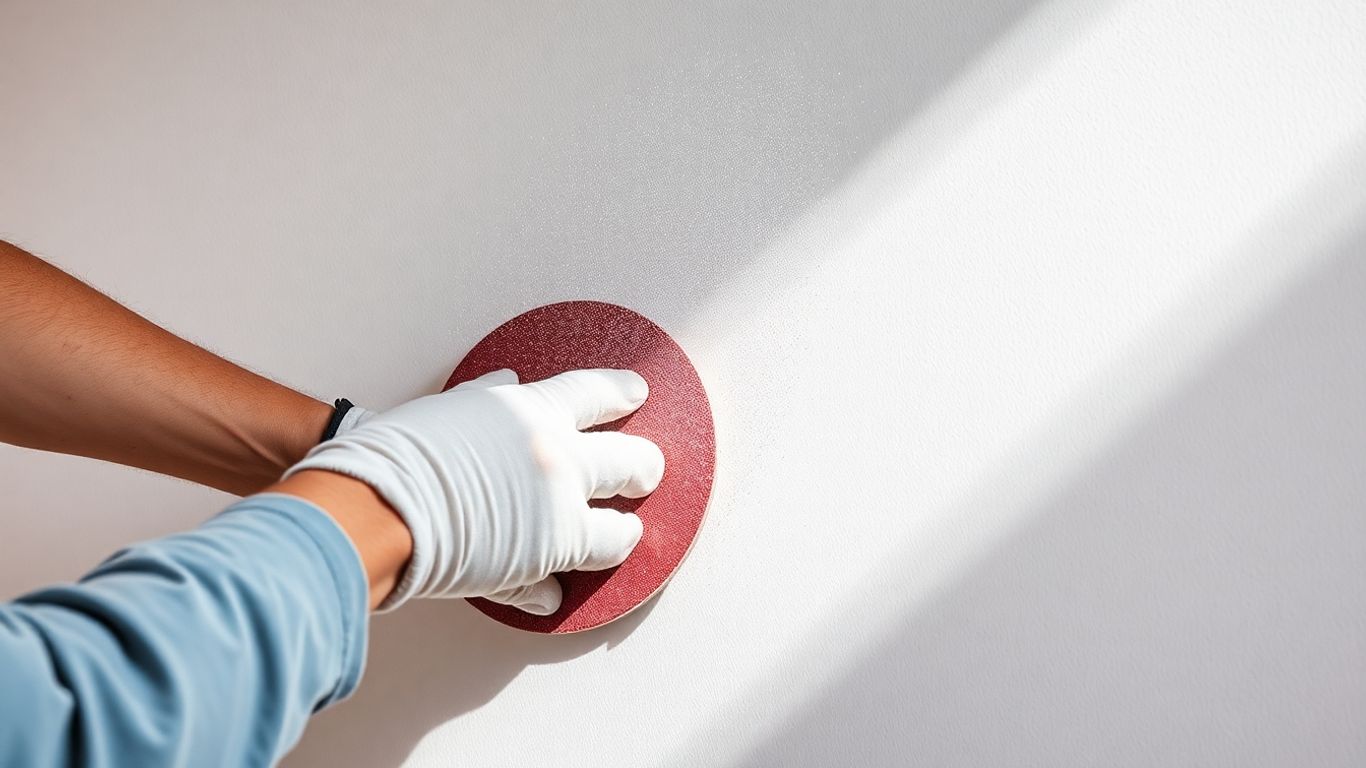
Sanding Between Coats For Perfection
This is one of those steps that many DIY painters skip, but it makes a huge difference. After you apply a coat of paint, especially on trim, doors, or cabinets, you might notice tiny bumps or rough spots. A light sanding with a fine-grit sandpaper or a sanding sponge can knock these down. It doesn't take much effort, maybe just a few minutes per piece. Then, wipe away the dust, and you're ready for the next coat. This process helps build up a super smooth finish that feels great to the touch and looks incredibly professional. It’s a simple way to improve paint adhesion and get that showroom quality.
| Surface Type | Sanding Grit | Notes |
|---|---|---|
| Trim & Doors | 220-320 | Light pressure, focus on bumps |
| Walls (if needed) | 180-220 | Only if there are noticeable imperfections |
| Cabinets | 220-320 | For a very smooth finish |
Remember, the goal isn't to remove the previous coat, but just to smooth out any imperfections. This attention to detail is what truly separates a good paint job from a great one.
Choosing The Right Tools For The Task
So, you've got your paint picked out, maybe even your color scheme all figured out. That's great! But before you even think about opening those paint cans, let's talk about the gear. Using the right tools isn't just about making the job easier; it's about getting that smooth, professional look that separates a DIY job from something you'd see in a magazine. Think of it like a chef using a sharp knife versus a dull one – the results are just worlds apart.
Professional-Grade Brushes Make A Difference
When it comes to brushes, don't skimp. Those cheap, flimsy ones? They shed bristles like crazy, leaving little fuzzy bits all over your freshly painted walls. Plus, they don't hold paint well, leading to uneven application and a lot more frustration. For cutting in edges and getting into corners, you want a good quality angled brush. Synthetic bristles are usually best for latex or water-based paints, while natural bristles work better with oil-based paints. A good brush feels balanced in your hand and allows for precise control.
Selecting The Correct Roller Nap
Rollers might seem straightforward, but the 'nap' – that's the fuzzy stuff on the roller cover – is super important. The nap length determines how much paint the roller holds and how it applies to the surface. For smooth walls, a shorter nap (like 1/4 to 3/8 inch) is ideal. It gives you a nice, even coat without too much texture. If you're dealing with slightly rougher surfaces, you might go a bit longer, maybe 1/2 inch. But for most interior walls, shorter is better. And remember, a good quality roller cover will give you a much smoother finish than a cheap one that might leave lint behind.
Essential Tools For Effective Preparation
Beyond brushes and rollers, there's a whole host of other tools that make prep work, well, less of a chore. You'll definitely want a sturdy putty knife or two for filling small holes and cracks with spackle. A good scraper is handy for removing any loose paint or debris. Don't forget sanding blocks and sandpaper in various grits – you'll need them to smooth out those patched areas and create a uniform surface. And for cleaning? A bucket, some sponges, and a good all-purpose cleaner will do wonders. Oh, and always have some painter's tape on hand for protecting trim and edges. It might seem like a lot, but having these items ready means you won't be scrambling mid-project.
Using the right tools isn't just about efficiency; it's about the final appearance. Quality tools help you achieve a smoother, more even finish and prevent common painting problems like streaks, drips, and shedding bristles. They make the entire process more manageable and the end result far more satisfying.
Here's a quick rundown of some must-haves:
- Sanding Blocks & Sandpaper: For smoothing patched areas and creating a uniform surface.
- Putty Knives/Scrapers: For filling holes and removing old paint or debris.
- Quality Brushes: Angled synthetic brushes for cutting in edges.
- Roller Covers: Short nap for smooth walls.
- Painter's Tape: For clean lines around trim and fixtures.
- Cleaning Supplies: Sponges, cloths, and a mild cleaner.
Picking the right tools makes a big difference in any job. Just like a painter needs the right brushes and a carpenter needs the right saws, we use the best equipment to get your project done right. We're always looking for the best ways to help you, whether it's painting your home or fixing up your deck. Want to know more about how we choose our methods? Visit our website today!
It's All About the Prep
So, we've talked about a lot of things that go into making a paint job look really good. It's not just about picking a color and slapping it on. The real difference between a so-so paint job and one that looks like it was done by a pro is all the stuff you do before you even open the paint can. Cleaning, patching, sanding, priming – it all adds up. It might seem like a lot of extra work, and honestly, sometimes it feels like it. But when you see how smooth and even the final coat looks, and know it's going to last way longer? Yeah, it's totally worth it. Don't skip those steps next time you paint.
Frequently Asked Questions
Why is preparing the walls so important before painting?
Getting the walls ready is like building a strong base for a house. If you paint over bumps, dirt, or cracks, the paint won't stick well and might peel or look uneven later. Good prep work makes the paint look smooth and last much longer.
Do I really need to clean the walls before painting?
Yes, definitely! Think about trying to stick a sticker onto a dusty surface – it won't stay put. Dust, grease, and grime on your walls act like a barrier, stopping the new paint from sticking properly. Cleaning them first ensures a nice, even finish.
What's the deal with primer? Is it always necessary?
Primer is like a special glue that helps the paint stick better. It makes the color look more true and covers up any old colors or stains. While you might skip it sometimes, using primer usually makes your paint job look more professional and last longer, especially if you're painting a dark color over a light one, or vice versa.
How long should I wait after cleaning the walls before I start painting?
It's super important to let the walls dry completely after cleaning. Painting on damp walls can cause problems with how the paint sticks and might even lead to mold later on. Waiting at least a few hours, or even a full day if it's humid, is a good idea.
What's the biggest mistake people make when painting?
The most common mistake is skipping the preparation steps. People get excited to start painting, but rushing through cleaning, patching holes, sanding, and priming almost always leads to a less-than-perfect finish and the need for touch-ups or repainting much sooner than expected.
Are expensive tools really that much better for painting?
While you don't always need the fanciest gear, using good quality tools does make a difference. Better brushes apply paint more smoothly with fewer streaks, and the right roller covers help you get an even coat. Investing a little more in your tools can save you a lot of frustration and make the job look way better.
Comments
Post a Comment