Rescuing Your Walls: Expert Wall Finish Repair Techniques That Make Damage Disappear
Let's be real—there's nothing more annoying than staring at a wall with a ding, crack, or ugly patch job. Sometimes you try to fix it yourself, and it just ends up looking like a lumpy mess. Other times, you might not even know where to start, especially when textures or bigger holes are involved. "Rescuing Your Walls: Wall Finish Repair That Looks Like Damage Never Happened" is all about showing you the tricks and tools the pros use to make those eyesores vanish. Whether you’re patching a tiny nail hole or dealing with a water-damaged mess, this guide will help you get your walls looking like new—no more obvious spots or mismatched paint. Ready to stop staring at that damage? Let’s get started.
Key Takeaways
- Spotting and understanding different types of wall damage is the first step to a good repair.
- Using the right materials and tools makes all the difference for a smooth, professional finish.
- Matching wall textures—like knockdown or orange peel—requires patience and the right technique.
- Always prime patched areas before painting to avoid obvious spots and help the paint stick.
- Take your time with sanding, blending, and cleanup for results that truly look like the damage never happened.
Diagnosing the Most Common Wall Surface Problems
Before you fix anything, you need to know what you're actually dealing with. Identifying wall problems early on saves time, money, and keeps small issues from spiraling into major repairs. Here, we'll break down what to watch out for and what those signs might mean for your next steps.
Spotting Small Holes, Dings, and Nail Pops
You know those tiny holes left by picture hangers or the little dents from moving furniture? Or maybe you’ve noticed a tiny bump—yep, that’s probably a nail pop. These are the bread and butter of home wall damage, and honestly, they’re usually more annoying than serious.
- Nail pops look like little blisters or cracks under the paint, often where a nail or screw pushes out.
- Dings and dents show up around high-traffic spots—think hallways, near doors, or in the kitchen.
- Even small holes can become more noticeable over time, especially if you keep touching them up but never fill them properly.
These are minor, but fixing them properly makes a big difference in how clean and fresh your space feels.
Addressing Cracks, Bumps, and Larger Damage
Cracks and bigger holes can signal larger frustrations. Here’s how to read what your walls are trying to tell you:
- Cracks near windows or doors might just be from settling, but keep an eye out for anything growing wider or longer—that could point to a bigger problem.
- Any bump that seems to get larger over time, or bulges in your wall, could mean something’s going on beneath the surface.
- For holes bigger than a quarter, it’s no longer a quick patch job; you might need new drywall, backer boards, or support strips.
Common Larger Wall Issues Table:
| Problem Type | Signs & Clues | What It Suggests |
|---|---|---|
| Hairline Crack | Thin, spider-web lines | Settling, minor movement |
| Large Crack/Bump | Wide, visible, sometimes raised | Foundation, moisture, impact |
| Holes over 1 inch | Obvious breaks/gaps | Accidental impact, hardware removal |
When you start seeing cracks or bigger damage, pause and assess carefully—these can point to underlying issues you don’t want to ignore.
Understanding Moisture-Related Issues
Moisture is the silent troublemaker for walls. Sometimes, the only sign will be a subtle stain or a little peeling paint, but it can get ugly fast. Here’s what to keep an eye out for:
- Water stains that show up as brown or yellow marks
- Paint that bubbles, peels, or feels soft
- Sagging drywall, or places that seem damp to the touch
The tricky thing is you can’t just patch or paint over moisture damage. Fixing the underlying leak or humidity source comes first—or you’ll be doing this all over again in a few months.
Key steps if you spot moisture damage:
- Track down the water source and fix it.
- Allow everything to dry thoroughly (really—don’t rush this).
- Cut out and replace any drywall that’s soft, bulging, or stained badly.
Those first clues you spot on your walls—no matter how minor—are your sign to act. Catch problems early, and your repair job gets a whole lot easier.
Essential Tools and Materials for Seamless Wall Repair
Before you even open a container of joint compound, you’ll want a clear idea of the exact gear and materials needed. Having the right supplies before you start means fewer runs to the hardware store and much better results. It’s just way less stressful.
Selecting the Right Compounds and Tapes
- Pre-mixed joint compound: Good for small patches; easy to sand, great for smoothing over nail pops or hairline cracks.
- Setting-type joint compound: Ideal for larger, deeper repairs; sets faster and harder than pre-mixed, but can be tougher to work with.
- Paper drywall tape: Best for corners and long seams. Requires a bed of compound underneath.
- Fiberglass mesh tape: Self-adhesive and good for flat patches; speeds up repair but can be weaker than paper on seams.
If you need a solid comparison before shopping, here’s a quick breakdown:
| Compound Type | Ease of Use | Dry Time | Best For |
|---|---|---|---|
| Pre-mixed | Easiest | Slower | Small holes, blending |
| Setting-type (powder) | Harder | Fast | Large, deep repairs |
Never underestimate the importance of proper tape selection—using the wrong one can mean premature cracks or visible seams months later.
Must-Have Tools for a Flawless Finish
- Utility knife: Essential for cutting drywall and trimming tape. Sharp blades make neater cuts—swap them out often.
- Putty knives: You’ll want at least two; a smaller one (4-6 inches) for tight spots and a wide one (10-12 inches) for feathering repairs.
- Drywall saw: For cutting out damaged areas precisely, a jab saw can do wonders.
- Sanding sponge or sandpaper: Medium and fine grit to smooth each layer. Sponges help for corners.
- Mixing pan or hawk: For holding and working compound.
- Screwgun or drill: For securing patches in place, especially with large repairs.
- Drop cloth: You will absolutely want this. Drywall dust is relentless and gets everywhere, so protect your space.
For a complete, practical guide—including details on taping tools and saw options—see this page about tools and materials for drywall repair.
Choosing Durable Primers and Paints
- Dedicated wall primer: Far better at sealing bare compound and providing even coverage than paint-and-primer combos. A must after repairs.
- Quality interior paint: Matte or eggshell hides imperfections best. Semi-gloss will show every bump, so only use in high-moisture zones.
- Foam roller and angled brush: For smooth finish and precise cutting in.
When picking paint or primer, don’t get tricked by "all-in-one" products. True primer seals the patch, and skipping this step often leaves a visible dull spot—known as “flashing”—where you worked.
- List of painting essentials after repair:
- High-adhesion wall primer
- Interior grade touch-up paint
- Clean rollers and brushes
Take your time setting up, because rushing through repairs guarantees you’ll see your fix every time you walk past that wall. Preparation always pays off.
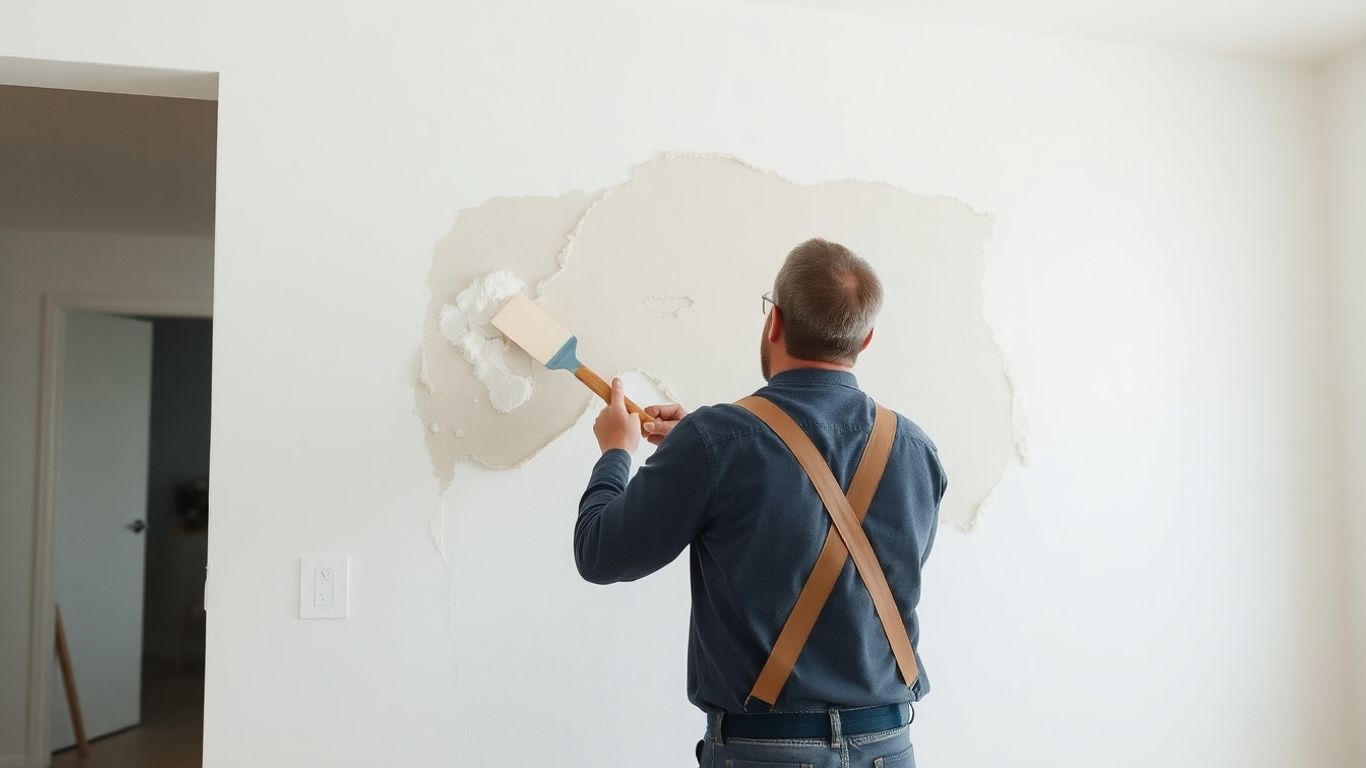
Mastering Patchwork: Repairs That Leave No Trace
Techniques for Invisible Patches and Blends
Blending patchwork into the original wall is what separates an okay fix from a repair no one will ever spot. Here’s how you make small and medium patches truly disappear:
- Always use thin, even coats of joint compound. Thick layers are harder to sand and tend to shrink or crack.
- Feather the edges much wider than the original hole—8 to 12 inches is not overkill. This helps the patch blend into the existing surface.
- Build up layers slowly, letting each dry before adding the next. Sand lightly between coats to keep the repair flush with the wall.
Most walls are far from flat, so look at your patch in different lighting and angles while you work. What looks great head-on might stand out under sunlight across the wall.
Tips for Supporting and Securing Larger Repairs
Big holes can’t simply be filled with mud. They need a base to keep from cracking later. Here’s what works best:
- Use scrap wood or furring strips behind the wall to screw the patch onto—this stops wobbly repairs.
- Cut your new drywall piece just a hair smaller than the hole for a snug fit, then tape around the edges.
- The “California Patch” lets the patch hold itself in with drywall paper, avoiding the need for extra tape.
| Patch Size | Backing Needed | Suggested Technique |
|---|---|---|
| < 1 inch | No | Spackle, no backing |
| 2–6 inches | Optional | California Patch |
| > 6 inches | Yes | Wood backing + drywall |
Ensuring Structural Integrity in Every Fix
A repair should last—no surprise bulges, cracks, or sags later. Check off these steps:
- Screw all backing and patch pieces securely in place before taping.
- Avoid using too much joint compound at once; multiple thin layers keep things solid.
- Look for loose paper, crumbled drywall, or signs of moisture and cut these out before patching.
Taking an extra few minutes to secure the patch and clean up the wall edges pays off in the long run. A strong foundation means you don’t have to redo the job later.
Texture Matching: The Key to Camouflaged Repairs
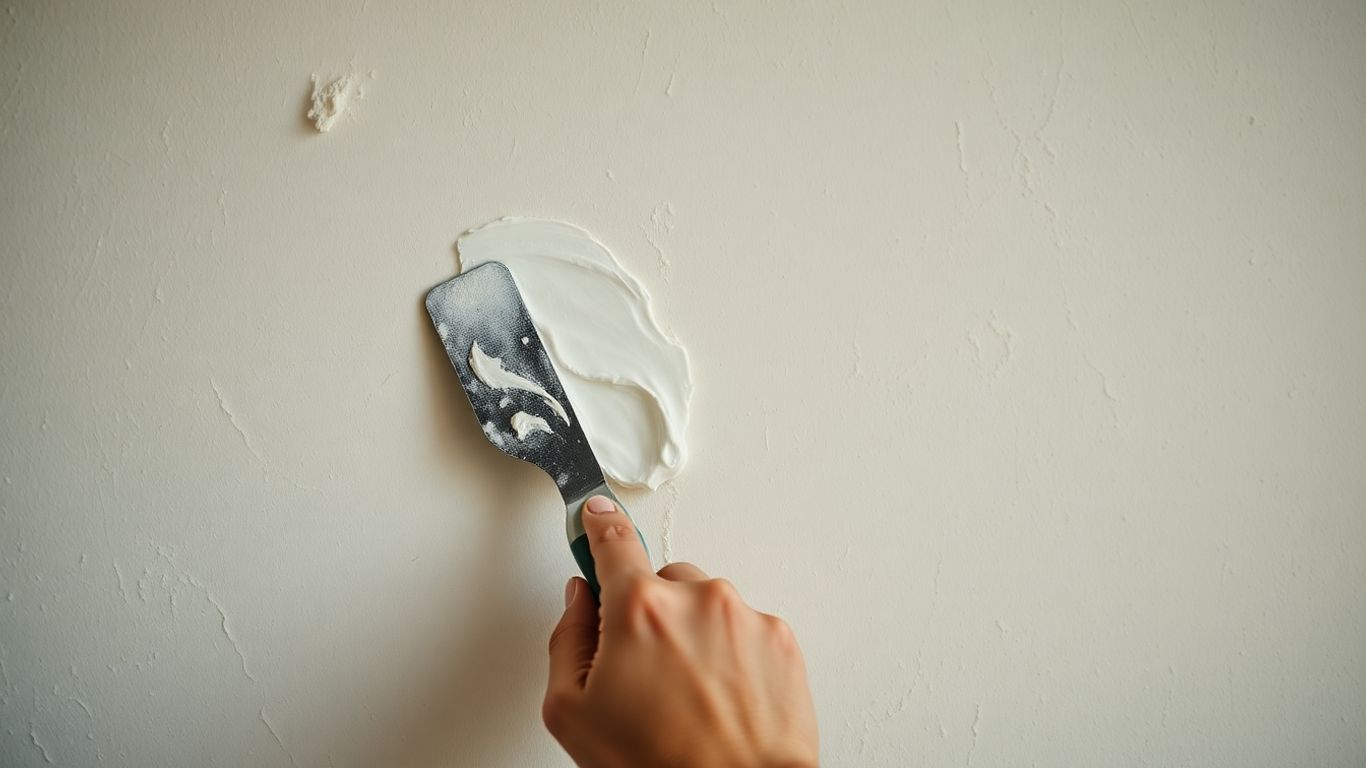
Getting texture to match after a wall repair is probably the part that trips up most folks. That little patch might be flush and smooth, but as soon as you put a fresh coat of paint over it, it's obvious. The rest of the wall is textured, and your repair is as flat as a pancake.
Replicating Knockdown, Orange Peel, and Popcorn Finishes
To blend your repair with the rest of the wall, you need to copy the existing texture—no shortcuts. Here's how it typically goes:
- Knockdown: Use a special knockdown knife or putty knife after lightly spraying joint compound. Let it set for a couple of minutes, then drag the knife across to flatten peaks.
- Orange Peel: Spray watered-down joint compound with a hopper or aerosol texture. Practice on a scrap first to get the same density and bumpiness.
- Popcorn: This one's tricky. Buy pre-mixed popcorn texture and either dab it on with a sponge or use a spray rig. It gets messy fast and takes a bit of luck to get right.
Matching wall texture often takes some trial and error, especially if you’re tackling it for the first time—don’t feel bad if it takes a couple of tries.
Blending Textures Along Patch Edges
Sharp lines where new meets old is a giveaway. Here’s what helps:
- Overlap the texture: Make your new texture slightly overlap onto existing wall sections.
- Feather out with a damp sponge: After applying texture, softly work away at the crossroads to blur the line between new and old.
- Build up in light layers: It’s easier to add more texture than remove it, so go slow.
Tools and Tricks for a Consistent Wall Surface
You don’t need a contractor’s arsenal, but a few specialized tools come in handy. Common items include:
| Tool | Best Use |
|---|---|
| Hopper Gun | Orange peel, knockdown |
| Texture Sponge | Popcorn, blending edges |
| Wide Putty Knife | Knockdown, feathering |
| Spray Texture Can | Small repairs, fast jobs |
Quick tips:
- Practice your technique on cardboard before going to the wall.
- Keep extra scrap drywall or board around for testing sprays and mixtures.
- Don’t rush—wait for the compound to set up before flattening or blending, otherwise it just smears.
Getting the texture right is all about patience. Yeah, it’s a little fussy, but when you finally step back and can’t even see where you patched, it feels pretty good.
Prepping and Painting for a Perfect Wall Finish
Getting your wall ready for paint isn't just about rolling color on a patched spot. The prep—priming, sanding, and picking the right kind of paint—makes all the difference and can save you from disappointment later. Here's how to go from patchwork to flawless finish, step by step:
Priming Patched Areas the Right Way
Priming patched drywall is a step a lot of folks skip, but that's where so many repairs turn obvious. Here's what works:
- Use an acrylic or latex primer specifically for drywall repairs. These seal up the patch so the paint sticks and stays even.
- Apply primer in a thin, even layer, feathering it out over the patch edge. Don’t glop it on.
- Let the primer dry completely—it helps stop moisture and stains from bleeding into the paint.
Don’t touch that paint roller until the primer’s dry and the surface feels completely smooth. It’s boring, but it keeps all your hard work invisible.
Choosing Paints That Hide Imperfections
Not all paints cover patch jobs equally well. If you're worried about seeing old dings:
- Matte and flat finish paints: Best for camouflaging textures and flaws, but might be less washable.
- Eggshell or satin: Adds a slight sheen, but can sometimes show off humps or dips if patchwork wasn’t perfect.
- Stick with high-quality paints for better coverage—cheaper paints often need an extra coat (or two) and can highlight repairs.
| Paint Type | Best Use | Pros | Cons |
|---|---|---|---|
| Flat/Matte | Low-traffic areas | Hides patches, no glare | Harder to clean |
| Eggshell/Satin | Living/bedrooms | Easy to clean, subtle shine | May show flaws under glare |
| Semi-gloss | Kitchens/bathrooms | Very durable, moisture-resistant | Shows every bump and scratch |
Applying Finishes for Long-Lasting Coverage
Painting is more than just slapping color on a wall. To stretch the life of your patch:
- Stir your paint well to keep the color even.
- Cut in around edges with a good quality angled brush.
- Use a roller for the big sections, overlapping slightly into the patched area to blend old and new paint.
- Let the first coat dry all the way before adding a second—rushing is why patches sometimes peek through.
Most of the time, two coats are best for a true, solid finish, especially if you used primer. If you take your time with each step and use the right paint for your patch, you can make even stubborn repairs disappear into the wall.
Mistake-Proofing Your Results for a Professional Look
Getting that flawless finish isn’t about luck—it’s all about avoiding those little slip-ups that show in the final reveal. If you rush the details, or skip a simple prep step, it’ll stick out every time you walk by. Here’s how to keep your hard work looking like a pro handled it.
Sanding and Feathering Edges Smoothly
A smooth wall is all about the transitions. When sanding, always start with lighter pressure and move to heavier grit only if needed. Here’s what’s helped me:
- Sand each patch outward, feathering the joint compound so it fades naturally into the wall.
- Hold a bright light at a shallow angle—this throws shadows on problem spots before paint highlights them.
- Clean as you go: even a bit of dust will ruin that flawless paint job.
Table: Recommended Sandpaper Grits for Each Step
| Step | Grit |
|---|---|
| Initial sanding | 100-120 |
| Feathering edges | 150-180 |
| Final smoothing | 220 |
Take your time with sanding. If you leave sharp lines or thick patches, no amount of paint will hide them. Go slow now, it saves you touch-ups later.
How to Avoid Common DIY Errors
Here are the usual suspects if your repairs don’t blend in:
- Rushing drying time—let each layer fully dry before sanding or recoating.
- Reusing dirty compound or tools—small debris or dried bits ruin the finish.
- Skipping primer after repairs—paint over bare joint compound always looks dull or uneven.
One pro move: mark any imperfections after the first coat of paint, then spot-fix and repaint those spots!
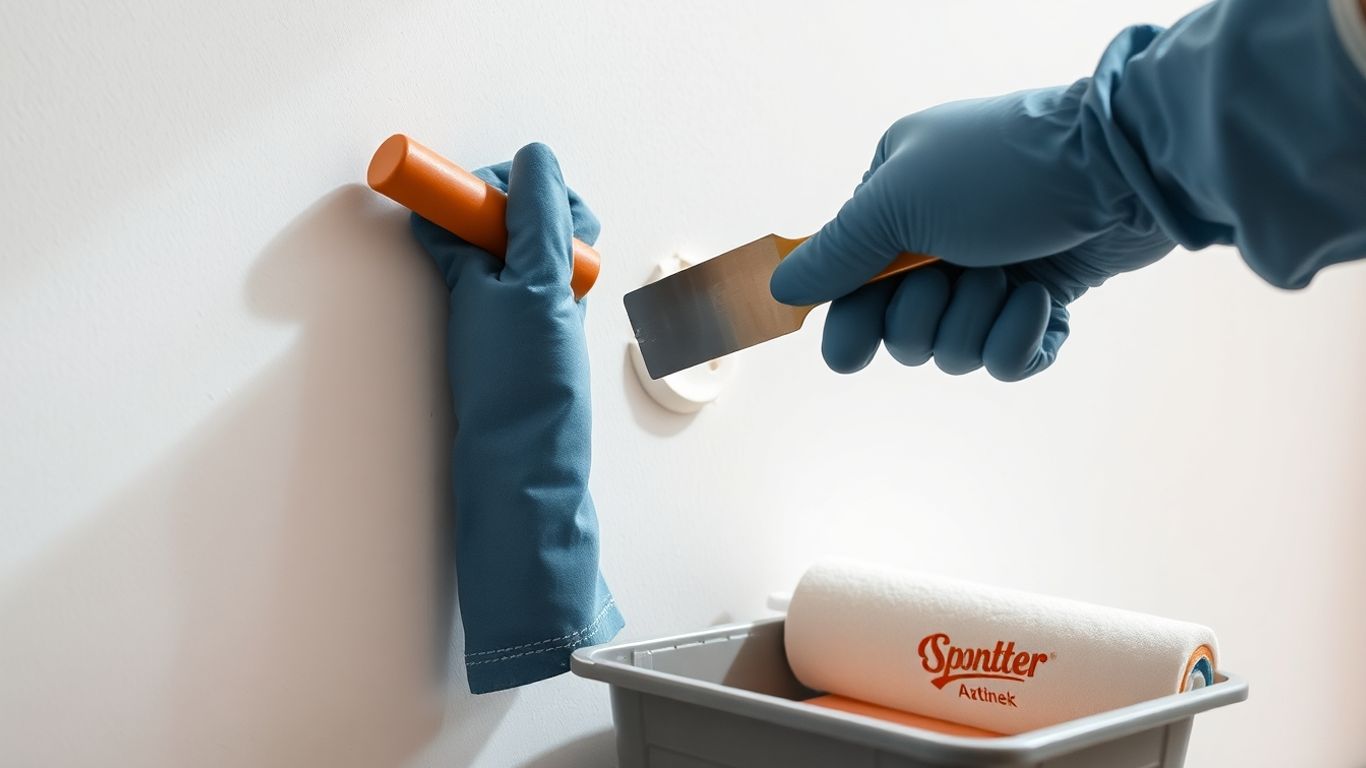
Cleanup and Tool Care to Maintain Quality
Your tools can make or break your next patch, so keep them in shape:
- Scrape excess compound into a trash bag before washing up.
- Never rinse muddy water down the sink—use a bucket or hose outdoors and finish with a paper towel for any grooves or stubborn bits.
- Dry metal tools thoroughly to avoid rust, especially on your taping and putty knives.
If you keep tools clean, you’ll catch mistakes earlier and save money on replacements. And honestly, when your gear is ready to go, your next wall fix feels so much easier.
Taking simple steps to avoid mistakes can really make your project look great and professional. If you want your results to stand out, pay attention to the details every step of the way. Need more tips or want a team you can trust? Visit our website to see how we can help you achieve quality results every time.
Wrapping It Up: Your Walls, Good as New
So, after all that, here’s the bottom line: wall repairs can be a pain, but they don’t have to be a nightmare. Whether you’re patching a tiny nail hole or dealing with a bigger mess, the right tools and a bit of patience go a long way. If you’re the DIY type, hopefully you’ve picked up some tricks to make your next repair less stressful (and maybe a little less dusty). But if you’re staring at a wall and thinking, “Nope, not today,” there’s no shame in calling in the pros. We’ve seen every kind of wall disaster you can imagine, and we know how to make the damage disappear—like it was never there. Either way, the goal is the same: smooth, clean walls that you don’t have to think about. So grab your putty knife, or give us a ring, and let’s get those walls looking their best again.
Frequently Asked Questions
How do I fix a small hole or nail pop in my wall?
To fix a small hole or nail pop, first clean around the area. Use a putty knife to fill the hole with joint compound, let it dry, and then sand it smooth. If needed, add another thin layer, sand again, and then prime and paint the spot to blend in with the rest of the wall.
What should I do if my wall has a crack or a bigger hole?
For cracks or larger holes, cut away any loose drywall first. For cracks, use mesh tape and joint compound. For bigger holes, patch with a new piece of drywall, secure it, and then cover the seams with tape and compound. Sand smooth, prime, and paint for a seamless repair.
How can I match the texture on my repaired wall?
Matching wall texture is tricky. For orange peel or knockdown textures, use a spray texture product or a sponge to dab on joint compound. For popcorn ceilings, use a special spray or brush. Practice on a piece of cardboard first to get the pattern right before applying it to your wall.
Why is priming patched areas important before painting?
Priming helps paint stick better and keeps the repaired area from looking different than the rest of the wall. It also seals the joint compound so the paint covers evenly. Always use primer before painting over any patch or repair.
What kind of paint hides wall imperfections the best?
Flat or matte paint is best for hiding small bumps or patches. Glossy paint can make flaws stand out. Choose a good quality flat paint for a smooth, even look, especially if your wall has been repaired in several spots.
How do I keep my wall repairs looking professional and long-lasting?
Take your time sanding and feathering the edges of your patch so it blends in. Always use primer, and don’t rush between coats of compound or paint. Clean your tools right after using them so they last longer and work better for your next repair.
Comments
Post a Comment